Salted dough in a bread maker. Salted dough for sculpting at home: a classic quick recipe for a mass for sculpting with your own hands, a recipe for colored and glowing salt dough, Play Dough with your own hands
Happy child 13.09.2017

Dear readers, many of us have children and grandchildren who love creativity. And it's wonderful. We offer children paints and pencils, felt-tip pens and plasticine. And more and more often in children's development centers, kindergartens and schools, instead of plasticine, they use salted dough for modeling. Stationery and baby product makers quickly caught the wave and put dozens of types of salted dough on store shelves. How does it not happen! And colored, and just white, and shiny.
Of course, you can buy a ready-made color test set. But it is quite realistic and completely easy to make it yourself, at home, because flour and salt will certainly be found in the kitchen of any housewife. Today on the blog, the head of the column, Anna Kutyavina, has prepared for you an excellent selection of recipes for salt dough for modeling. I give Anya the floor.
Hello dear readers of Irina's blog! Modeling with plastic materials is a very useful activity for kids. After all, it not only develops fine motor skills of the hands, but helps the child to master spatial thinking, textures, colors and shapes. In addition, children often feel like real creators of something new and significant while sculpting.
The modern industry offers a large selection of plasticine for modeling. But now I would like to talk about salt dough as a good alternative to purchased plasticine. Its main advantage is safety. Due to the fact that salted dough is made only from safe ingredients - flour, salt, water, high quality food colors - it is an ideal option for a baby's first creative experiences. After all, if a child pulls a piece of plasticine into his mouth, this, to put it mildly, will not be useful for him. And from salty dough, in which case, there will be no harm.
Plus, salted dough can be made quickly and easily at home. The ingredients are very affordable and can be found in every kitchen, and the recipes are so simple that they don't even require any significant effort. But then what a wide field for creativity!
Benefits of Salted Modeling Dough
Modeling dough is a mass similar to ordinary plasticine. But, unlike the usual hard pieces of colored plasticine, salty dough:
- much softer and more pleasant to the touch;
- does not stick to hands;
- does not stain hands and clothes;
- does not have an unpleasant odor;
- does not cause allergic reactions;
- safe when swallowed, but at the same time tasteless - the child can taste it, but immediately spit it out and lose interest in it.
Types of dough for modeling
Creative teachers and moms and dads came up with a lot of salt dough recipes:
- classic salted dough;
- cooked in the microwave;
- brewed over a fire;
- glowing in the dark;
- with starch;
- with the addition of glycerin, citric acid, vegetable oil, spices, baby cream and even wallpaper glue.
The structure of the resulting dough can be influenced by the temperature of the water, the quality of the flour, the amount of ingredients. So if suddenly the first time it turned out not quite what you expected - it does not matter, try again. Many mothers share that they interfere with the mixture by eye, and it turns out wonderfully.

Features of cooking salty dough
For the dough to be successful, there are several important things to consider. Firstly, it is better to take only ordinary flour, wheat, other types - pancake, with different additives - are not suitable.
Secondly, fine salt is more suitable, "Extra". Large grains of salt can make crafts look unkempt. Although there are recipes with coarse salt.
Thirdly, it is best to use cold water, even ice cold. To make the dough more plastic, potato starch is added to it. And to increase the strength of the material in the recipe, PVA glue diluted in water is used. To obtain a high-quality dough, it must be intensively kneaded by hand.
High-quality dough is soft, dense, elastic, it does not crumble or stick to hands, it has a uniform color.
You can paint the dough either immediately during kneading, or then paint the finished craft. You can paint both with special food colors, and independently created from cocoa, carrot or beetroot juice, coffee. The dried product is then painted with gouache.
The finished material for modeling is wrapped in a bag and kept in the refrigerator for a couple of hours. It is permissible to use the dough for a month if stored in a cold place.
How to make salted modeling dough - recipes
We will now consider the most reliable and at the same time uncomplicated dough recipes. In addition, the smaller the child, the easier the dough should be - it is better to refrain from complex recipes with "inedible" ingredients. Let's look at recipes for salt dough for beginners step by step.
Classic salty
Any crafts can be made from such material, it is safe and very simple.
Ingredients:
- white flour - 200 g;
- fine salt "Extra" - 200 g;
- chilled water - 125 ml.
You need to add salt to the flour and mix well. Then pour water into the dry mixture in small portions, stirring all the time, in order to end up with a homogeneous and smooth mass. It is also important to monitor the consistency of the dough - it should not be very runny.
Second classic recipe
This recipe is very popular among both experienced craftsmen and beginners in sculpting.
Ingredients:
- white flour - 300 g;
- salt - 300 g;
- cool water - 200 ml.
Take a deep bowl. Pour salt into it, add a little water. When the salt dissolves, add the sifted flour to the mixture. Start kneading in a bowl, and when a lump forms, transfer the mass to the table and knead. To make the dough more plastic, gradually introduce water.
From this number of components, a lot of dough is obtained. If you are not planning large volumes of crafts, you can reduce the amount of ingredients by 2-4 times.
Salt mass in the microwave
You can quickly prepare the modeling dough in the microwave.
Ingredients:
- water - two parts of water;
- coarse white or rye flour - two parts;
- fine salt - one part;
- tartar - 1 tbsp. l .;
- food coloring;
- vegetable oil - 1 tbsp. l.
Mix all ingredients. Pour the mixture into a microwave oven dish. Keep in the oven at medium power for five minutes. When the mass has cooled down, it must be thoroughly kneaded.
Salted dough in 5 minutes
The dough according to this recipe is well suited for those who like to sculpt a lot, often with the whole family.
Ingredients:
- water - 1 cup;
- flour - 1 cup;
- salt - 0.3 cups;
- soda - 2 tsp;
- vegetable oil - 1 tsp;
- food coloring.
Pour soda, salt and flour into the container, pour in water with vegetable oil. Then put the saucepan over low heat and heat for a few minutes.
Add color and mix well. As soon as the dough starts to stick to the spoon, turn it off, it's ready. Place it on a plate and let cool. Then knead well with your hands.
Such a quick dough is famous for another feature - if you follow the storage rules, keep it in the refrigerator, the mixture retains its properties for several months.
Elastic dough
This recipe produces a very flexible material that is easy to work with.
Ingredients:
- wheat flour - 1.5 cups;
- water - 1.5 cups;
- salt - 2 cups.
Mix dry ingredients and pour in water little by little until the mixture becomes plastic and homogeneous. Crafts from such a test will turn out to be durable and aesthetic.
Coarse salt dough
There will be quite a lot of such material, so if you need a small portion, you should reduce the volume of the components several times. The composition is the same as in the classic dough, only coarse salt is taken instead of fine.
Ingredients:
- coarse salt - 300 g;
- wheat flour - 300 g;
- water - 200 ml (1 glass).
Pour in salt, pour most of the water into a large container. When the salt dissolves, sifted flour is poured into the liquid in portions. The dough is kneaded.
Salty dough glowing in the dark
Children will definitely like this dough!
Ingredients:
- warm water - 2 glasses;
- white flour - 2 cups;
- salt - 2/3 cup;
- vitamin B in capsules or tablets - 2 pcs.;
- vegetable oil - 2 tbsp. l .;
- tartar - 4 tsp
Grind the vitamins to a powder. Mix it with salt, flour and tartar. Pour in water and oil, mix until smooth.
Cook over low heat until the mass becomes sticky and resembles plasticine.
Recipe for volumetric figures
This dough makes the figurines strong and sturdy.
Ingredients:
- white flour - 200 g;
- salt - 400 g;
- ice water - 1.5 cups.
Dissolve the salt in water. Pour in the sifted flour little by little. Knead the dough.
Dough with glue (not for small children!)
This recipe is not entirely natural, but it helps the mixture to set and dry faster.
Ingredients:
- flour - 1.5 cups;
- water - 1.5 cups;
- salt - 1 glass;
- glycerin - 4 tbsp. l .;
- dry wallpaper glue or PVA - 2 tbsp. l.
Mix everything except glue, knead the dough like for dumplings. Add glue, previously diluted in a small amount of water. Stir the resulting mass well.
More tips for making salty dough easily can be found in this video.
Drying salt dough at home
The prepared figurines must be dried well. This can be done outdoors, outdoors or indoors, where a fresh air stream circulates. This drying option is the most economical.
It is best to dry your crafts in the sun. The thicker the product, the longer it will take to dry. The color after hardening of the craft will not change.
The second drying option is the oven. For a couple of days, the products are dried in the fresh air, then the oven is heated to 50 ˚С. It is necessary to cover the baking sheet with paper, lay out the crafts and dry, increasing the temperature to a maximum of 140 ˚С. Drying at 50 ° C lasts approximately 3 hours, at 140 - half an hour. But you should not set the maximum temperature right away - the products may crack.
If the figures are still cracked, you can fix it with a mixture of PVA glue and ordinary flour, filling the cracks with a thin brush.
To understand if the product is dry, you just need to knock on it. A dull sound indicates that the figurine is still damp, and a ringing sound indicates that it is already finished.
How to arrange crafts
Finished figures are painted with paints. Better to take acrylic - they do not paint the skin, do not smudge and dry quickly. You can paint with gouache mixed with PVA glue, and even watercolors. Or you can just leave the products in their original form.
When sculpting, you can use various decorative elements: beads, buttons, threads, ribbons, small shells, cereals and pasta. If the product is cracked after staining, you can dry it in the fresh air, then eliminate the imperfections with sandpaper and paint again.
Varnish coating can protect the craft from defects. Also, this measure will prevent paint fading and preserve the aesthetics of things for a long time. Liquid varnish will make the craft blush and give it a natural shine. Thick will reliably protect against moisture, make the surface of the product matte or shiny. Spray varnish protects the surface from damage and makes it brighter.
Salt dough crafts
Now I invite you to see what kind of crafts you can do with your children. Photos of such crafts were sent to us by Anya Pavlovsky. Her daughter Svetlana, five years old, under the guidance of a teacher Tatiana Viktorovna Semenovs (MBDOU kindergarten №32, Izhevsk) made just such a beauty from salt dough.


Choose the recipe that suits you best, try and create with your children. After all, childhood is a wonderful time when any manifestation of imagination becomes a masterpiece! So let creativity be not only fun, but also safe!
Joyful creativity to you and your children!
Anna Kutyavina,
psychologist, storyteller,
the owner of the site Fairytale world
I thank Anya for such a creative theme for everyone. Agree, sometimes you start to do something with children like that and you get carried away too. So not only our children enjoy such activities, but we ourselves can also escape from the routine, immerse ourselves in creativity, and relax our souls. And, of course, this is such a wonderful occasion to be with your children and chat with them.
Sand therapy for children

Sculpting is a great way to develop fine motor skills in children, very fun and enthusiastic. Using salted dough for this activity is one of the best options. Parents can make their own inexpensive, safe sculpting material with excellent plastic properties.
The benefits of sculpting for children
The creation of figurines from plastic materials is a kind of useful leisure time not only for children, but also for the whole family. You can do it with kids, starting from one and a half years of age. Sculpting is both a fun and rewarding way to work with children. At the same time, adults will also spend time with benefit and pleasure.
Making crafts from plastic material develops in children:
- spatial thinking;
- creativity;
- the ability to perceive and distinguish colors and shades;
- perseverance;
- Attention;
- memory;
- coordination of movements;
- fine motor skills and, as a result, speech function.
Modeling helps children to understand what shapes, shades, size ratio are. This activity has a beneficial effect on the psycho-emotional state of the child.
Children use both hands when making crafts, that is, both hemispheres of the brain are involved in the process, which develops both logical and creative thinking at the same time.
Children who are involved in sculpting acquire useful skills that will be useful to them in their future studies and life. Classes teach kids to be neat, purposeful, focus on the goal. Children begin to fantasize, to think independently, to analyze the process.
Advantages of Salted Modeling Dough
Dear reader!
This article talks about typical ways of solving your questions, but each case is unique! If you want to know how to solve your particular problem - ask your question. It's fast and free!
It is recommended to use dough for making crafts for many reasons. The dough, unlike other materials, is non-toxic and safe. If a child eats a piece, it will not negatively affect his body. In addition, the modeling dough has a rich, salty taste, which will discourage your child from pulling it into their mouth. Due to the fact that the dough is an environmentally friendly product, you can make crafts from this material with very young children.
Dough is a much more plastic material than plasticine. It does not have to be kneaded for a long time before use. The dough does not stick to hands, dries quickly. The advantages of using the dough include the fact that when making the material with your own hands, you can give it any color you want.
Simple recipes for salt dough with your own hands
There are a lot of salt dough recipes for creating crafts. Making such a dough requires almost no culinary skills, so even a child can do it. Of course, parental control will be required, but it will be interesting for the child not only to sculpt, but also to take part in the process of making the material.
For a start, it's better to choose a simpler recipe - a classic one. Not necessarily the first time you get a material with the parameters necessary for sculpting. Failure can occur due to the improper quality of one or another ingredient, the wrong water temperature. Some people like to measure the ingredients to be mixed by eye, which also affects the quality of the final product.
Classic recipe
For the first time, it's best to choose a simple salty dough recipe. You need flour, salt and water:
- Add 200 grams of Extra grinding salt to 200 grams of premium white flour, mix thoroughly.
- After that, water is poured in a thin stream (only 125 grams). You should not add all the water at once, but gradually, stirring the mixture after each portion and observing the consistency.
- The resulting dough may crumble slightly due to the high salt content. This problem can be solved by adding a tablespoon of vegetable oil to the mixture. In this case, the dough will be elastic.
- After the dough has been kneaded, it needs to be refrigerated for a short time. Half an hour is enough, and your sculpting material will be ready.
With PVA glue
To prepare the dough according to this recipe, you need to take a standard glass of flour and salt and mix thoroughly. Dissolve a tablespoon of PVA glue or other wallpaper glue in 150 ml of water. The resulting whitish liquid is slowly added to the mixture.
In this case, you need to pay attention to the consistency. Different flours take water in different ways, so you need to navigate by sensations. Grains of salt can be felt in the resulting mass, so it will take a little longer to knead the dough with glue than usual.
The dough with glue is more durable, does not crack when dried. The finished mass needs to be held in the refrigerator for a while. If there is more test than needed, you can store it in the same place. For two weeks it retains its properties.
With added starch
You can make a sculpting material without using flour. In this recipe, it is replaced by potato starch. For cooking, you need a glass of starch and two glasses of baking soda:
- The ingredients are thoroughly mixed, then half a glass of water is added. You can add food coloring to the mixture if you wish.
- The container with the mixed components is put on low heat and, with constant stirring, is brought to the desired density.
- When the mass becomes sticky and very thick, it is removed from the heat and cooled, and then kneaded.
- If the cooled dough sticks to your hands, you can add a spoon and a half of vegetable oil and knead again.
With food coloring
Children will love the colored sculpting material. Making it is simple: prepare the dough according to any of the recipes given, divide into parts and add food colors of the required colors to each of them. It is preferable to use liquid dyes. They give the mass an intense color and improve elasticity. You can paint the dough like this: put each part of the dough in a plastic bag, add a few drops of dye and knead it well for even coloring.
Luminous dough
Children will be delighted if the dough is made glowing! In order to make it, you need to take two glasses of wheat flour and water, an incomplete glass of fine salt, two tablespoons of vegetable oil. You will also need tartar and two vitamin B tablets:
- The tablets must be crushed thoroughly. Mix all dry ingredients, add water in a thin stream, then oil.
- Put the resulting mixture on low heat, stirring, bring to the desired consistency.
- After that, the mixture is removed from the stove and cooled.
The glowing dough is ready! You can see it "at work" in a dark room using an ultraviolet lamp.
Play-Doh plasticine analog
Many children love Play-Doh's bright plasticine. You can try to prepare its counterpart. A self-made modeling mass is completely safe for a child:
- Mix half a glass of salt with a glass of wheat flour, add a couple of teaspoons of citric acid, a little glycerin and vegetable oil.
- Put the resulting mixture on a small fire and pour in about half a glass of water in small portions. Keep the mixture on the stove until it is clear and smooth.
- Cool slightly and place on a floured surface.
- Divide the mass into parts if you want to get dough of different colors.
- Add dye to each part and knead thoroughly. The mixture prepared according to this recipe turns out to be very plastic and beautiful.
DIY photo ideas
For the little ones
For the first lessons, you need to choose the simplest options. A small child can be offered to cut out figures from the dough with special pastry molds, having previously rolled out the mass with a rolling pin. You can make a flat blank in the shape of some animal, and then make and attach small parts to it: eyes, ears, teeth, a tail, bows, frills and everything else that you have enough imagination for.
You can then make a picture from such flat figures by sticking them on thick paper or cardboard. An example of such work in the photo:
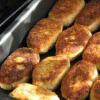
For kids 2-4 years old, you can come up with a game in the store. To do this, you will need to independently make products and other goods for the game. The easiest way for a kid to make a loaf or bagels. In the first case, the child just needs to form a small sausage and make cuts with the help of a stack, as on the "City" loaf.
The bagels are not more difficult to make: small pieces of dough need to be rolled out into thin sausages and the ends of each of them must be fastened to each other. After the "baked goods" are ready, they need to be properly dried and then painted with acrylic paints.
Holiday decorations
With a child 4-6 years old, you can make Christmas tree decorations and other decorative elements. It's very simple:
- you need to mix 1 cup of salt and water with 2 cups of flour;
- then knead the total mass for 10 minutes to the desired consistency;
- separate a small part of the dough, make them a ball;
- flatten and make a hole in the center with your index finger;
- place the blanks in a donut baking dish;
- make holes-grooves with a toothpick along the edges of the future product;
- bake at 200 degrees for 6 hours, then dry the products completely;
- Use a knitting needle to make holes for attaching the decorative tape.
You can paint toys in different colors and decorate with any decor (beads, bugles, beads, etc.) - the matter is limited solely by the child's imagination.
You can make themed souvenirs from dough for any holiday, wonderful gifts for family and friends, decorative ornaments for home interiors. Such activities not only help the child to develop, but also bring pleasure to all participants in the process.


Handicraft is a special kind of art and creativity, in which the author puts a piece of his soul and energy into his products, therefore it is highly valued. Even such seemingly childish labor as sculpting handicrafts from dough (it is also called bioceramics or testoplasty) has been popular among the peoples of Russia and all of Europe for centuries, and it pays off with interest.
Salt, flour and imagination
There are more than one recipe for salt dough for sculpting crafts. The craftswomen took the traditional set of components as a basis, and made their own adjustments by trial and error. The base may include various types of glue, petroleum jelly or hand cream, cream, potato starch, sunflower oil, glycerin. What other tricks do creative people go to to transform lumps of dough into fabulous masterpieces, we will talk separately. Let's start with what recipes for salt dough for sculpting crafts are especially relevant today.
A minimum of materials and financial costs are transformed in skillful hands into magnets, key holders, voluminous figures and whole compositions, depending on the skills and desires of the master. It will be interesting for children to come up with crafts from a fairly soft, pliable and uncomplicated material from available tools that can be found in any kitchen. Adults, on the other hand, will help the crumbs to give vent to their imagination, contribute to the development of fine motor skills and imagination, and will keep little creators busy with useful and good deeds.
Consider some recipes for salt dough for sculpting crafts
1. Simple. Suitable for beginners.
To prepare the base you need:
- Equal amount of flour and salt. Depending on the amount of material required for the craft, the ingredients can be taken at 200/300/500 gr.
- Water is needed respectively 125/200/250 ml.
2. Beginner level. We take the already well-known "simple" recipe, add 1-2 teaspoons of PVA glue to it. It will give strength.
3. Average level. Suitable for creating 3D crafts, plates. The base is rather rough and strong.
- Wheat flour - 200 gr.
- For the strength of the product, salt requires twice as much - 400 gr.
- Water - 125 ml.
4. For jewelry items.
- Flour - 300g.
- Salt - 200 gr.
- Water is half a glass.
- Wallpaper glue - 2 tablespoons
- Glycerin (sold at the pharmacy) - 4 tablespoons
5. For experienced craftswomen.
- 1 glass of fine salt and flour. To stir thoroughly.
- Water is excluded, bustilate is taken instead.
The recipe is excellent, but beginners are unlikely to be able to work with it due to the fact that it is difficult to mix the base. On the other hand, compositions based on bustilate have a lot of advantages: they do not break, do not damp, do not crack during firing.
You will also need:
- Tea spoon.
- Measuring cup (you can use a kitchen scale or measure the ingredients "by eye").
- Plastic bag or cling film.
- Deep plate or bowl.
- Cutting board.
- Rolling pin.
- Any decorative elements. Buttons, cookie cutters, combs, paper clips, a fork - all this may be needed to give the dough a relief.
Secrets of the craftswomen
Although the recipes are simple, there are some tricks and nuances noticed by experienced masters. For example, it is necessary to use wheat flour, which does not contain impurities, so that the parts do not deform during drying.
Coarse or iodized salt is likely to give the effect of a “fur coat” that is used to coat the exterior walls of houses. If you are not going to make a tiny bioceramic house, it is better to use fine salt for the composition. This product is not dissolved in water, but mixed with flour, and only then cold water is added to the resulting mixture.
For greater strength, instead of water (or with a small amount of it), use wallpaper glue, PVA or bustilate. But in this case, the base is difficult to mix, so beginners should refrain from such recipes for now.
If you add a spoonful of vegetable oil or potato starch, the dough will be pliable and pliable, but it can crumble. This also needs to be taken into account in the work.
The workpiece should be elastic, dense, softer than plasticine in consistency, should not stick to hands, crumble and contain lumps. The longer the mass is kneaded, the better and more homogeneous it will be. After that, it is "sent" to the refrigerator for 2-3 hours, wrapped in polyethylene. At low temperatures, you can store the rest of the material, but not more than a month.
In the absence of special scales or a measuring cup, it is important to understand: the main components are different in volume, if we take 1 glass of salt, then 2 of flour.
Drying properly
It is known 4 ways to dry salty dough so that the craft has served for a long time : in air, on a battery, in an oven or a combination method. It is selected depending on the thickness of the work, the recipe according to which the base was prepared and the presence of convex details in the composition.
Air drying salt dough suitable when there are free days, or even weeks, in stock. It is recommended to turn flat compositions over for uniform evaporation of moisture, while bulk or multi-layer compositions cannot be turned over without injuring them.
Things will go much faster in the oven... Before placing the work in a gas oven, dry it in the air for 2-3 days. Firing is performed at a temperature of 50 degrees, it is not recommended to increase it in order to eliminate the risk of swelling of the dough and the appearance of fractures.
In an electric oven, the figures are fired from half an hour at a temperature of 150 degrees, up to two hours at 50-75 degrees, and it is recommended to keep the door ajar. Before burning the dough, cover the baking sheet with cling foil.
The base is ready for painting when there are no damp spots on its front and seamy sides, and when tapping with a finger, a sonorous sound is heard, and not a dull one.
Drying on a battery - the process is controversial, because with the wrong approach, the work will be hopelessly spoiled, deformed and burst. On batteries of the Soviet type, it is impossible to dry salt dough evenly, their surface is uneven. Modern radiators are flat, so this type of drying also finds admirers. Irregularities are smoothed out with paper, cloth or foil placed under the work.
Combined drying assumes both the "open" method of exposure to sunlight, and firing.
It is important to remember: the product is not baked, but rather dried, and although a high processing temperature of salted dough is allowed, it is better to refuse it, and do not close the oven door tightly!
The final step in making a salt dough for sculpting crafts
If you did everything correctly, then you can proceed to the last stage of work - painting, varnishing and attaching strings, on which our decorative composition will be attached to the wall.
You can tint the craft both while kneading the base, and after giving it strength. In the first case, gouache paints, food colors or natural coffee, cocoa, beet juice are added to the water during the preparation of the mixture. This is done in the case when the whole base should be painted in one color. You can divide the total mass into several separate parts, paint them in different colors, and sculpt from multi-colored pieces. In the second, the finished work is painted.
Salted dough is absolutely unpretentious, it will be homogenously colored even with acrylic, oil or building paints. Jewelry details can be emphasized with ink, ink, felt-tip pen or marker.
On the finished product, the colors will turn out brighter if it is varnished before painting. If this is done later, then the work will be protected from moisture by a reliable "shield". Do you like glitter? Add some PVA to the varnish. I do not like? Use a matte varnish.
They are varnished in order to prevent fading of shades using a liquid varnish. Its only "minus" is getting inside the base, so the varnishing process must be repeated several times, taking breaks to dry it. If you take a thick transparent varnish or aerosol, then 1 use will be enough.
Step-by-step master class on the recipe for salt dough No. 2 "Octopus" housekeeper
Take 2 containers for bulk, 1 for water, and 1 more deep plate or bowl in which we will knead the base. I use items from the coffee set, they are almost "doll" size, but for the idea we do not need a lot of dough.
We collect 1 cup of "Extra" fine salt and 2 - wheat flour. Mix well.

 We add water. Knead the dough until smooth, carefully making sure that there are no lumps.
 The finished mass is pliable, dense, pleasant to the touch. We crumple it well in our hand for 10-15 minutes. We put it in a bag, put it in the refrigerator for 3 hours (more is possible).
 We prepare a rolling pin, a fork for edge decoration, a knife, a teaspoon. We divide the mass into 2 parts: the first is the base to which we will attach the volumetric parts, the second is the material for these parts.
Use our fingers to roll out the "sausages" on a firm horizontal surface. This is our main part, from which the tentacles and umbrella will be made. We sculpt one circle (character's face). Transfer the details to the background. Use a fork to frame the edges of the composition.
 We unscrew the ballpoint pen, make 4 holes in the base with the frame. 2 - for keys, 2 - for strings. We transfer the dough to a baking sheet, send it to the oven for 2 hours at a temperature of 50 degrees.
Greetings, dear parents, readers of our blog! Recently, an old technique for the development of fine motor skills of a child has been revived - sculpting from dough. And today I want to tell you more about salted modeling dough. You will find recipes with photos at the end of the article.
Sculpting is a great opportunity for adults to express themselves or relax, as well as develop fine motor skills and imagination for children. Sculpting with children is fun and interesting. The big advantage of sculpting from salted dough is that it will cost you much cheaper than other materials for children's creativity.
For modeling, you can use pottery clay, and plasticine, and ordinary dough while cooking cookies or dumplings together. Children are very fond of sculpting and rolling balls from such materials. Salted dough is used exclusively for creativity, because it is inedible.
It has long been molded from salt dough:
- Amulets;
- Kids toys.
Now this type of creativity is becoming popular again; dough can be used to make:
- Decor items;
- Figures, toys;
- Paintings;
- Prints of baby's arms or legs.
It is no secret that adults are very fond of doing this type of modeling, preferring salted dough to clay or gypsum, sculpt whole pictures that decorate the house or are presented as a present:

2. Why salty dough
It is surprising to many to hear that the dough must be salty so that something can be sculpted out of it. The fact is that you can sculpt something from any dough, because it is always plastic, but not any dough can be used to make crafts that will be stored for a very long time without losing their appearance.
The secret material - salt - cements the dough, so the products hold after drying. The main ingredients of this test are:
- Flour;
- Salt;
- Water.
In addition, you can add other components, depending on what you want to get. It can be glue, oil, or paint that can be added to any recipe. But the main thing here remains salt, which should be finely ground and without impurities (iodine).
3. Salty dough recipes
There can be many recipes, consider a few of them. You need to choose the simplest flour, no additives, and the water is very cold.

3.1. Salted dough, ordinary
Composition:
- Wheat flour - 1 tbsp.;
- Salt - 1 tbsp.;
- Water - 0.5 tbsp.
How to make a sculpting material from these ingredients?
- You need to mix flour and salt, then gradually pour in water, quickly stirring everything with your hands.
- You do not need to knead the dough for long, if it turns out to be tight, add a little more water.
- If the dough is sticky, add a little flour. It all depends on the flour, so you may need more water sometimes, sometimes less.
3.2. Salted dough with rye flour
Composition:
- Rye flour - 1 tbsp.;
- Wheat flour - 1 tbsp.;
- Water - 0.5 tbsp.;
- Salt - 1 tbsp.;
- Oil - 1 tablespoon
Rye flour will give the product a soft brown color, especially if dried in the oven. Rye flour alone is not used, since the dough will turn out to be very tight and it is difficult to mold something out of it. The butter will give the dough elasticity, it will not stick to your hands.
3.3. Salted dough with glue
Composition:
- Flour - 2 tbsp.;
- Salt - 1 tbsp.;
- Dry wallpaper glue - 2 tablespoons;
- Oil or glycerin - 4 tablespoons;
- Water - 125 ml.
- First you need to combine flour and salt, then add glue diluted in water.
- Mix everything and add oil.
- If the mixture is sticky, add a little flour. In addition to wallpaper glue, PVA glue is used, this is done for the strength of the material.
How to make colored dough?
To tint the dough, you can add food coloring or natural juice, adding drop by drop and stirring with the finished mass. In addition, you can paint the finished craft, after it dries, using artistic paints.

If you do not want to cook the dough yourself, you can buy a ready-made one - it is inexpensive, you can immediately take a set of different colors and with molds. You can see prices and choose a ready-made set on this website. This is a great children's goods store with a huge assortment!
4. Crafts from salt dough
As soon as the baby turns 1-1.5 years old, he can be introduced to the test as a way of playing and developing.
The dignity of the test is also that the child will not get poisoned if he tries it, and it also does not smell like plasticine. Such a natural material is an excellent tool for making crafts. The dough can be stored in a bag in the refrigerator for several days.
A child of any age can use the salt dough sculpting technique, gradually complicating the task. For beginners, sculpting small, simple figures is best.
The child can do the following:
- Roll out the dough with a rolling pin;
- Cut figures out of it with molds (from a constructor, cubes or cookie cutters);
- Sculpt sausages, balls;
- Combine several elements into one figure (attach buttons, sticks, beads to the figure);
- Make hand or foot prints on the rolled dough;
- To paint dried figures or crafts with paints (watercolors, a mixture of gouache with PVA glue, acrylic paint) - under the supervision of adults.
The child can stick different elements on a thin layer of dough, creating pictures. Also, ready-made flat figures can then be glued to the canvas and inserted into the frame, receiving a work of art.

5. Drying salted dough products
There are such types of drying:
- on air;
- in the oven;
- on the battery;
- in the sun.
One way or another, the products need to be dried well. If the layer of dough is thin, it will take less time. Three-dimensional pictures from dough or figures need a long drying time.
The surest and easiest way is to air dry, preferably warm, but not in direct sunlight. For a product up to 1 cm thick, it will take 4-7 days. Then check by tapping the surface with your finger. If the sound is ringing, the product is dry, if it is deaf, it needs to be dried.
It will take about one day to dry on a battery; in the summer you can lay the product out on the windowsill.
When drying in the oven, you need to set a low temperature (50-150 degrees) with the door open. It will take about 3 hours for a thin piece.
After drying, the craft can be painted or varnished to protect the surface from damage and brittleness.

You can watch a video on how easy and simple to make salty dough here:
Develop together with your kids, sculpt and create for yourself in joy! Subscribe to updates and share the article with your friends in social networks! And I am waiting for you on our site again.
Modeling using soft and elastic materials is one of the varieties of creative leisure for children. It is more convenient to replace expensive purchased plasticine with a budget option - salt dough for modeling. There are many recipes, following which, it is easy to prepare plastic mass and create real masterpieces from it.
The benefits of sculpting for children
| Mental development | Regular modeling exercises have a positive effect on the mental and emotional state of the child. Such a creative pastime activates the activity of both cerebral hemispheres. Perseverance, patience, accuracy appear, the skill of bringing the started business to completion is consolidated. The imagination also develops when the child himself comes up with crafts and recreates them. |
| Fine motor skills, logic | In the process of making figures and parts from plastic material, fine motor skills develop - this makes a tangible contribution to the formation of abstract thinking, good memory, and the ability to think logically. |
| Perception of the environment | Small children, working with plastic materials, begin to learn colors and shapes. Visual perception of surrounding objects develops, aesthetic taste is born. |
| Emotional resilience | During modeling, the emotional state is aligned, which is especially important for children with an excitable nervous system. Increased mobility, activity and irritability are temporarily reduced. Internal fears and contradictions are not kept inside, but find a way out through creative activity. |
Why is it better to use salted modeling dough?
One of the advantages of salted dough is naturalness. The elastic mass created by your own hands is harmless even for children under 2 years old.- it does not provoke the occurrence of allergic reactions, does not repel with an unnatural smell. The dough with the addition of salt is more pliable, softer than ordinary plasticine - it will be easier for children's hands to create the intended details.
When the product is sculpted and dried, it is made decorative using varnish and paints.
Simple recipes for salt dough with your own hands
Salted dough (a recipe for sculpting for children is given below) is easy to prepare, no expensive components are required. The classic recipe is convenient because the necessary components are always found in the house.
Based on creative preferences, traditional ingredients combine:
- with food paints;
- glycerin;
- soda;
- wallpaper glue;
- vitamin B;
- natural flavors;
- essential oils.
After that, the eco-friendly material acquires unique features.
Classic recipe
In the test according to the classic recipe, there are no additional components, which is why small children are allowed to work with such material. Traditional preparation involves the use of wheat flour, salt without additives (the finer, the better it dissolves), warm or cool water.
 Salty dough: the recipe for sculpting for children is simple and includes absolutely harmless ingredients
 Salt (1 cup), flour (2 cups) are poured into a deep bowl. Add water (¾ glass) slowly. The dough is kneaded so that it becomes uniform and does not stick to your hands. The addition of oil (any vegetable oil) is allowed - 1 tbsp. least.
Salted dough in the microwave
A non-standard way to create plastic dough is in the microwave. The main ingredients are: water and flour (half a glass of each component), salt (1/4 cup). Additional additives that are added to the main ones: 1 tsp each. vegetable oil and tartar.
Those who want to get dough dyed in a certain color can add safe food paint to the mixture. A mass is prepared from the listed components, which is laid out in dishes designed for the microwave. Expose to medium power for 5 minutes. the mixture is in the oven. Then it is cooled and kneaded by hand.
Coarse salt dough
A dough in which fine salt is replaced with coarse salt is a variation of the traditional recipe. This mass is suitable for children under 2 years old. Coarse salt (300 g) and a glass of water are combined in a container. Stir well to dissolve the salt crystals.
Flour in the amount of 300 g is gradually poured into a salt solution.
With PVA glue
Sometimes PVA glue is present in the salted dough - it is included in the usual composition in order to increase the strength of future products (small children cannot work with such a dough). A glass of flour is mixed with a glass of salt. Glue is diluted in 120-130 g of water (1 tablespoon).
This liquid is slowly poured into a container with dry components. They knead the dough for a long time - until the moment when it stops sticking to your hands. The mass should become homogeneous. The finished ball is covered with a cloth and for 15 minutes. put in the refrigerator, after which you can start sculpting.
With added starch
There are methods for making starch dough. Starch is a flour substitute and soda is a salt substitute. 2 cups of soda are combined with a glass of starch, stirring. Slowly pour in half a glass of water, continuing to stir the components. The mixture is slowly heated on the stove. The dough should turn into a lump. It is cooled and kneaded with your hands until tender.
The recipe uses potato starch, but you can substitute corn starch for it.
With food coloring
Salted dough, dyed in bright colors with the help of food dyes, especially pleases children and allows you to skip the stage of painting the finished product. You can add food coloring while mixing the ingredients. Or you can pour it into the finished dough, and then knead the lump thoroughly so that the paint is evenly distributed.
One of the options for dyeing brown is the use of cocoa powder and instant coffee (they are diluted in water).
Dough with rye flour
The sculpting recipe for children also has other variations - for example, salted dough to which rye flour is added. It must be mixed with wheat flour, otherwise the material will be naughty because of its hardness. Rye flour products have a characteristic brown tint.
A glass of salt is diluted in ¾ glasses of water, wheat (one and a half glasses) and rye (half a glass) flour are added. Knead the mass with your hands.
Luminous dough
Salted dough (sculpting recipe for children over 2 years old) can glow under the influence of an ultraviolet lamp. The luminous effect arises from the presence of vitamin B. The main components will be: a glass of flour and ¾ glass of salt. Additional components: tartar (2 tsp), vegetable oil (1 tbsp). In the absence of tartar on hand, it is advised to take apple cider vinegar.
An important component - vitamin B - is easy to obtain at the pharmacy. For the test, 2 tablets or 1 ampoule are enough.

Pour flour and powdered tablets into a saucepan (or pour in a liquid vitamin). Salt with tartar is also sent there. Add water, vegetable oil. The resulting mixture is put on minimum heat. As a result of heating, a lump should form, it is taken out and cooled. Mix until ready by hand.
Play-Doh plasticine analog
Play-Doh is a bright and beautiful plasticine that has long been loved by children. But it is considered an expensive material for creativity. A plastic multi-colored mass with similar characteristics is created on their own at home. Salty dough (a recipe for sculpting for older children who will not taste the material) - like an analogue of imported plasticine - is colored when kneading.
It is convenient to cook several pieces of different colors at once.
In a saucepan, combine half a glass of salt, 2 tsp. citric acid, 1 cup flour. 1 tbsp is added to the mixed dry mixture. sunflower oil and 1 tsp. glycerin. The dishes are slowly heated on the stove. To dilute food paint, take half a glass of water, pour the colored solution into the future dough. Stir the mass without stopping - it will gradually acquire density and uniformity.
The result should be a com. The mass is removed from the dishes, laid out on the table, where it is stirred to the desired state.
How to store the finished dough correctly?
Prolonged exposure to air is bad for salty dough. The plastic mass begins to dry out and become crusty, which leads to the loss of its properties. Therefore, the material remaining after creative manipulations is placed in a refrigerator - wrapped in plastic wrap or placed in a container with a tight lid.
Light crafts master classes for children
The options for creative work from salt dough are endless. They are chosen based on the skills of the child, his age. Most of the crafts are based on sausages and balls. The child, starting to learn modeling, tries to recreate these details. And over time, he gets better.
After mastering the techniques of rolling soft material into balls, sausages and flattening parts, they proceed to making simple crafts.
Video of a turtle sculpting workshop:
Examples of simple crafts:
- fungus;
- Hedgehog;
- Caterpillar;
- flat faces of animals;
- flowers.
Fungus
For the fungus, you need to mold a hat and a leg. For a hat, roll up a ball and press it on one side. For the leg, roll out a small sausage, thickening it from the bottom side. The cap and the leg are attached to each other. To prevent the fungus from falling apart, you can hold the pieces together with a toothpick. The craft is painted, making sure that it is completely dry.

You can complicate the task a little and make a large fungus with hands, a voluminous hat and a drawn face.
Christmas decorations
The dough is rolled out on the table, turning it into a smooth layer. Cut figures with cookie cutters. A small round hole is made in these Christmas tree decorations. Crafts are dried, then they are painted. A tape or thread is passed through the hole.
the Rose
Salted dough roses are molded in different ways. Beautiful flowers are obtained from an already dyed material, but colorless dough can be dispensed with.
Rose modeling methods:
- First, a small cone is formed - it serves as the base on which the petals are fixed. Pieces of the dough are pinched off and balls are rolled out of them. Then the balls are flattened so that each of them is shaped like a petal. The petals are attached in a circle to the cone - you should get a bud. The outer petals are made a little differently: they are also rolled out, made flat, but the edges on the upper side are slightly bent outward.
- In the second way, you can create many miniature roses and make them part of an artistic composition, combining them with leaves or other flowers. To sculpt several small roses, balls of the same size are rolled from the dough. Each ball is turned into an even sausage, which should be of the same thickness along its entire length. The sausage is flattened - it resembles a strip. The strips begin to roll neatly into rolls. The bottom of the roll will be narrowed, and the top will be widened (forming petals).
Jigsaw puzzles
A large cardboard stencil is made. It can be an animal, a car, an airplane. The dough is rolled out on a flat surface, a stencil is placed on top and a figure is cut out along the contour. The dough piece is left to dry (8-10 hours). Then it is cut into pieces with a knife. The cut pieces must be completely dry before painting.

After painting, the homemade toy is varnished to prolong its life.
Drying salt dough at home
Special attention is paid to the drying of the sculpted handicrafts.
Of the existing methods, everyone will choose the one that is convenient for him:
- in the oven;
- on the balcony, in a warm room with active air circulation, in the country;
- on the heater.
Immediately after manufacturing, the product is not sent to the oven - it is kept in air for 2 days. Preheat the oven to 50 ° C before drying. A sheet of foil is laid on a baking sheet. Crafts are placed on top. Before laying out, lightly dust the foil with flour.
The dough pieces will dry for 3 hours at the original oven temperature.
The temperature can be gradually raised up to 140 ° C. Under such conditions, the dough will take about 40-50 minutes to dry. But it should be borne in mind that products with bulky and thick parts will take more time to dry to the end.
Rapid drying at higher temperatures can lead to cracks on the surface of the dough.... Therefore, it is better to choose a gradual and unhurried drying. Crafts are taken out of the oven after cooling. The simplest, natural and longest drying method is outdoors or in an apartment on a windowsill.
The product dries out faster in summer in warm sunny weather. But you don't need to place it directly under the hot rays of the sun. A well-lit and warm place is suitable, as well as a smooth surface so that the crafts do not deform. Another way is drying on a battery.- used during cold seasons.
The finished product is not simply put on a hot battery. First, prepare a flat surface, cover it with foil, spread the dough on top. The resulting structure is placed on a heating radiator. When tapped, a completely dried out craft emits a sonorous sound.
A product that is damp inside will sound hollow.
Do I need to varnish my crafts?
Varnish can be applied to crafted and dried crafts. Painted and colorless dough creations are lacquered. It protects the figurines from moisture and prolongs their life. For varnishing, you can purchase an aerosol - the varnish is sprayed in one or several layers.
Before applying a new layer, dry the previous layer thoroughly.
On sale there are varnishes with the addition of decorative elements - they will give originality to crafts. The use of manicure varnish is allowed. Salted dough (a recipe for modeling for children is not suitable) can shine even without varnish spraying - the glitter effect is caused by the presence of glycerin in the composition of the material.

The dough, which will contain glycerin, begins by mixing a glass of salt, undiluted wallpaper glue (2 tablespoons) and flour (1.5 cups). 2 tablespoons are added to the resulting dry mixture. glycerin. Little by little water is added (it will take about half a glass), creating an elastic ball.
If the dough was prepared without adding dyes, the figures can be covered with acrylics or gouache.
Young children can color their crafts themselves using felt-tip pens or markers with indelible ink. Watercolors are not very suitable, but if only they are available, they paint them: they slightly moisten the brush and thickly coat it with paint.
Gouache is suitable both for dyeing products and for dough. It is put into the dough and kneaded with a lump with your hands so that the paint is distributed.
Salted modeling dough, prepared at home, is not losing its popularity. By experimenting with the main and auxiliary ingredients, you can choose a recipe for creating a plastic material that is suitable for children of all ages.
Article formatting: E. Chaikina
Useful video clip on salt dough for modeling
A simple video recipe for self-preparation of dough for creativity with children: