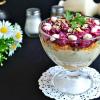
Oak barrels. Banana wine Banana jam wine
Homemade banana wine is a fragrant honey-colored drink with light notes of raw materials, the taste is difficult to compare with anything. The technology of preparation is somewhat different from the traditional winemaking, since the fruits give off juice and other substances poorly, but even beginners can do the recipe.
Any ripe bananas are required for wine. They will even do with a blackened peel, so long as the pulp is not rotten and moldy. In order not to infect the wort with pathogenic microorganisms, all containers and tools used should be sterilized with boiling water, then wiped dry with a clean cloth.
Ingredients:
- bananas - 5 kg;
- water - 10 liters;
- sugar - 2 kg;
- citric acid - 7 teaspoons (35 grams);
- unwashed raisins (any fresh berries) - 100 grams or wine yeast for 15 liters of wort.
Citric acid is needed to increase the acidity and break down sugar into fructose with glucose, which promotes fermentation, improves taste, increases shelf life and prevents some wine diseases. To activate fermentation, wine yeast is required (other types are not suitable) or raisin sourdough (fresh berries can be used).
Banana Wine Recipe
1. If there is no wine yeast, 3-5 days before processing bananas, make a leaven from unwashed raisins (raspberries, currants, cherries, etc.): pour raisins or berries into a jar, add 25 grams of sugar and 250 ml of unboiled water , stir, cover with gauze, put in a dark place at room temperature.
After 2-3 days, the leaven will be ready - foam will appear, a slight sour smell and a hissing sound will be heard.
2. Peel bananas. Grind the pulp with your hands, a wooden rolling pin or a meat grinder until puree.
It is undesirable to make wine with banana peels, because the peel is treated with toxic chemicals to increase the shelf life.
3. Mix in an enamel saucepan 5 liters of water (half), 1 kg of sugar (half), mashed banana and citric acid. Bring the mixture to a homogeneous consistency.
4. Heat the wort to 55-58 ° C, maintain the specified temperature range for 60 minutes, heating the pot over low heat. Stir occasionally so that the gruel remains homogeneous and there are no lumps at the bottom.
It is very important not to let the temperature rise above 60 ° C, otherwise the enzymes will break down and the release of fructose from bananas and sugar will stop. As a result, some of the raw materials will be wasted.
5. Cool the wort to 25-27 ° C. Add remaining water and sourdough (along with raisins) or wine yeast. Mix. Cover with gauze, leave for 4 days in a dark place at room temperature. Stir every 12 hours with a clean hand or a wooden stick. After 3-8 hours, foam and fermentation odor should appear on the surface.
6. After 4 days, strain the wort through 4-5 layers of gauze, squeeze the cake well, taking away all the liquid. The pomace is no longer needed. Add 500 grams of sugar to the liquid part, mix.
7. Pour the resulting banana juice into a fermentation vessel. Fill up to a maximum of 60-65% of the volume. Install a water seal of any design on the neck (you can pull and secure a medical glove with a small hole in one of your fingers).
Attention! When banana wine ferments for the first 6-10 days, a lot of foam appears, so I advise you to fill the container by half or even less.
8. Transfer the container to a dark place (or cover) with a stable temperature of 18-27 ° C and leave until the end of fermentation.

9. After 5 days after installing the water seal, add the remaining sugar (500 grams). To do this, pour 250 ml of wort through a tube into a separate container, dilute the sugar in it, pour the resulting syrup back into the fermentation container and close it with a water seal.
10. Depending on the activity of the yeast and temperature, homemade banana wine ferments for 30-60 days. The end of fermentation is indicated by the absence of gas from the water seal (the glove is deflated) and a layer of sediment. It is necessary to drain the young wine through a straw, without touching the sediment at the bottom, into another container.
If fermentation does not stop after 50 days from the start of preparation, drain the wine from the lees and leave to ferment at the same temperature, otherwise bitterness may appear.
11. Taste the drink. If desired, sweeten with sugar (to taste) or fix with vodka (alcohol) in an amount of 2-15% of the volume of drained wine. The fixing aids storage but makes the taste somewhat pungent.
12. Pour wine into storage containers. To minimize contact with oxygen, it is advisable to fill to the top. Close hermetically. If sugar was added at the previous stage, I recommend keeping it under a water seal for the first 7-10 days in case of re-fermentation.
13. Transfer the banana wine to a refrigerator or cellar with a temperature of 5-16 ° C. Leave for at least 4 months (preferably 7-8). Aging significantly improves the flavor.
14. Every 15-20 days (then less often) as the sediment appears in a layer of 3-5 cm, filter the wine by pouring it through a tube into another container.
15. When no sediment appears, homemade banana wine is ready. The drink can be poured into bottles and capped. Shelf life - up to 3 years. Strength - 9-12%.

Home distillers never cease to delight with new ideas, such as mash, distillation methods. There is also such an original idea: to drive moonshine in a slow cooker. The manufacturer can hardly be distracted by the process, a vigilant electronic eye will monitor the temperature regime, so that the quality of the product will certainly be at its best, but at its maximum.
Multicooker has become a common technique in our homes for ten years already. This is a hybrid of an electric steamer with a software module that frees us from kitchen slavery and seriously saves time on cooking stews, pies, cereals and soups. Why not assemble a distillation cube from a multicooker with your own hands? Home-grown Kulibins are ready to throw a couple of interesting ideas.
We collect a distillation cube based on a multicooker
Quick jump to article
To start a career as a home brewer, it is not at all necessary to purchase equipment that is not too expensive, but still affordable. It is possible from a multicooker, and for this you do not even need to have any technical skills. On your own and at minimal cost, you equip a kitchen distillery in one day.
You will need:
- multicooker with a bowl volume of at least 5 liters;
- a distiller, it can be made of tempered glass or metal (cheap options cost less than a thousand in the store);
- a rubber tube 3 meters long (you need to make 3 sections of 1 meter) from food (medical) rubber;
- contact thermometer for measuring the temperature of the wash;
- alcoholometer;
- access to electricity and water supply.
 If you do not have a multicooker yet, and you are going to purchase one for home brewing purposes, choose models with a removable valve in the top lid. If there is equipment, but there is no valve, you can make a hole, which will be closed with a homemade stopper during the preparation of ordinary dishes.
Read also: Characteristics and applications of alambic
The first rubber tube is inserted into the hole in the lid and fixed, its second end will be connected to the inlet of the distiller. This is a low pressure system, so no special fixing methods are required, the simple absence of steam leaks will suffice. Now we connect the cooling system to the refrigerator - inlet (second tube) and outlet (third tube) of cold water, and we can assume that our moonshine still from a conventional multicooker is completely ready for use.
Cooking mash for a multicooker
Since we only have a five-liter bowl, we need to take a small amount of mash. You can make it according to the following recipes:
- The proportions sugar: water: as 2000: 2000: 250. Fermentation time is about 7 days in a warm place.
- The proportions of sugar: water: yeast as 1000: 3000: 100. Fermentation will take a little longer - about 8-10 days.
After the mash has completely fermented - it has stopped driving the foam and has lost its sweet taste, you can start distilling the moonshine in a slow cooker. This is a simple procedure.
Distillation process
 Each distiller chooses his own modes for making high-quality moonshine, but you can start with the following program:
- We turn on the device to the "multi-cook" or "porridge-soup" mode at a temperature of + 120 ° С. As soon as foam starts to form, we immediately set the mode to + 100 ° С.
- We control the temperature of the wash with a contact thermometer. We try to keep it within the range of + 65 ° С - + 68 ° С. This is the ideal mode for removing harmful impurities, that is,. Since we took 2 kg of sugar, the volume of the "head" will be about 100-150 ml. It can be poured out as it is too harmful for internal use.
- We change the temperature regime of the multicooker so that the mash warms up to + 80 ° C. Now the distillation of the useful fraction - "body" will go. Raise the temperature gradually. We drive until the moonshine from the multicooker falls on the fortress below 40 °. By this time, the brew should warm up to a temperature of + 85 ° C - the "tails" fraction begins.
- Separate the "body" faction. In a separate container
Each of us is used to the fact that wine is a purely grape product. Few have tried any other unusual beverage that uses different raw materials. However, you should not limit your horizons and tastes so much, but you should take a chance and try to make an equally tasty and healthy drink - banana wine. Exotic? Undoubtedly! But the taste of such a product is also unforgettable.
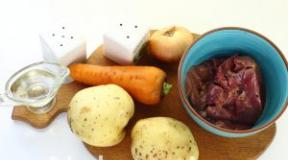
Components
It is not difficult to prepare such a drink at home, especially if you have a dozen or two kilograms of bananas in stock. As you know, bananas are an excellent source of vitamins, pectins, and healthy fiber. Such wine, in addition to excellent taste, will contain a whole range of useful elements and components. It goes amazingly with creamy desserts, chocolates and various exotic fruits.
The wine recipe includes the following components:
- Bananas - 10 kg.;
- Granulated sugar - 10 kg.;
- Water - 15-20 liters;
- Raisins - 2 kg.;
- Citric acid - 5-6 tsp;
- Nutritional yeast - 1 g. for 1 liter of wine material;
- Tannin - 1.5 tsp;
- Enzymes for activating fermentation: glucamil - 25 ml., Amyl - 15 ml.
Recipe
On the day of preparation, it is necessary to make a wort, which will be the basis for our further wine. The wort is prepared according to the following recipe:
- Cut the entire volume of bananas together with the peel into 1-2 cm slices;
- We place them in a saucepan with a volume of 30-40 liters;
- Pour water there;
- We fill in granulated sugar, mix;
- We place the container on the fire and, while stirring, bring it to a temperature of 60-65⁰ for 40 minutes or an hour. At this temperature, the inulin contained in the fruit decomposes into monosaccharides. We turn the mass into a puree-like state as much as possible;
- Remove the hot wort from the heat, add citric acid, tannin, enzymes there, mix thoroughly and leave for several hours;
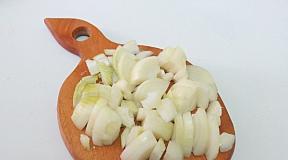
- Pour unwashed raisins into another prepared container, which we sort out to separate branches and rotten berries;
- Pour the strained wort on top, then add 1/3 of the pulp from the digested wort to a new pan;
- Top up the remaining 7-10 liters of warm water;
- We close it with a water seal (instead of it, you can use a rubber glove with a punctured finger or with a tube removed to another container);
- We leave for a day.

The second stage of making banana wine includes exactly the preparation for the fermentation process. The next day after aging, you still need to work on the wine material:
- Drain the liquid from the container with the wort;
- Squeeze the remaining cake into a drained wine blank;
- We remove all fruit cake and sediment;
- Add yeast to the prepared wine material;
- Close with a water seal and place for 7 days for fermentation at room temperature;
- Stir for a week;
- After a week, we drain off the sediment and again close it with a water seal;
- We place the vessel with wine material in a dark cool (not cold!) Place for 30 days. We make sure that the fermentation process is over - bubbles should not go out into the gas outlet tube, and the glove should deflate. If this does not happen, then let the wine stand still, having previously separated it from the sediment into a disinfected container with a water seal. For some, the process takes 2-3 months. During this period, sugar can be added to make the wine sweeter;
- After a certain time, we again separate the liquid from the sediment and pour it into clean sterilized bottles for long-term fermentation and storage. Some winemakers stop the fermentation process with potassium sorbate, but this should be done no earlier than 2-3 days before corking in bottles;
- We seal with cork stoppers.
Bottled maturation
Banana wine, according to the recipe, ripens from four months to 2-3 years. Wine acquires more noble shades after a year, while after several months its taste is sharper.
Wine bottles should be stored following the rules for storing grape wine. Compliance with the temperature regime within 11-12⁰ will ensure its correct ripening. Wine should not be stored in direct sunlight and in damp basements, then it can delight the winemaker and guests with its bright exotic taste.
Many winemakers find banana wine tricky to make, despite the detailed recipe. It all depends on the quality of the material and on the fact that the banana is considered a "capricious" product. It is necessary to start production with small volumes in order to take into account all the moments and disadvantages that arise, to eliminate knowledge gaps in the cooking process, without spoiling a large volume of products. And if the process is successful, then you can safely start large-scale parties. And banana wine, without fail, after ripening will delight the eyes and taste of the most notorious gourmet.
The best way to pleasantly surprise family and friends is to invite them to taste banana wine. The amazing banana wine has a mild taste and a light fruity aroma. The original recipe for making a light alcoholic drink from bananas came to us from Latin America, where abundant harvests of tropical fruits encouraged people to use them in every possible way.
Due to the high percentage of fiber content, wine can be safely consumed even by people with digestive problems. B vitamins, vitamin A, ascorbic acid, manganese, potassium, magnesium - this is an incomplete list of what banana wine can boast of. In addition, it is beneficial for hypertensive patients due to its mild effect on lowering blood pressure. In a word, a drink with such healing properties must be kept in reserve in case of the arrival of guests who have some health problems. So, let's begin!
How to make healthy banana wine?
First, you should prepare everything you need. We will need:
Bananas of sufficient ripeness - 10 kilograms;
Granulated sugar - 10 kilograms;
Black raisins - 1.5 kilograms;
Water - 20 liters;
Citric acid - 6 teaspoons;
We take yeast based on the calculation: 1 gram of yeast per liter of wine material;
Tannin - 1.5 teaspoon;
Fermentation enzymes - 25 ml glucamil + 15 ml amyl.
Cooking sequence
- bananas do not need to be peeled, we cut them into pieces no more than 2 centimeters thick;
- put chopped bananas in any heat-resistant container with a volume of at least 40 liters;
- add granulated sugar there;
- add 10 liters of water;
- put the container with the blank on a slow fire for 45 minutes;
- we follow the process, stir frequently and in every possible way contribute to the transformation of the fruit mass into a homogeneous puree;
- remove the wort from the fire;
- we introduce citric acid into the mass;
- add tannins;
- fill in the amyl enzyme at the rate of: 0.5 ml of amyl per 1 liter of wort;
- we enrich the wort with glucamil at the rate of 0.8 ml per 1 liter of wort;
- mix thoroughly and set aside for a while;
- we take another clean and dry prepared container;
- we fall asleep there unwashed, but sorted out raisins, previously separated from rotten and damaged berries;
- pour the prepared cooled wort onto the raisins;
- top up the remaining 10 liters of water;
- we seal with a water seal;
- our wine stock costs one night.

The next day, you need to remove the fruit mass from the liquid. For this:
- we drain the liquid from the container;
- squeeze out the sediment remaining at the bottom;
- add the result of squeezing to the liquid;
- remove the fruit residue;
- we introduce yeast into the wine preparation;
- close with a water seal;
- put in a dark place with room temperature for one week for fermentation;
- do not forget to stir the drink;
- after a week, we drain the wine material from the sediment;
- close tightly with a water seal;
- we place the vessel with future wine in a cool place for a period of 1 month for thorough fermentation;
- we repeat the procedure for removing wine from the sediment;
- We bottle refined banana wine for long-term storage.
The drink gains its best taste and aroma in a year and a half after its production. But, as practice shows, it is rather difficult to withstand this period - the banana wine is too tasty!
The easiest and at the same time original way to pleasantly surprise relatives and friends is to invite them to taste banana wine. Exotic light alcohol has an unforgettable and unique taste, as well as a special tropical aroma.
The original recipe for banana wine came to us from distant Latin America, in the vastness of which bountiful harvests of delicious and aromatic tropical fruits are collected. So, let's find out how to make exotic banana wine according to a simple, generation-proven recipe that can be easily implemented at home.
Step by step cooking
Preparation
Fermentation stage
- Stir everything thoroughly, cover the pan with gauze and send it to the same dark place for about 4-5 days. Approximately 6-8 hours after the start of fermentation, foam and a noticeable fermentation smell should appear on the surface of the wort. Do not forget to stir the mass thoroughly every day with a clean hand or with a wooden spatula.
- We filter the fermented wort through multilayer cheesecloth, while squeezing out the cake well, trying to squeeze out as much liquid as possible. Repeat the procedure twice if necessary.
- Add half a kilogram of sugar to the purified liquid and stir everything well.
- Pour the resulting mixture into a fermentation tank, filling it with a maximum of 60 percent of its volume.
- Installing a water seal - you can use a medical glove, after making a small hole in one of your fingers.
- We place the container in a dark place where the temperature does not drop below 18-20 degrees, and leave the mass there until the end of the fermentation process.
- After five days after installing the water seal, add the remaining granulated sugar. To do this, pour about 200-240 ml of wort from a container using a tube and dilute the sugar in it, then return the resulting syrup back to the fermentation tank and reinstall the water seal.
- We are waiting for the end of fermentation. On average, banana wine ferments for anywhere from 40 to 50 days. Fermentation is complete when carbon dioxide ceases to evolve and a layer of sediment has formed.

The final stage
- Gently drain the young wine with a straw, being careful not to touch the sediment at the bottom of the container.
- We taste the drink. If necessary, sweeten it with sugar or fix it with vodka or alcohol. Fixing with alcohol contributes to a longer storage, but at the same time makes the taste slightly harsh and increases the strength of homemade alcohol. If sugar is added again, we reinforce the water seal and return the vessel to its original place for about a week.
- We pour the finished wine into three-liter glass jars, while filling them up to the very neck in order to minimize contact with oxygen.
- We tightly close the jars and put them in the refrigerator or any other cool place.
- Let the alcohol ripen for at least 4 months, and best of all 7-8. Longer aging will definitely improve the taste of the drink.
- Every 17-21 days, as a 4-5 cm thick sediment appears, we filter the liquid by draining it from the sediment through a tube into another container.
- When the sediment stops forming, we bottle the alcohol.

Did you know? The strength of the banana wine prepared according to this recipe is from 9 to 13 turns. The shelf life of the finished product reaches three years.
The subtleties of cooking
- Never wash the raisins, as there are "wild yeast" on the surface that will help activate the fermentation process. You just need to carefully sort it out, removing rotten or moldy berries, which can significantly spoil the taste of alcohol, giving it too tart notes.
- Instead of raisins, you can use wine yeast or sourdough made from any fresh berries, such as cherries, raspberries, red or black currants, and so on.
- A lot of foam will appear during fermentation for the first 6-9 days, so I recommend filling the container with wort by half or less.
- If the fermentation process does not stop after 50 days, it is necessary to drain the liquid from the formed sediment and put the wine again to ferment. Otherwise, the finished product may be too bitter.
Banana Lemon Orange Wine Recipe
List of required components
Step by step cooking
- Peel the ripe bananas, then cut the fruit pulp into random-shaped pieces and put them in an enamel container.
- Fill the sliced bananas with 2-2.2 liters of cold water.
- We send the pan over medium heat, and after boiling the liquid, boil the mass for half an hour.
- Cool the prepared compote to room temperature, and then pour the remaining amount of water into it.
- Squeeze juice from one lemon and one orange into a separate bowl in a convenient way for you.
- Add the resulting citrus juice to the banana mixture, add granulated sugar there.
- Stir the liquid until the sugar grains are completely dissolved. Then we taste the prepared liquid and, if necessary, add sugar or citric acid, if there is not enough acidity.
- Add wine yeast there and stir everything well, then pour the prepared mixture into a fermentation container.
- We cover the vessel with a lid and send it to a warm, dark place for about a week. During this time, mix the contents of the vessel daily.
- We leave the wort to ferment for about 2 more months, without shaking the mass.
- After the specified period, add unwashed raisins to the fermented liquid and let the wine infuse for another six months.
- We filter the alcohol through multilayer gauze and bottle it.
- We put the bottles in the refrigerator or any other cool place for another six months.

As you can see for yourself, there is nothing difficult and unattainable in making banana wine at home. If you have developed your own variations of this delicious light alcohol, then share your experience in the comments and describe in detail your author's recipe. Banana wine is great for pre-meal quality and will greatly improve your appetite. Thank you all for your time and wish you a successful tasting!