How to make a dough of sourdough. Sourdough for bread "Eternal
This sourdough for yeast-free bread will delight everyone who bakes homemade bread. It can be called eternal, it is enough to cook it once and “feed” it several times a month. And the bread from it will turn out just gorgeous!
Probably, each of us is already aware that rolls and loaves based on pressed yeast are not particularly useful for the human body.
It is much more interesting and useful to create pies and bread yourself, based on natural sourdough.
The most difficult thing is to make a high-quality and "live" workpiece.
Fermented milk based fermented product is an easy and not troublesome option for making homemade buns.
In addition to the fact that such a product contains healing milk bacteria, its creation is within the power of even the youngest cook.
Such a starter culture can be stored in a cold place for a long time, "feeding" it several times a month with a small amount of water and rye flour.
If you will use a fermented milk product for “feeding”, such a procedure can be carried out once every several months.
To create bread, you must first lay out a small rate of sourdough, add water and flour to it and leave for 5-7 hours.
After that, you can start making buns or bread, guided by a specific recipe.
Sourdough for bread without yeast
Ingredients
- rye flour;
- fermented milk product.
Cooking sequence
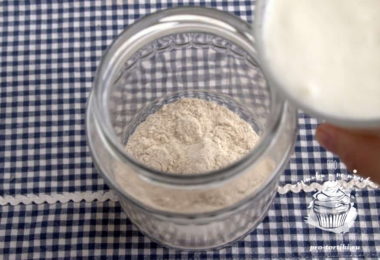
 Pour 80-150 grams of rye flour into a clean and dry container. For "mother sourdough" we use only this type of flour.
Pour 80-150 ml of homemade yogurt, yogurt or other fermented milk product.

 Gently mix all the ingredients for a "live" mass. Cover and leave in a warm room. We are waiting 10-12 hours.

 Mix the ingredients, wait another 6-8 hours. We begin to "feed" the workpiece: pour in a container from 2 to 5 tbsp. l rye flour.

 We introduce the same rate of yogurt.

 Mix the products, wait another 10-12 hours. During this period, the leaven “will begin to come to life”: bubbles will appear on its surface.

 We use the blank to create any homemade bread. To do this, we can use any recipe we liked. The approximate rate of leaven at 4 tbsp. flour and 1.5 tbsp. water - 1 tbsp.
Sourdough for bread "Eternal"
Ingredients
Flour - 300 g
Water - 300 g
This is the simplest yeast - to bake BREAD WITHOUT YEAST. The aroma of bread is DIVINE. I don’t have a bread machine, so I knead the dough myself, and this recipe helped me a lot in making a DELICIOUS BREAD. This recipe is taken from the site "Landowner" - the hostess of which I am very grateful. For the idea of \u200b\u200bleaven, I express my personal gratitude to the user "VASILNA"!
 |
It doesn’t matter what flour the so-called “starter” is made from: wheat, whole, rye .... And it doesn’t matter what kind of yeast the bread is made from: from rye to wheat, or vice versa. Therefore, do not bother with the manufacture of different starter cultures, one is more than enough. In short, if briefly, then the recipe is this: Eternal Ferment 1 day 100 g of flour and 100 g of water. Stir well. A pasty mass should be obtained, like a thick market sour cream. Cover with a damp towel and put in a very warm place without drafts. The starter should wander about a day. Before the appearance of small, albeit rare, but bubbles. It makes sense to stir him sometimes. I just covered with a dry, kitchen towel. I set in the kitchen, on the cabinet near the stove. At first, the flour will settle under water, but it's not scary, just stir 3-4 times a day. I did not see any special bubbles after the first day))), but that did not stop me! The experiment continues !!! In the photo: just the flour is mixed with water, the bubbles in the photo turned out after I pounded the flour with water (then they disappeared naturally). |
 |
2 day Now you need to feed the starter. To do this, again we add 100 g of flour and add water so that its consistency returns to the initial state of market sour cream. We cover with a towel and set it for another day. After the second day, rare vials appeared - it already made me happy. I stirred 4 times a day. |
 |
3 day As a rule, now there are no questions, the surface of the starter culture is not just bubbles, it grows in size and all consists of such a foam cap. Feed her one last time. And again in the heat. That's for sure! The foam mass turned out))) I could not resist and put half into action, and fed the other half and left it for the last proofing using technology. Here, a very important point, the leaven is already strong enough and we need to catch the moment when it will be at the “peak of form”, i.e. she should double. At this moment she is as strong as possible. Divide it in half. The first half is our eternal leaven. We put it in a jar with a plastic cover with holes in it (to breathe) and put it in the refrigerator until next time. Then they got it - fed it - left it warm - and again it is ready for battle! |
 |
To say that the bread turned out delicious is to say nothing! Only natural everything !!! HERE A LINK TO MY BREAD http://www.povarenok.ru/recipes/show/54662/ For baking one loaf of bread, I needed 700 g of flour - 6 tbsp. yeast, the effect will surprise you, you can 7-9, it's not yeast (unless of course everything is done correctly with the leaven). FEEDING is adding a little flour and water (3-4 tablespoons is enough). If you keep it for a long time, as I’m going to, you need to get it from the refrigerator - “feed” it - keep it warm, when the reaction has started - it is ready for use. It’s better to feed in the evening - in the morning she “matured”, or in the morning to feed in the evening (and + a warm place is required). If there are no bubbles for a long time, add a pinch of sugar (my grandmother advised me), the reaction will go faster. |
Sourdough for bread without yeast
The easiest way to prepare yeast for bread without yeast is on flour and water.
It is done this way: prepare a glass jar with a volume of 1 liter; any flour - rye or wheat; unboiled drinking pure water (not from the tap!). Fermentation water is half the success, buy it either in a store or type in a spring.
Sourdough for bread without yeast ripens for several days at room temperature, in winter you can put it closer to the heating battery. We gain patience and start cooking.
1 day. You need to mix 100 g of flour and 100 ml of water at room temperature. Place the mixture in a jar, cover the neck of the jar with gauze. Mark the level of the mixture on the bank with a felt-tip pen - this is important for observing the fermentation process.
2 day. On the second day, remove half of the contents from the can with a spoon. After that, add a fresh mixture of flour with water (1: 1) so that the jar is filled to the mark that you put on 1 day.
3 day. On day 3, the mixture begins to bubble and emit a rather pleasant sour smell. The manipulations on this day are such - again, remove the half of the contents from the can with a spoon. After that, add a fresh mixture of flour with water (1: 1) so that the jar is filled to the mark that you put on 1 day.
4 day. By the end of 4 days the leaven will increase in volume by 2 times compared with 1 day. It is fully ripe and can be used for baking bread.
When I'm interested in a material, I always read comments on it. Sometimes there is even more info than in the main text. I myself somehow made a sourdough; I didn’t succeed, as I myself would like. Now I’m studying in detail how to do it and what were my mistakes.
From the comments in the source, tips and doubts
- If your dough, no matter how you interfere and knead, stretches, then prepare the yeast on the whey .... Well, the last addition to this recipe: a couple of spoons of bran - only cheer up your bread! ...
- Sour bread means weak sourdough! Need to feed twice (for now). Initially, take a little bit (so as not to spend a lot of flour, gr. 30 Sourdough, the same amount of flour and water) and when the sourdough is at the peak of activity (in 4 hours !!! And not in a day), cook! I really like this bread - http://www.povarenok.ru/recipes/show/77002/ And the remaining yeast (not fed) will either have to be thrown out, or you can make pancakes with it (here is the recipe http: //www.povarenok. com / recipes / show / 79744 / .. in general, she has many recipes with leaven).
- I never have a foam cap, only when I feed it and stand in strong heat. In the refrigerator, just like batter without bubbles. Try baking test bread. You just need the bread to rise well. I fill the bread pan only halfway, the dough for three hours is unchanged, then the process begins.
- She baked bread on the third day, fed the starter, put it on the battery, and the next day she put it in the refrigerator. By the way, the sourdough in the refrigerator behaves differently, then it delaminates, then it bubbles a little, but bread always turns out. Now I bake two loaves of bread right away, as one loaf of bread is eaten right after baking. I mix 1200 grams of wheat flour and 400 grams of rye flour, about 4.5 cups of water, two tablespoons of olive oil, 2 teaspoons of salt, 10 tablespoons of sourdough. The dough is very sticky and very thick, I scrape it straight off with a knife. I put the dough immediately in bread form and on the battery, I just need to watch, the dough can run away. As it rises, I immediately put it in the preheated oven. The dough can rise without a battery, more time is needed. I just want to say that I initially thought that it would not work, but everything turned out to be much simpler. The bread is very tasty.
- I bake for about 40-45 minutes. At first, I have 220 degrees, I lower it to 180 degrees in 10-15 minutes, then after 30 minutes from the beginning of baking I open the oven and look at the surface of the bread, if it burns, reduce heat, if it turns a little brown, then leave it for 10 minutes at a temperature of 180.
- Yeast is the same sourdough, only dried. In your samopal, which wandered at an unknown temperature, there are also many pathogenic fungi acres of those that make bread fragrant.
- For two weeks now I’ve been baking bread with the “Eternal” sourdough. There was only one “damn lump” - for the first time, when I did not wait for the required number of bubbles (I really wanted to try to bake some bread). Thanks for the recipe! By the way, I found a way to cook bread quickly! I knead the dough in the oven by 50 degrees. Then after 10 minutes I turn off the heat and leave the dough to come up. After 2-3 hours you can already bake.
- Ferment, as experience has shown, can mature by the end of the second day, it will foam very much, take the right amount, and the rest in the refrigerator. Feed, and when she "came to life" - in the refrigerator.
- It turns out differently for everyone, the quality of flour is different for everyone, so the reaction is appropriate.
- In the bread machine I bake constantly, everything turns out. Choose a longer mode than Basic, something like French. Or work in manual mode. And the first time you use a very young sourdough, and the second you can, add half a teaspoon of dry yeast until the sourdough is very strong. If the yeast immediately bubbles very well, then for the first time it is possible without yeast.
- Sourdough pancakes it's simple. Make any, the easiest pancake dough, add the starter to it, let it stand a little at room temperature and you're done, you can fry it.
Additional tips
The birth of sourdough
Ferment is prepared once, and subsequently only used and replenished. It is a living dough that can doze in the refrigerator, and can actively rise if it is fed. Sourdough biomass consists of natural microorganisms (fungi, bacteria, etc.) that live on rye grains.
The point is to revitalize, propagate and grow these microorganisms so that they self-organize into a stable symbiotic colony. Life itself in nature is built on the principle of symbiotic colonies of micro– or macroorganisms (for example, soil, ocean, intestinal microflora). Organisms in symbiosis support and complement each other.
Sourdough is prepared simply from flour and water. Ratio: 2 parts of flour and 3 parts of water (exactly one and a half times more water). You will need a room thermometer, a digital kitchen scale, a glass pan or can with a capacity of 1.5 liters, a wooden spatula. In time it will take four days, on the fifth you can already bake bread.
Sourdough should be prepared exclusively and only on the basis of rye flour, because rye sourdough, in comparison with wheat and other, is the most stable, healthy and strong. Those microorganisms that live on rye grains are quite enough to organize a well-coordinated symbiotic colony.
Washing the grain does not have a significant effect on microorganisms, you can not worry about this. But high-temperature drying kills most of the necessary microorganisms, therefore, germinated grain for starter culture should be dried at a temperature of no higher than 41 ° C. Obviously, flour made industrially is not suitable for creating high-quality sourdough.
As already mentioned, the sourdough is prepared once, then it can be used continuously, putting off part of the batch for the next baking.
Cooking Technology:
1. Load the measured grain weight into the mill, grind the flour directly into the pan, fig. 13. The degree of grinding should be set to the smallest fraction.
2. On the scales measure the right amount of warm water, with a temperature of no higher than 36–37 ° C. Water should be clean, filtered, not chlorinated. You can take spring water, boiled or distilled, infused with shungite and flint.
3. Pour water into a pan with flour and stir with a wooden spatula so that the flour is evenly combined with water. You get a dough of thick sour cream, rice. 14.
4. Cover the pan (or jar) with a lid, do not tightly, cover it with a cotton napkin from the light, and put it in a secluded place, away from drafts and electrical appliances. The optimum temperature for feeding the starter culture is about 24–26 ° C, not higher. Find a place in the kitchen with a thermometer. Closer to the ceiling - warmer.
This procedure will need to be repeated four days in the morning and in the evening:
Day 1. Morning 40 g flour, 60 g water. Evening 40 g flour, 60 g water.
Day 2. Morning 40 g of flour, 60 g of water. Evening 40 g flour, 60 g water.
Day 3. Morning 40 g of flour, 60 g of water. Evening 40 g flour, 60 g water.
Day 4. Morning 40 g of flour, 60 g of water. Evening 40 g flour, 60 g water.
Day 5. In the morning we already have 800 g of sourdough. 500 g will go to the first bread. We put the rest in the refrigerator until the next baking, fig. 15.
Sourdough should have a pleasant smell of natural kvass. If the starter has a bad smell, it means that you have violated the technology in some way or used dirty dishes. If everything is done correctly, but the smell is still nauseous or chemical, it means that perhaps the environment in the room where the leaven is made is not environmentally friendly. Or the initial raw material - grain - caught substandard or containing some foreign impurities. In this case, you should find grain from another producer and trader.
Some prescription authors write that the smell of burping or something else for sourdough is “normal.” But this is not normal. There should not be any “disgusting smell” in the starter culture. If on the fifth day the sourdough has a smell of alcohol, acetone, vinegar or mold in general, you can throw it away and start over. Try not to break the technology, and you will succeed.
At the same time, excessive perfectionism is not required here. The behavior of the starter culture is quite stable, so that all parameters are permissible to vary slightly. For example, it is desirable to maintain the temperature regime, but not necessarily too pedantically. Now a few practical tips.
It is better to choose electronic scales such that there was a function of dumping of indications. The principle is as follows: the container (container) is put on the scales, the button is pressed, the balance readings are reset to zero, then the product is loaded into the container, and the net weight is thus displayed on the display. It's comfortable.
To store the part of the sourdough that goes to the next baking, you need to pick up a container - made of glass, ceramic or food-grade plastic. The lid should be leaky, but not too open so that the leaven does not absorb odors from the refrigerator. If the lid is plastic and closes tightly, you can make a few holes in it with a needle. Fermentation dishes should not be washed with household chemicals. Everything is easily washed off with warm water.
Sourdough can be stored in the refrigerator, on the top shelf, where not the lowest temperature. Long breaks in baking bread are undesirable. Ferment should be updated regularly. Personally, I tried to leave her for half a month, and she came to life safely. Perhaps the leaven is able to survive for three weeks, but it is better not to leave it longer than this, otherwise it will have to be reborn. Still, leaven is a living colony of microorganisms, and you need to treat it as a living entity. If you leave for a long time, instruct someone to look after and feed at least once a week.
Flour should always be ground before use. No need to store it - this is a perishable product. Vitamins and nutrients in the air quickly oxidize. That is why flour of industrial production cannot be considered a natural product - manufacturers will go to any tricks, just to increase the implementation period.
The degree of grinding is set to the finest fraction. This is because in a home electric mill it is still impossible to achieve the same degree that is achieved under industrial conditions. But this is not required. The quality of bread, which should be REAL bread, is determined by completely different parameters:
1. Sprouted grain.
2. Freshly ground flour.
3. Natural, natural sourdough.
4. The presence of the shell and the germ in the flour.
5. Lack of chemical and synthetic additives.
Flour should not be white, like starch, even if it is wheat. What it should be, it is impossible to describe. When you first make your flour, smell it, taste it, touch it, you will understand what REAL flour should be.
Bread should not be white and fluffy either. It should be REAL, not synthetic. Real bread is also impossible to describe in words. When you try it, everything will become clear to you. He has both taste and smell - special - noble.
One question remains open: if so far there is no mill or dehydrator, and you want to bake your own bread now, what should I do? You can try your luck, look at local stores or on the Internet for whole grain rye flour or at least first grade flour. If you are lucky and get a product of a conscientious and honest, as well as, importantly, sane producer, then yeast, and bread, real (well, or almost), can happen.
In any case, it is better to get everything you need to get rid of system manufacturers and traders who care only about profit, but not your health at all, as well as from a system that is directly interested in your HEALTH.
100% rye bread
To achieve the best result with the least expenditure of time and effort, it is advisable to use a bread machine. Of course, you can get by with a conventional oven, but with a bread machine it’s easier. This is the case when system products are used to bypass the system itself.
The bread machine works simply: all the ingredients are loaded into it, the baking program (recipe) is selected, the button is pressed, and then she does everything herself - knead the dough, heat it so that it rises, and then bakes.
All programs are hard-coded and designed exclusively for yeast. Do not flatter yourself if you see a bread machine with such “natural” programs as “yeast-free”, “gluten-free”, “whole grain”. In the best case, this refers to the fact that the recipe does not use yeast, but a chemical baking powder. The system is hypocritical.
For our purposes, you will need only two programs: Yeast Dough and Baking. In fact, we are deceiving the system, we will not use yeast, and we will ignore the firmware. The main thing is that in the “Yeast dough” mode the bread maker should be able to knead the dough and heat it a little so that it fits. And you also need a timer to set the time in the "Baking" mode.
It is not necessary to choose a multifunctional and expensive bread machine. The two named programs are all that is required for our real bread. The presence of additional options and programs, such as a dispenser, delayed start, pie, jam, cake - at your discretion, if you find this useful.
A bread machine should be chosen with a power of at least 800 watts, otherwise it will not cope with a heavy rye dough. The working capacity (bucket) should be with two mixers and such a shape that a “brick” is obtained. The weight of baked bread is at least 1 kg. For convenience, the window does not hurt, so that you can observe the process.
Another significant point: the design of the bread maker should allow opening the lid during operation. If the scoreboard and buttons are located on the case, and not on the cover, then, most likely, this is possible.
100% rye bread recipe:
500 g rye sourdough
400 g rye flour
200 g of water
3 tbsp flax seed
1 tsp cumin seeds
14 g of salt
The process begins with the awakening of the starter left in the refrigerator. At the very first baking, the leaven is ready for us, so we skip the first 7 points.
Cooking Technology:
1.
Take the starter from the refrigerator and put it in a warm place for an hour so that it wakes up. The optimum temperature for starter culture is 24–26 ° C.
2.
After an hour, measure 220 g of rye, load into the mill and grind the flour in the same container in which the starter was born, for example, in a saucepan. Obviously, what is the weight of the grain, the same weight and flour will be.
3.
Measure 330 g of warm water, temperature 36–37 ° C, and pour into a pan with flour. For example, put a glass on a digital scale, reset the readings, pour cold water, and then add a little hot from the kettle, so that it turns out exactly 330.
4.
Stir with a wooden spatula so that the flour is evenly combined with water. The ratio of water to flour for sourdough is 3/2. For the test, the ratio is already different. Why are these numbers 330/220? Because we need to get 500 g of sourdough, and at the same time take into account that the dough partially remains on the dishes, so we must take with a margin so that the amount of sourdough does not decrease each time, but rather increases. On fritters can come in handy.
5.
To load the awakened sourdough into the pan and stir again with a spatula, now it’s not so zealous as to not particularly disturb a living entity - a colony of microorganisms.
6. Cover the pan with a lid, not tightly, cover with a cotton cloth from the light and put in a secluded place, away from drafts and electrical appliances, as was done before. If you intend to bake bread in the morning, this procedure should be done in the evening. Conversely, if bread is baked in the evening, the yeast is put in the morning.
7.
The meaning of this whole procedure is that we take part of the starter culture from the last time, awaken it, feed it, as a result of which the colony of microorganisms grows, develops violent activity (good party!), The starter culture rises, then drops, slightly bubbles, and later 10-12 hours comes to the right condition when it is moderately hungry and active, Fig. sixteen.
8
. An hour before making bread, soak three tablespoons of flax seeds in water at room temperature or can be warm, rice. 17. Flax seeds quickly swell and become softer. Soaking is required even then, at which time the seeds wake up and neutralize their "preservatives" - inhibitors.
9
. After an hour (or you can half an hour) throw the flax into a sieve so that the glass water, fig. 18.
10
. Measure 400 g of rye, load into a mill and grind in a large container made of food-grade plastic, with a tight lid. Measure out 14 g of salt (shallow, preferably sea salt) and a teaspoon of caraway seeds, pour them into flour, rice. 19, close the container with a lid and turn it slightly so that everything mixes up.
11
. Measure out 200 g of warm water, preferably around 40 ° C. Remove the form (bucket) from the bread machine, pour water into it, put 500 g of sourdough and flax, rice. 20. The principle is this: first, liquid ingredients are loaded into the form, then thick, then dry. To conveniently measure exactly 500, you can set the form on the scales, reset the readings and unload the sourdough directly from the pan to the desired weight.
12
. Unload the rest of the starter from the pan into a specially designated container and put in the refrigerator. It will be touched on the next baking. The value of this backlog is better to maintain about 200-300 g. When the excess accumulates, you can put on other purposes, such as kvass or pancakes.
13.
Pour flour from the container into the mold, fig. 21. The preparatory phase is completed. Now it's up to the bread maker.
14
. Paste the form into the bread machine. Launch the Yeast Dough program. First there is a batch, about 25 minutes, with possible stops. During this period, the cover can be opened. You will see that rye dough, unlike wheat dough, does not mix, but is pounded in place, since rye dough does not contain the gluten fiber binders that are in wheat, rice. 22. Therefore, it is necessary from time to time to help with a wooden spatula, directing the dough from the walls to the middle. It is not necessary to do this constantly - mainly at the beginning and at the end of the batch.
15
. When the batch is finished, the stove enters the mode of weak heating. The lid should be closed and the stove covered with something on top for insulation, for example with a folded terry towel. The temperature inside should be around 37 ° C. You can check this by putting a thermometer on the dough to make sure at the same time whether your stove is really heating. (If there is no heating, you will have to pull out the form and put it in a warm place, for example, over the back of the refrigerator or over the battery.) This will take about another hour.
16.
When the program is over, the bread maker emits a signal. You will need this signal to count down the next period. Yeast dough is suitable for an hour. The leaven test takes twice as much time. That is why standard programs for a leaven test are not suitable. So we do not remove the towel from the stove, do nothing, wait another hour or a half.
17
. So, it took 2–2.5 hours to rise after the batch. The dough should almost double in this case, fig. 23. Now we start the program “Baking”, having previously set the option “Medium crust crust” (if available), as well as the time on the timer. Baking time depends on the weight of the loaf and should be indicated in the instructions. Weight according to our recipe is a little more than a kilogram. The average baking time for such a weight can be about 1 hour 10 minutes.
18.
Finally, the stove emits a signal, the bread is ready. You can pull out the form, not only with bare hands, but with tacks. Let it cool for 10 minutes (no more, otherwise the bread will sweat), lay a linen or cotton towel on the table and shake the bread from the mold, fig. 24.
19
. Wrap bread in a towel and place it “upside down” on a wire rack or wicker stand so that the bottom is breathing and not sweating. So you need to let the bread cool.
It may seem that all this is very complicated and long, but this is only at first. When you master the technology in practice, make sure that your eyes are afraid and your hands are doing, and that everything is actually elementary, and the time of your actual participation takes a few minutes.
The whole process comes down to weighing, transfusion and transferring raw materials from one container to another. Moreover, performing all these manipulations, especially with living substance, you tune in to the frequency of vibrations of living Nature. At this moment, your "usb ports" are released - you disconnect from the matrix, which means that you begin to think freely and SEE the real state of things.
Other options
You will be convinced that even the very first bread made using this technology has an exquisite taste. And the older the sourdough, the better the bread. In some countries, in some bakeries where they are able to value and preserve traditions, there are starters that are several hundred years old. But you won’t buy anywhere such bread as you get at home, because even in bakeries that work according to old recipes, germinated grain is not used. This is the oldest and long forgotten technology.
Of course, the same technology can be implemented in an industrial environment. There are no particular difficulties here. But the general race for profit zombies people - they cease to understand and see what they are doing and why. Do you think that the technologist at the bakery is aware of what surrogate ingredients he is dealing with and what kind of surrogate product he gets? Not at all. His mind stuck once and for all at one point: "it is necessary." How it is necessary is determined not by his consciousness, but by a system, a matrix.
The matrix distributes programs that the bread makers that the people - the same. Both surrogate producers and their consumers cease to understand and see what they eat and where they go. More precisely, they do not go, but lead them. In the system - you become a cyborg - you eat synthetics, you eat synthetics - you become a cyborg. However, maybe someone is quite happy with this. Well, God forbid health.
So, you got acquainted with the unique technology of pure rye bread. Why is it worth baking just rye bread? Because for the body it is in every way more useful, easier, more pleasant. However, wheat-rye bread is also very good if the wheat is germinated. Here is his recipe.
Wheat-rye bread
500 g rye sourdough
400 g wheat flour
150 g of water
3 tbsp flax seed
1 tsp cumin seeds
14 g of salt
As you can see, less water is taken here, because wheat is less hygroscopic. Rye absorbs more water. Everything else is done the same way. The only nice feature is that the bread maker copes with the wheat-rye dough herself, there is practically no need to help with a spatula (except maybe a little).
This feature is also one of the reasons why 100% rye bread is not produced industrially. (Other reasons are wheat bread, white, soft, airy, but these are dubious advantages.) It is more difficult to knead rye dough. Although, of course, this problem is not a problem, everything is solved. But we do not care about this issue, especially since we have hands and a few minutes of free time.
I don’t know how you like it better, but personally it’s more convenient for me to knead rye dough manually, without the help of a bread machine. To some extent, doing it yourself is easier and more convenient than helping the mixer. Try the manual way. Here are the amendments to the technology (see pages 288–292), starting at paragraph 9:
9.
Pull out a form from a bread machine. Launch the Yeast Dough program. The stove will “knead the dough” for as long as it should be according to the program, but at no cost. During this time, you can knead the dough manually.
10.
Fold the flax into a sieve and then prepare all the other ingredients.
11.
Pour flour mixed with caraway seeds and salt from the container into an enameled bowl. Make a depression in the flour (crater). Unload flax, sourdough and water. (As in the shape of the stove, only in reverse order.)
12.
Mix all ingredients until smooth, fig. 26. This is convenient to do with a wooden spatula, making inverting movements from the edge to the middle and at the same time turning the bowl with the other hand. Rye dough, unlike wheat, does not require complex manipulations (kneading, rest, kneading again, proofing, etc.). Rye protein is water-soluble, so the dough needs only to be mixed well for 5-7 minutes.
13.
Put the dough into the mold, having previously pulled the mixer blades from it, fig. 27. Strongly leveling the dough is not necessary, it will be distributed and settled itself.
14.
As soon as the bread machine finishes interfering and starts heating, carefully insert the form there, using tacks to additionally protect yourself from the accidental voltage that can break through the heating elements, especially if the network does not have grounding. Further - all the same, starting with paragraph 15.
Instead of flax, you can try to soak the sunflower or pumpkin seeds and pistachios in the same way. Only the soaking time for them is a few hours. Instead of caraway seeds, you can put coriander seeds, perhaps this is the taste you like more. Or do not use seasoning at all, although it is more interesting with it, of course.
Instead of wheat, you can just as well use spelled (spelled). The advantage of spelled is that it, as a rule, is grown without the use of chemicals, and surpasses wheat in protein content. Everything else is a matter of taste.
Finally, consider another option - baking in the oven. To do this, you will need one or two forms with a non-stick coating and a frying pan that can be put in the oven (without plastic parts).
Technology for the oven:
1. Knead the dough manually, as described above.
2. Put in forms, fig. 28. It is better to bake rye dough in forms, because on the baking sheet it spreads.
3. Put the mold in the warmest place in the kitchen and cover with a linen or cotton towel. The duration of the proofing is 2-3 hours. The dough should rise almost twice, rice. 29.
4. Once the dough has risen, preheat the oven to 240 ° C. At the same time, pour water into the pan, bring to a boil on the fire, put on the oven floor. This is required so that the bread does not dry out.
5. When the oven has warmed up, place the dough forms on the top shelf.
6. After 15 minutes, lower the temperature to 200 ° C. Bake another 35 minutes. Or another 40-50 minutes, if all the bread in one form. Time can be controlled using a timer.
7. Bread is ready, rice. thirty.
Some may like the oven more than the bread maker; it's a matter of taste. In both cases, some of their advantages. The bread machine has the advantage that it itself maintains the necessary temperature conditions when proofing the dough and baking.
Finally, a few practical tips:
“You can eat hot bread, but it's better to let it ripen.” Bread continues to ripen for several hours, adding to the quality and richness of taste.
- Bread is better stored in a bag made of food-grade plastic, for example in polyethylene. Only cooled bread can be packed in a bag.
- If the top of the bread sank, then you should slightly reduce the amount of water in the recipe. The proportion of water can depend significantly on the moisture content of the grain and other ingredients, such as soaked seeds.
- Do not greatly underestimate the proportion of water in the dough. By its consistency, rye bread should be “raw”, this does not spoil it at all. Dry bread is less tasty.
- If the dough does not have time to rise enough, you should increase the proofing time by half an hour or an hour. Or this indicates that the proofing temperature is low. Or the leaven is weak for some reason. Read the technology carefully.
- Allocating more than three hours for proofing does not make sense. The dough can rise first and then fall. Do not wait until the critical point when it begins to subside. During baking, the bread also settles a little, this is normal.
- A new bread machine the first 2-3 baking can give an unpleasant smell. Then this smell will go away.
- Basic safety precautions. It is advisable not to touch the metal parts of the breadmaker with your bare hands and metal objects. Use a wooden spatula and mittens or oven mitts. On feet should be slippers with rubber soles. There is nothing special to fear, but a weak voltage can sometimes break through, especially if the network does not have grounding.
- If the dough is made in a bread machine, you will have to come to terms with such inconvenience as the presence of paddles from the mixer in the bread. You need to get them right away or cut the bread carefully.
- Cooking bread should not be done in a bad mood. Bad emotions have a negative effect on the quality of bread.
- Real bread is an independent and self-sufficient food. But in a small amount it is compatible with many dishes. It goes well with vegetables, herbs. A special treat is a pile of bread, spread with a dessert spoon of cedar or pumpkin oil, with garlic and cayenne pepper to taste.
* * *
Now you know everything you need to know. It remains to add that real bread in your home is not just an everyday dish - it is a philosophy, lifestyle, freedom. Freedom from the conditions and framework that the system imposes on you. And, what is obvious, is your health and clear consciousness. A healthy body will make your life complete, and a clear mind will allow you to create your own world. Real homemade bread is your green oasis in a technogenic environment. Your new hope. Your new Arkaim. But not the only and not the last. It happens that the past lies ahead.
Baking bread in any folk cuisine is always a sacred, mysterious action, almost witchcraft. The secret of making bread was carefully kept in every family and passed on from generation to generation. Sourdough bread, baked in a Russian oven, was tasty and fragrant; we can say that there is no such bread and cannot be anywhere else in the world. The ancient science of bakery is not forgotten today.
Russian bread sourdough was made from rye flour, straw, barley, wheat, hops ... In the remote villages far from the "enlightened" civilization, you can still find recipes for making bread without purchased yeast. The yeast-free yeast and the bread prepared on them enrich the body with organic acids, vitamins, minerals, enzymes, fiber, pectins, biostimulants - in general, all those wholesome substances that are present in whole grains. In favor of sourdough bread one experiment speaks, which was carried out by journalists of one of the channels of our television. They bought a regular loaf of bread and compared it to bread baked at home. The camera recorded changes that occur with bread during the week. The store bread was moldy already on the second day. Three days later he was all in black and green down. But homemade bread has just hardened. Just the leavened bread, in principle, cannot mold - the acidic environment kills all the harmful bacteria and does not touch the healthy ones.
 So, if you are ripe for baking homemade bread, the first thing to do is prepare the sourdough. There is nothing terrible and complicated in this. You do not need to tremble over it, like a crystal vase, just mix the right products and wait, and the result will be. To begin with, we will determine what kind of leaven we will prepare. Sourdough is different: rye, wheat, malt, hop, potato, raisins, even rice - they are all good (each in its own way) for baking bread. I must say that rye flour is best suited for the preparation of sourdough, as it contains all the useful substances that are not found in refined wheat. That is why leaven on wheat flour often goes astray in the direction of pathogenic flora, acidifies and becomes unusable. It is better to cook wheat starter for one or two times, but rye can be successfully used for more than one year, the main thing is to store and feed it correctly.

1 day:Mix 100 g of rye flour with clean water until the consistency of thick sour cream, cover with a damp cloth and put in a warm place without drafts.
2 day: bubbles should appear on the leaven. If there are few of them, that's okay. Now you need to feed the starter. We add 100 g of flour and add water to again get the consistency of thick sour cream. Leave again in a warm place.
3 day:the sourdough has grown in size and has a foamy structure. Add 100 g flour and water again and leave in a warm place.
A day later, the leaven is ready for use. Divide it in half, put one part in a jar and cover with a cloth or a lid with holes to breathe, and put in the refrigerator. We use the other part for baking bread.

1 day:knead a handful of raisins with a crush, mix with ½ cup water and ½ cup rye flour, add 1 tsp. sugar or honey, put everything in a jar, cover with a cloth or a holey lid and put in a warm place.
2 day: strain the leaven, add 4 tbsp. flour and warm water to the density of sour cream and put again in a warm place.
3 day: sourdough is ready. Divide it in half, as in the previous recipe, add 4 tbsp in one part. flour, water (until thick sour cream) and put in the refrigerator. Use the other part for baking bread.

1 day: Soak 1 cup of grain (wheat for wheat bread or rye - for "black") for germination, wrap the dishes with a towel, put in a warm place.
2 day:if not all the seeds have sprouted, then rinse it, wrap it up and leave it in a warm place until evening. In the evening, grind the grain in a blender or combine (more accurately, do not burn the motor!), Mix with 2 tbsp. rye flour, 1 tsp sugar or honey, put in a warm place under a lid or towel.
3 day: the leaven can be divided (as in the previous recipes), leave a part in the refrigerator, and use the other part to prepare the dough.
As an option - grain yeast can be cooked boiled. Mix the ground grain with flour, sugar and water (if it is dry) and put in a saucepan on a small fire. Cook for 20 minutes, remove from heat, wrap and put in a warm place. Then proceed as usual - feed, divide, etc.

1 day:Pour 100 g of rice with 150 ml of warm water, add 1 tsp. sugar and leave in a cool place for three days.
3 day: add 3 tbsp with a hill of wheat flour and 1 tsp Sahara.
4 day:mix the sourdough and add 100 ml of warm water and 1 tablespoon with a hill of flour.
5 day:strain the yeast, add 1 tsp. sugar and 4 tablespoons with a hill of flour.
After a few hours, you can cook the dough. Set aside part of the starter for dough, put the rest of the starter in the refrigerator. This sourdough is ideal for pies, rolls and pancakes.

1 day: in the evening pour in a thermos 1 tablespoon dry hop cones with 1 cup boiling water, close the thermos and leave until morning.
2 day: strain the resulting infusion in a two-liter jar, add 1 tbsp. sugar or honey, stir well, add rye flour to the consistency of thick sour cream. Put in a warm place, covering the jar with a cloth.
3 day: the leaven will become liquid and foamy, the smell is still unpleasant. Add flour to the density of sour cream, cover and put in a warm place.
4th day: mix the sourdough, add warm water (1/2 or 1/3 of the volume of the sourdough), mix and add flour until the sour cream is thick.
5 day: add water and flour again.
6 day:use part of the sourdough to prepare the dough, put the remaining sourdough into the refrigerator, adding water and flour until the sour cream is thick.
As you can see, there’s nothing incredible, the leaven is growing with our minimum intervention. But for the preparation of dough and for baking bread you need some skill. But the most important thing is that sourdough bread needs to be cooked in a good mood, otherwise nothing will work. Checked.
Opara
Homemade bread is cooked on a dough - this allows live yeast in the sourdough to gain strength. One glass of sourdough is approximately equal to 40 g of pressed yeast (or 1.5 tbsp dry). Pour a glass of sourdough into a wide bowl, add 350-500 ml of warm water, stir and add as much sifted flour to make a thick batter of thick sour cream. Cover with a towel and put in a warm place overnight.
 Dough
Dough
In the morning, knead the dough. Opora has to “walk” well during the night, rise 2 times and have time to go down. In ½ cup warm water, stir 1 tbsp. honey and 1 tsp salt (approximate proportions, they can be changed), add to the dough, stir well. Then we add to our taste all kinds of fillers and spices: bran (about half a glass or more), ½ tsp. ground cloves, ground coriander on the tip of a knife, 1 tsp each. ground ginger and nutmeg, 2-3 tbsp unrefined sunflower oil. You can add raisins, seeds, nuts, flax seeds, oatmeal, boiled potatoes, quinoa seeds, pumpkin seeds - in general, for every taste. Mix everything thoroughly and pour the sifted rye flour - so much so that there is a spoon in the dough, that is, a sufficiently thick dough should turn out. Then we pour wheat flour on the table, dump the dough, sprinkle flour on top and begin to knead and fold it. Do not knead, but knead, sprinkling with flour so that your hands do not stick, and fold them in an envelope. Then knead again and fold again. Sprinkle with flour so that the dough does not stick to your hands, but you do not need to add too much flour, otherwise the bread will turn out to be dense, baked.
Ideally, the dough should be dry on top and sticky inside. Rye dough will always be sticky, so you need to focus on its outer side. As soon as the dough can be held in hands, knead it, fold the corners, forming a ball. Then we take the dough into our hands and smooth the ball from the dough, shaking off excess flour and turning the dough inside the ball. We spread the prepared dough into a pan or a cast-iron pan greased with oil, seam down, and leave it in a warm place. The surface of the loaf can be sprinkled with water and sprinkled with sesame seeds or flax. And you can make incisions or decorate with thin strips of dough. The dough fits 1-3 hours.
 Baking bread
We bake bread in the oven at a temperature of 220-230ºС, “with steam” - that is, a bowl of water should be put at the bottom of the oven. Do not open the door for the first 20 minutes! Bread is baked for 40-60 minutes, depending on the size. Wrap the finished bread in a towel and leave for a day - this is a must. Properly baked bread, when tapped on the crust, makes a loud sound, and the crumb is completely straightened when squeezed.
There are many options for homemade bread recipes: you can bake pure rye bread, similar to Borodinsky, you can add pea flour or boiled potatoes, grind pre-soaked grain or add seedlings, increase the amount of wheat flour, or even bake white bread - it all depends on your imagination. In any case, sourdough bread, prepared with your own hands, with love, will bring only benefit to your household. Enjoy your meal!
Larisa Shuftaykina
1. The recipe for sourdough bread without yeast is actually quite simple. However, there are several important nuances that must be taken into account. First you need to take 4 tablespoons of flour and sift. Pour 4 tablespoons of warm water into a small jar. Water should be purified, and its temperature should be about 40 degrees. That is, the water should be slightly warmer than body temperature. Gradually add flour to the water, stirring constantly. When all the flour is in the jar, the mass must be thoroughly mixed to get rid of lumps. Then cover the jar with a sterile bandage or gauze and tighten with an elastic band. Send the starter to a warm place where it will ripen.

2. It is worth noting that the first time the leaven will not change either in volume or in texture. This is not a reason to panic. It is necessary to wait 2 days when bubbles form on the surface.

3. After 48 hours, you can proceed to the second stage of preparation. To the leaven, you need to add 2 more tablespoons of sifted flour and 2 more tablespoons of water. Water, as for the first time, should be about 40 degrees. Mix the mass thoroughly, eliminating the lumps. Cover the jar again with gauze, tie and send to the previous warm place.

4. Ferment should stand still for a day. After that it can be used. For one serving of bread you will need 2 tablespoons of sourdough. You need to add salt, water and sugar to it and you can knead the dough.

5. Sourdough for bread without yeast at home, although it is prepared from rye flour, but any bread can be baked from it. In addition, it is perfectly stored for up to 10 days in the refrigerator under a tightly closed lid. However, before direct use, the leaven should be put in a warm place somewhere for 1-1.5 hours.