How to roll rolls at home. Video tutorials on making delicious homemade rolls
In order to make good Japanese sushi rolls (or onigiri), you do not need to study the technique of slicing fish in Japan for five years and listen to someone insulting remarks that the first sushi in your life, made by yourself, is more like a sea cucumber, pulled out of the water during rush hour. All you need is a little desire and a good guide to get you through these difficult times. So, you want to learn how to wrap rolls? Good. You have come to the right place.
It’s worth starting with the purchase of equipment and ingredients for sushi, with which you can continue to work further. You will most likely find everything you need at your local Asian grocery store.
Rolls are a 60% visual dish. From the very beginning, try to make them as raw as possible. The more you touch the ingredients, the more you change the natural look and taste of the sushi.
How to wrap rolls
Things you will need to make rolls:
- bamboo rug;
- nori sheet;
- boiled rice for sushi;
- fish/vegetables of your choice.
Instruction:
1. Rough side of nori.
Feel the nori sheet on both sides and you will find that one side is smoother and the other side is rougher. Nori should be placed on the sushi mat with the rough side up.

Wet your hands and roll a handful of rice into a ball. It is important to keep your hands moist throughout the entire handling of sushi rice because it is very sticky. However, when working with nori, you should keep the sheet as dry as possible. That's why you should have a bowl of water (with a bit of rice vinegar added to it) and a dry kitchen towel on hand when you make your rolls.
3. Distribute.
There is a very precise tradition of spreading rice over nori, but most modern sushi bars have forgotten all the rules. Roll masters study for years to learn the correct technique. For example, the correct way is the one in which rice is laid out on nori with only 6 movements. It is said that sushi masters can put rice on top of nori so that all of its grains lie in the same direction. The idea is to spread a tennis ball-sized amount of sushi rice over the nori without pressing too hard to make it sticky.
When you look at the rolls, you should be able to see individual grains of rice. What you don't want to see is a compressed block of rice around your roll. Careful spreading of sushi rice will prevent it from sticking together. Remember: the art of sushi is to keep the ingredients as raw as possible. Rice consists of individual grains and should remain the same.
But you can just gently place a ball of rice in the middle of the nori sheet and start spreading it evenly over the seaweed, creating a layer of rice that covers almost the entire sheet, except for the top borders, about 2 cm of which should be left uncovered. Later it will be necessary that the borders are not filled with rice. This will help wrap the roll properly. Be careful not to squeeze the rice too hard, just spread it over the nori.
4. Lay out the filling.
Now that the rice is spread over the nori sheet, you can sprinkle it with sesame seeds or spread it with tobiko (flying fish roe). If you want to make inside-out uramaki, simply turn the nori sheet over with the rice and place the ingredients on the other side.
In this case, turn the nori and rice over and spread the sushi ingredients in a thin layer across the middle of the seaweed. If you put too much food inside, it will be difficult for you to wrap it tightly. Remember to be careful not to flatten the rice or squeeze the food out.
If you are making plain rolls, place the roll toppings, such as tuna slices for sushi, on the edge of the nori. You can add a slice or two of vegetables, in particular, try putting a long slice of avocado or even a cucumber in there. This, moreover, will allow you to wrap the roll more tightly, because all the voids will be filled.
5. Begin to perform sequential folding actions.
Using the near edge of the sushi mat, close the nori filling, creating a rectangular raised area, and press it firmly on top.
Move forward, continuing to wrap the roll and give it a rectangular shape, while keeping it better firmly throughout each of your movements until you reach the end of the nori. Periodically apply pressure on the roll from all three sides, especially during stops, to let it roll tightly. Make sure you tighten the roll, moving from its ends to the center. Be careful not to accidentally squeeze the stuffing out of it.

Another way is to roll the sushi rice, nori and ingredients off the mat with your hands, then place a slightly damp bamboo mat on the roll and press it down lightly. As you apply pressure to the mat, spread the pressure evenly and gently. The idea is to use light pressure to shape the roll into a rectangular shape. Form a rectangle with your fingers and press it simultaneously from all sides in the middle, then repeat the same with the edges of the roll that are far from the center, and then again with the middle.
7. Cut.
Use a damp, sharp knife to cut the package into small rolls. Aim to divide one bundle into 6-8 rolls. It will be more convenient if you keep the knife always wet during this action, as this will help it to pass through the rice and nori unhindered.
First, cut the roll in the middle. Lay the two halves side by side and cut the two sections into 3-4 pieces. In this way you will get 6-8 rolls by making only 3-4 cuts.
Place your sushi cut side up on a decorative plate or platter. Serve with wasabi, ginger and a little soy sauce on the side.
- a wonderful and quite interesting dish, which is becoming more popular with us every year, despite its exoticism. The best restaurants offer them to their visitors in banquet halls, and some even practice Japanese food home delivery http://sushi-v-dom.ru/, by the way, prices here are quite adequate, unlike many others. But now it’s not about that, but about how to wrap the rolls yourself so that the result of their preparation does not turn out to be a shapeless piece of rice stuffed with seafood.
How to wrap rolls at home - start with choosing the right rice
In order for the rice to turn out to be the right consistency, it must be:
- - round unsteamed
- - boiled initially in the form of porridge-smear, but thicker
- - unwashed and unburnt.
ATTENTION! Not bad increases the stickiness of boiled rice a few tablespoons of wine or apple cider vinegar, added five minutes before the end of cooking.
Ideally, it is better to purchase special sushi rice, bags and jars with which are offered in almost every supermarket. If you choose this particular type, then the question of how to wrap the rolls at home as carefully as possible should disappear by itself. Special rice very easily retains its desired shape and does not crumble. Another advantage of this choice is the smaller grains, which reveal their taste qualities much better along with any seafood. And the downside is the price. Special rice for roll and sushi is much more expensive than ordinary rice. 
The rice is cooked, what's next?
It is best to roll the rolls at the moment when the rice has not yet completely cooled down, but it no longer burns your fingers. The optimum temperature is 40-45 degrees.
ATTENTION! It should be understood that these tips are only suitable for making a roll. Sushi is prepared using a different technology, which is an order of magnitude more complicated.
Next, a rug is taken, or, as it is also correctly called, a mat. A sheet of nori is placed on top of the mat. Nori is a very healthy product consisting of dried seaweed fibers. The nori is covered with rice in a longitudinal strip, and on top of the rice is the filling. Everything, you can start twisting. But it's easier said than done - how to properly wrap rolls at home so that they don't fall apart later? Here are a few apps:
- 1. The mat must be evenly pressed along the entire length.
- 2. Do not rush - because of this, the sheet will not have time to gain a foothold.
- 3. Do not roll the roll for too long - the nori will get wet and break through.

And if there is no mat? How to wrap rolls without a mat?
Not every hostess will be able to carry out this idea. The “sausage” will definitely break through somewhere, the rice will come out on the sides, and the rolls will turn out to be crooked - this is the result of many years of practice. But there is a way out - to build a mat yourself. For this task you will need:
- - two identical pieces of foil;
- - food film;
- - two wooden sticks;
- - a few minutes of free time.
Algorithm: we put two identical pieces of foil together, fold the edges, making them rigid, and fix wooden sticks on two opposite sides. Maybe plastic. Then we wrap our homemade product with cling film. How to wrap rolls without a mat? Use homemade! But it will not be as convenient as with the real one - you need to have the skill to make it work.
"Sausage" is ready - then what?
How to wrap rolls at home? How then is it better to cut them so that the pieces are beautiful, even and the same? The most important thing is to wait until everything cools down and infuses. Ideally, it should take about half an hour, but about an hour is better before servings are formed. It is best to put the sausages on a plastic board, if there is none, we wrap a wooden one with cling film. Then they are covered with a film and placed in the refrigerator for the specified time.
Tricks of the last stage - how to quickly and correctly cut the rolls
After the “sausages” have been infused, they should be freed from the protective film and proceed to the division into pieces. The pieces are supposed to look as identical as possible, so it does not hurt beginners to mark future cuts in advance. Then cut - but you do not need to press with the sharpest blade. You should try, as it were, to saw off uniform slices, swiping the tip back and forth, and so on several times. All is ready!
Rolls can be laid out on a tray or flat plate in any way. If there are a lot of people eating, a common large tray is a good option. But then everyone should have a bowl of soy sauce and an empty plate with bamboo sticks placed next to it. Irreplaceable ginger and wasabi are served either in separate large bowls or placed next to each individually.
ATTENTION! For beginners, you can use special plastic clips for sticks, they will help you quickly learn how to use a simple device that is unusual for many
How to fold rolls correctly - repeat the algorithm
- 1. Boil the rice to the state of a very thick viscous porridge. It is better to take special rice for roll and sushi.
- 2. We spread a sheet of norrie on the mat (rug).
- 3. We make a path of rice on pressed seaweed.
- 4. Put the filling on top.
- 5. We twist.
- 6. Let it brew and cool.
- 7. We form portions.
In general, from the first minute to the end, depending on the amount of the finished dish, from one and a half to two hours is required. Enjoy your meal!
Well, amazing things are happening! Ordinary Russians, our neighbors, who have never been Japanese, calmly and with pleasure eat some kind of ... miso soup or yakitori - as if it were cabbage soup or buckwheat porridge known since childhood. And sticks wield freely and naturally. The country of Japan is far and mysterious ... and every second person in Russia knows how to cook sushi and rolls ... Well, maybe every third
Previously, I was not involved in rollover ... not a complete zero, of course, I was interested in the process, but I was a theorist, and nothing more. Here to feast - with pleasure, but to twist ... somehow it did not happen. But then an unexpected twist of fate, and I got to the roll master class - the well-known and beloved by us mother Masha conjured at the table - mashuk .
Fascinated by the diversity and abundance, firmly holding my faithful Olympus in my hands, I continually gasped and pressed the button. I looked at everything, asked everything, and now I really want to show you “what was there”!
I must say honestly - once you feel the magic of this process, and you are a “roller” forever! An incredibly meditative activity, it easily touches some spiritual strings, touching and appeasing ... My creativity has been purring with pleasure for a week now.
Many u-mommies have long and skillfully not only twisted rolls, but they will also surprise you with a salad, and they know what tempura is! For example, "A Narrow View of Japan" - have you read it? And if you haven’t “turned” yet, I recommend it!
About myself I can say with confidence - I will, yes! I’m about to have a big dish of this rainbow beauty, and I’ll go to congratulate my girlfriend on the New Year - I’ll show off. Or not, it’s not like that - the New Year holidays are long, I’ll call you, we’ll twist together. Spending a frosty January evening with friends, having a leisurely pleasant conversation, sipping warm sake and industriously making roll after roll is very worthy! Join now!
What is it called (a drop of theory - who cares)
Sashimi- These are pieces of specially cut raw fish (without rice). "Sa" - knife, "shi" - fillet. The Japanese prefer sashimi, by the way, not sushi. At least sashimi is eaten at the beginning of the meal, before sushi. Served with wasabi and soy sauce.
Sushi- a dish of specially seasoned rice, fish (usually raw), seafood and nori seaweed.
Nigiri sushi- from the Japanese "compress". This is what we usually understand by the word "sushi". Rice for this type of sushi is compressed in the hand, so that a block is obtained. A slice of fish, shrimp or shellfish is placed on top of it. May be "tied" with a nori ribbon. (Example: "maguro nigiri" - a slice of tuna (maguro) on top, "ebi nigiri" - shrimp (ebi) on top.)
gunkan maki- an oblong lump of rice wrapped in a sheet of nori (it turns out a “cup”), the filling is laid out on top. Often such sushi is served with salmon caviar (“ikura gunkanmaki”).
Maki sushi- rolled sushi. These are our favorite rolls.
* Temaki - rolls formed in the hands, similar to small bags, pounds. Put the nori sheet in the palm of your hand, rice and fish in the middle, and fold it into a bag. This is what the Japanese usually do at home.
* Hosomaki - thin rolls, 1-2 ingredients.
* Futomaki - thick rolls, with a lot of ingredients.
* Uramaki (saimaki) - rolls turned inside out. Rice outside, filling in nori inside - these are familiar to us, for example, California rolls.
Oshizushi- pressed sushi. A funny kind of sushi, like a puff pastry - folded from rice, nori and toppings, and pressed into a special shape.
There are several more varieties of sushi that are loved by the Japanese, but not very common with us, for example: temari (in the form of a ball), chirashi (crumbly, with stuffing laid on top), and ... here I will stop.
Roller dictionary
MAKISU- a bamboo mat for rolling rolls. Wash after use with a mild non-perfumed detergent (soap). Not in the dishwasher!
NORI- dried and pressed into thin sheets of seaweed.
WASABI- spicy green Japanese horseradish, it comes in the form of a ready-to-eat paste or in the form of a powder that is diluted in water.
GARI, or SHOGA- pickled pink ginger. It is eaten between various types of rolls and sushi, as it helps to cleanse the mouth of the taste of the previous sushi in order to feel the taste of the next one more subtle.
COME(sushi, nikishi) - Japanese rice, round grain, sticks together well when boiled. This makes it suitable for making sushi and eating with chopsticks.
HASHI(saibashi) - chopsticks.
HASHIOKI- stand for chopsticks.
SU- rice vinegar. Has antibacterial properties.
Yu-mama rolls from Masha-mashuk
You will need:
Rice "Sushi" - pack;
Nori sheets - 1 pack, sheets about 20 * 20 cm in size.
Salmon or lightly salted salmon (piece) - 200 gr.;
Salmon or lightly salted salmon (thin slices) - 120 gr.;
Avocado - 1 pc.;
Fresh cucumber - 2 pcs.;
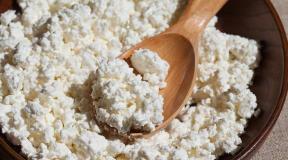
Curd cheese (Almette or Philadelphia) - 1 jar;
Crab sticks - 3 pcs.;
Sweet Bulgarian pepper - 1 pc. red and yellow;
Carrot - 1 pc. (we had a ready-made Korean carrot);
Flying fish caviar (tobiko) - half a glass;
bunch of lettuce
bunch of dill
Wasabi
pickled ginger
Kikkoman soy sauce (dark), it is the most delicious

Tools:
Wide bottomed rice cooker
Bamboo rug - napkin for folding (makisu)
Film thin food
Food foil
Very sharp knife!
Note:
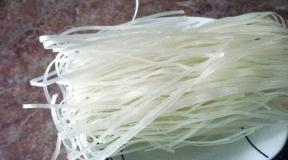
a). Rice we need not simple - this is important! A special “roll” rice is suitable, it is sticky when boiled, the grains are soft inside, but it does not boil into porridge. Ideally, of course, Japanese. You can buy Sushi rice (manufacturer Angstrem) and Yaponika rice (manufacturer Mistral) from us. In the absence of the above rice, take a variety with short round grains, like Iberica or Krasnodar. The Japanese, of course, will figure out the substitution of the flight, but we will still enjoy the sushi / rolls! (Long grain and steamed will not work!)
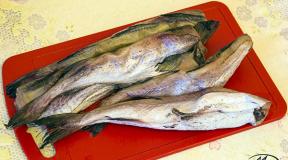
b). fish(salmon, salmon, chum salmon, tuna, trout) can be salted on your own, you just need to take care in advance. Many know how, in a crisis - a very useful skill. They shared their experience recently in the forum - the topic "How to salt salmon". And here - "Salted Fish". And we will not use raw fish (as the Japanese do, and, in general, correctly) - it is difficult to find fish of such freshness in Yekaterinburg, alas.
in). Flying fish caviar (tobiko) comes in different colors - green, red, black, yellow. In its natural form, this caviar is small, hard, and colorless. It is tinted and used specifically for decorating sushi and rolls. Bought in "Metro" - frozen. The packaging is large, but if you plan to make rolls more than once, then buy - the remnants of this caviar are perfectly stored in the freezer.
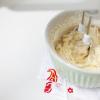
Step 1. Cook rice.
First things first, cook rice, because it is the most important ingredient in sushi. Pour rice into a bowl or immediately into a saucepan, and rinse several times, rub the grains directly with your hands , drain the water - until it becomes transparent.
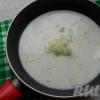
This is a very important operation - you need to wash off all the "dust and flour" from the grains! Otherwise, there will be a jelly or mushy mass between the grains of cooked rice ... Washed rice is poured with water in the proportion of 1 part of rice and 1 ¼ of water, that is, 250 ml per 200 grams of rice. water. Chef Masha says that it is very simple, and after 2-3 times you will even be able to determine how much water is needed “by eye”. Bring to a boil under a tight lid over high heat, lower the heat and cook for 10 minutes, all without removing the lid.
Then on the lowest heat until the water evaporates - 5-10 minutes. Visually - “holes” should appear on the surface of the rice, that is, gaps between rice grains, individual grains become visible. Done, turn off and after 10 minutes remove the lid to cool. Rice will turn out soft, sticky, and at the same time one grain from another separately. And not at all watery - that is, the water should be completely absorbed.

- According to tradition, boiled rice needs to be seasoned - a marinade of rice vinegar, salt, sugar, mirin plum wine is whipped for it. I was surprised that we didn’t season the rice with anything, and didn’t even salt it! Masha said that since the fish is salty (not raw, like the Japanese), rice can not be salted. And I must tell you - it turned out to be quite enough of the salt that is present in the fish and soy sauce (it is very salty! The rolls turned out delicious. For vegetarian, vegetable rolls (without fish), rice should be seasoned, as in tradition
- Dressing for rice: 1 tbsp. l. sugar, 1 tsp salt, 3 tbsp. l. rice vinegar (about 400 grams of rice). If you bought a sauce - vinegar is already with sugar and salt, then, of course, you don’t need to salt and sugar!AT hot Pour the dressing into the rice in a thin stream and mix gently (!) until it is evenly and completely absorbed. Pour in a little and try - for the acquisition of personal experience, how much dressing you personally need for taste. The Japanese, while stirring, are still waving a fan at the rice - so that it cools faster, otherwise it will be more sticky than necessary ...
- If it is completely impossible to buy rice vinegar - take apple cider vinegar (dressing: 3 tablespoons of apple cider vinegar, 2 tablespoons of sugar and ½ teaspoon of salt).
Step 2. Preparation and cutting of products.
It is necessary to cut and prepare everything that we will wrap in rice. The basic rule is to cut everything into thin long “sticks”.
Avocado you need to clean and remove the bone. Cut it in a circle to the bone, and with a knife and fingers, divide it into halves - you can easily get the bone. The halves of the fruit should be cut into slices about half a centimeter thick, and the slices should be cut into “sticks”, that is, straws.


Cucumbers: cut off the tips, cut the cucumber lengthwise into four parts, and cut off the center with seeds. Now cut each quarter further along the length - into 2, 3 or 4 parts, depending on the thickness of the cucumber. You should end up with long thin sticks.


Pepper cut into halves, clean out the seeds and white partitions. We cut off each half ... uh ... butt and nose? tips, in general, and chop into thin straws. It is better to cut a pepper thinner than an avocado, it will be more pleasant to chew - unlike avocado, it is hard.

fish(which is a piece) also cut into slices a little thinner than 1 cm, and slices into sticks.

Crab sticks - lengthwise into 4 parts.
Dill and lettuce you need to wash it, disassemble the salad into sheets and dry it, dry the dill and cut it very finely - we will roll the rolls in it.

Several sheets of nori cut in half - this is for thin rolls. If you lay it out on the whole sheet, you get a snail (spiral) on the cut.

They say that it happens with the Japanese too, but this is a rare twist option. For large thick rolls, you need a whole sheet.

Step 3: Preparing the Tools
Well, almost everything is ready, and the exciting moment is already close. It remains only to wrap the bamboo rug with cling film (otherwise it will be difficult to wash off the rice later), and prepare a cup-bowl with water (water in half with vinegar) - we will dip our fingers into it during the rollover process. Also prepare a few square pieces of foil - we will wrap the finished rolls in them, to facilitate subsequent cutting.

Step 4. Wrap it up! thin rolls - hosomaki
1. Place a half sheet of nori on the makisu (bamboo mat) - shiny and smooth side down. It is not necessary to wet anything, the nori will soften from the rice and become elastic. If wet, it will be very difficult to roll. On top, on the nori, lay out a little rice - level it and press it with a spoon and fingers dipped in water (rice sticks less to wet fingers).

The layer of rice should not be thick, less than a centimeter. Visually - so that the nori sheet itself is slightly translucent, 2-3 grains thick. If you put a lot of rice, the taste of the filling will be lost, and the roll may fall apart. Evenly compacted rice is the key to a beautiful even roll!

Leave one long edge of the sheet (far) free by about 1.5 - 2 cm - for wrapping and gluing the roll. They laid it tightly, and in the middle - put a “path” of Almette cheese. Approximately one teaspoon, lightly spread over rice. Now put the fish sticks on the cheese, “in a ruler”, next to it - the same avocado sticks. Excess - what has crawled out of the edges of the nori sheet must be cut off.

2. The edge of the nori free from rice should be slightly moistened with water. We roll it up: we place the thumbs of both hands on the bottom of the mat, and lift the edge while twisting it forward and down, so that the edge of the nori sheet comes into contact with the other edge - where the layer of rice ends.

Gently pressing on the mat, compact the roll.


Then lift up the edge of the mat-makisa and tighten the roll so that the edge of the nori free of rice, which we left “for gluing”, wraps up and sticks. Roll the roll gently on the mat, pressing evenly on all sides.


3. Hooray! We will get a beautiful even roll, no more than 3 cm in diameter. We wrap it in foil, and let it lie down for about 10 minutes. After that, it will be easier to cut. Need a very sharp knife - this is important, otherwise the rolls may be crushed when slicing. And also mashuk shared her secret - cut the rolls right in the foil! So you can even cut evenly with a non-super-sharp knife!

4. The most exciting moment is the first cut! How is it inside? Handsomely? From such a roll-roll we should get 8 rolls. First, we moisten the knife with water, cut the roll in half, and fold the halves side by side. Now you need to aim well and cut these halves (both are cut at the same time!) into 4 equal parts (in half and again in half - everything is simple!). Before each cut, moisten the knife with water, washing off the remnants of rice - so that it does not stick and the roll does not wrinkle.

5. The right atmosphere is created by dishes - special for sushi, or just white and black square plates. Simplicity and elegance - plain dishes will perfectly emphasize the picturesqueness of sushi. We unfold the sliced rolls, lay them out, remember about ginger with wasabi ... soy sauce ... hashi sticks ... and ...

Enjoy your meal!

Read the sequel and cook thick rolls and rolls "inside out", as well as learn all sorts of tricks !!!
All lovers of Japanese cuisine love such a tasty and healthy dish as rolls. Many of our compatriots try to cook this Japanese dish on their own at home. First of all, they need to decide how to spin the rolls, and then look for the appropriate recipes. This simple procedure does not take too much time from the cook, while the dish turns out to be tasty and satisfying. It is quite possible for them to feed guests, family and at the same time enjoy the action itself.
How to wrap rolls correctly: step by step

What fixtures will be needed? A roll mat is an indispensable and integral component of any kit for making rolls at home. In addition, the kits often include such components as nori seaweed, sauces, rice, sticks for eating sushi, makisa. If a home cook will cook rolls on his own, he must definitely familiarize himself with the recipes, and then proceed to a simple procedure.
How the rolls are twisted, we will tell in this article. First you need to prepare the base for the roll. To do this, you need to put sushi rice on a sheet of nori, which is laid on a mat. After that, the rice should be compacted and turned down. After that, you can lay out a delicious filling prepared for rolls. It is best to start with cream cheese, and then spread the other filling strictly in the center.
After laying the cheese in the center of the future roll, put the rest of the ingredients. But they are closer to the edge. Twisting is done using a makisa or mat. Its edge is taken with both hands, while you need to grab the nori, turn it over with the filling. In fact, the movements are simple, but they should not be sharp, otherwise the whole filling may fall out.

The roll is gradually twisted, while you should not try to complete the dish with a light wave of your hand. The roll is folded in stages, while the mat must be pressed tightly. Even at the stage of twisting the roll, you can give it the desired shape. It does not have to be a regular circle, it can be a square or a rectangle. Moreover, it is square rolls that are considered the most dense and do not fall apart.
It is necessary to make the last turn of the roll so that the nori sheet that remains empty is at the bottom. On the edge of the sheet, you need to put a few grains of nori, try to crush them, pressing the nori sheet evenly along the entire length. It is thanks to such a trick that the roll will hold on, keeping its shape. After the correct roll of a square or round shape has turned out, you need to carefully cut off the uneven edges, and divide the roll into several parts. On top of the roll, you can lay an eel or salmon fillet.
How to spin the right rolls without using a mat?

The option considered above suggested how rolls with a mat are wrapped correctly, now you need to figure out how to do this without the specified device. And do not think that this is a real feat - twisting without a mat. You can twist them with due skill and diligence in just 3 minutes. Of course, when there are basic ingredients.
What can replace the makisa or mat? For cooking, it turns out that you can use the most ordinary plastic bags. However, in this way it will not be possible to form uniform rolls, so the resulting roll will need to be leveled independently. But wooden sticks, when wrapped, help to create normal pressure along the entire length, which means that the roll will have the correct and beautiful shape.

If you decide to cook rolls without using a mat, in this case you can use foil. Several sheets are cut out, and then superimposed one on top of the other. It turns out quite a dense sheet. And after that, you can spin the roll in the same way as you would do with a mat. After twisting, the "sausage" must be cut into 6-8 parts and served.
How to turn rolls inside out?

After gaining knowledge of how to roll a roll, you need to learn more complex techniques. We are talking, of course, about inside-out rolls, which were called ura-maki-sushi in their country. They belong to thick sushi. They may include more than five different components in the filling. The only difference with our usual rolls is that they are rolled inside out with rice, and the filling remains inside. They were invented by a Japanese chef who immigrated to California.
Spread a bamboo mat on the table, and then wrap it with cling film. This must be done so that the rice does not stick to the mat. There is a sheet of nori on the rug. For inside-out rolls, the seaweed sheet can be laid down or up with the rough side, since in this case it does not matter.

A couple of tablespoons of acetic acid dissolves in a cup of water, after which you need to moisten your hands in it. Rice should be laid out on a sheet of seaweed, while the entire surface should be lined with rice. By this time, the algae had already absorbed moisture and stuck to it thoroughly. It is necessary to turn the resulting workpiece very carefully so that the rice is on the film. It remains to lay out the ingredients on the black square of the seaweed.
If the cook or household loves mayonnaise or wasabi, they can be told the nori surface. Pieces of avocado, crab sticks, salmon, eel fillet, cream cheese or cucumbers are laid out on top of each other. They should be near the edge. After laying out, roll up the roll, holding the filling in place and lifting the edge of the mat with your thumbs. Continue to lift the mat until a full turn is made.

How to twist the rolls inside out so that the cling film does not get inside? The edges of the rug must be folded up. Roll to the end when using the rug, each time you need to bend its edge up. The workpiece rolls back and forth several times and is pressed lightly. If the ingredients fall out, you need to press the ends of the roll with your fingers.
The roll is laid out on a smooth surface inside out. It should be noted that in this case a "snail" is allowed. This is a curl of seaweed inside the roll, but you can learn how to do it without it. The resulting blank is decorated on the outside with sesame seeds, small flying fish eggs, and then cut.
There is nothing related
It can be found in any major city and lovers of soups or sushi can always please themselves without worrying about time, because sushi, rolls or soup can be easily delivered around the city. However, many learn the principle of preparing their favorite dishes, especially when they find out that there is nothing complicated and ordinary products are used. For example, how to wrap rolls correctly, or in which pan to cook ramen.
How do you cook sushi to make it look like from a cafe, beautiful and tasty? What is put there, why do you need to roll rolls, where to find the right cheese? All this is worth exploring if you love Japanese cuisine and want to explore it more so that you can always feast on it, and not wait for delivery, because sometimes it is expensive.
Difficult?
If you carefully examine the outside of a roll or sushi, you will notice that complex ingredients are not used here and it is quite simple in structure. The main secret is in the right design. Roll or the same sushi must be neat, of a certain shape and size, not to lose shape. After all, they are eaten with chopsticks, lifting and dipping first into the sauce. How can this be achieved?
Inventory
Luckily, many specialty sushi items can be purchased at grocery or hardware stores, as long as you know what they look like and what you need them for. So:
Rice cooker - probably only the most experienced housewife or professional chef can cook rice for sushi in an ordinary pan, because this is the basis for sushi or rolls, there are certain requirements for it. Therefore, it is easier to buy a rice cooker.
Shamoji is a special flat spatula, more often wooden, more needed for stirring and then cooling the rice. You can then level the rice layer instead of a regular spoon.

A cutting board - better wooden and large, you will actually wrap sushi on it.
A set of knives - always keep an eye on your knives, they must remain sharp and clean. For sushi, their sharpness is required, because you need to evenly cut the fish or vegetables chosen for you.
Tongs - special, they are convenient to pull out all the fish bones.
Hangiri is more like a small flat barrel, tied with copper hoops. It is easy to replace with any wide bowl, just do not take a metal one. Hangiri is used specifically by the Japanese to mix boiled rice with diluted vinegar.

Sticks - what else is there ready-made rolls?
Ingredients
Making rolls is cooking, so take care of the ingredients first. They have the most different stuffing:
Fish (red is tastier, but sometimes lightly salted salmon or fresh trout are taken). True, if you decide to focus on fresh fish, choose carefully so that the carcass does not look sticky, the blood remains bright on the cuts, and the flesh feels firm and shiny to the touch. Well, the smell, of course. Many regions are far from the open seas or reservoirs, fish are brought there. Therefore, you should be careful about buying, because raw fish is used for rolls, without processing;
avocado or cheese, cucumber (then you get vegetarian rolls);
nori seaweed - they are also sold in ordinary grocery stores, now they have everything you need for homemade sushi.
be sure to purchase special rice, ordinary will not work. Look among the varieties of rice, some packs indicate that it is for rolls or sushi. It also says how and how much to cook it;
Rice vinegar - some mix its solution with the rice itself, others simply grease the nori sheet before laying out the rice, others wet their hands before laying out the rice. The main thing is that a little vinegar is absorbed into the boiled rice. This will give richness to the taste.
spices.

Now it's time to move on to the most important stage - in fact, spinning the rolls. You will also need makisu - a small bamboo rug where a sheet of seaweed is first laid.
Then you need to choose what thickness they will be - in thin ones, one or a maximum of two components, then the diameter is not more than 2.5 cm. Thick ones have more than 5 different components and a diameter greater than 5 cm. on one whole sheet.
Use rice already boiled, at the same time, so that each grain of rice is clearly visible and in consistency it should turn out to be slightly undercooked. This will retain both shape and firmness. This is easier to do with a rice cooker. Boil it in ordinary water, adding a little salt. Then drain the water and wait until all the moisture has drained out. Rolls at home may not turn out so neat and beautiful if you are making them for the first time or just a couple of times, do not chase a beautiful example from a picture or a finished restaurant dish. After all, venerable chefs cook there. Homemade rolls are more difficult to roll, especially when you think about the aesthetics of the look.

Next, soak your hands in the diluted vinegar. Simply dip your fingertips in. That's it, now spread the rice in a thin layer over the already laid out sheet of nori. For convenience, help with your free hand, taking a spoon. So it is easier to compact and monitor the uniformity of the layer.
Leave the top of the layers of nori about 2 cm free, then step back 1.5-2 cm from the bottom edge. Then it's time to start laying out the filling. Remember, the components cannot simply be stacked one on top of the other, distribute in strips, moving towards the center of the sheet.
Next, holding the ingredients with one hand, lift the edge of the mat with the other and begin to slowly move forward so that one edge touches the other. After that, the edge will bend up and you can twist the roll. Now squeeze the resulting roll with a bamboo mat, holding both ends with your fingers so that the rice does not fall out. Everything, the wrapped roll is ready, now you need to divide it in half, first turning the seam of the rug down. Then divide each of the two resulting parts in half again. Ready.

Makisa is required?
How to roll rolls without using a mat, while maintaining their beautiful appearance, even texture? Some people think that you can use plain cellophane, but it is very difficult to roll them evenly, because you will have to compress the sausage with your own hands. Makisa creates even pressure due to its solid construction. It is enough to hold and roll slowly to the end.
If you want to try rolls without a mat, replace it with foil. First, cut out several identical strips of foil, fold them together to form a tight sheet. Then you need to fold, presenting the mat instead of the foil. The correct result will be even rolls, which will then be divided into 6 or 8 already parts before serving.

Remember, the only thing that can replace the mat is something that is as dense and flexible as it can be rolled around, compressing the rice. After all, sushi should really look like rolls, moreover, their contents remain inside, and not joyfully fall out at the slightest movement. Here, the mat rather plays the role of a press, and you can use it to make a finished wrapped roll without algae, as you like.