Dishes in cast iron. How to cook in a Russian oven and recipes for beginners
Simmering food, is this a new marketing ploy? No, this is a revival of the taste of Russian cuisine at a new level. Stewed dishes are as healthy as steamed ones, but much tastier. Moreover, their taste is unique. So this is a gourmet find with health benefits. The unique simmering technology, on the one hand, eliminates burning; on the other hand, it is fundamentally different from both cooking with a large amount of water and steaming.
What is languor
Simmering is a process of long-term (up to 3 hours) low-temperature heating that completes the preliminary stage of cooking. It was invented thanks to the Russian stove: the hostess cooked it on the stove, and then put it in a warm oven to finish. With the disappearance of Russian stoves from everyday life, Old Russian cuisine could be considered to have disappeared in principle, not counting individual restaurant delights. The revival of widespread interest in cast iron cookware is one of the most exciting culinary trends of the last decade, allowing you to cook stewed dishes even without a Russian oven.
Simmering food in cast iron dishes
In general, the best dishes for cast iron cookware are those that will “cook” after the main cooking - a variety of porridges, meat, fish and vegetable stews, rich soups, pilaf (albeit with regard to quick cooking over an open fire - for example, baking pancakes - cast iron is a very good helper). But in the matter of preparing dishes by simmering, a cast iron pot is simply irreplaceable for the simplicity and taste of the resulting dishes, thanks to its shape and closed volume.
The secret of simmering a dish, which occurs either on the stove at a minimum temperature, or after removing the cast iron or cauldron from the heat (from the oven), is that the cast iron cookware cools very slowly, so the dish is cooked for several more hours, but only due to the internal thermal resources of the container. This is a unique ability that only cast iron products have. Moreover, any dish prepared in this way turns out much tastier. Stewed meat, vegetables, fish are particularly tender, reminiscent of steamed meat, only with a much brighter and richer taste. The unique simmering technology, on the one hand, eliminates burning; on the other hand, it is fundamentally different from both cooking with a large amount of water and steaming. The combination of constant heating (due to the heat of a cast iron, saucepan or cauldron) and the absence of a large amount of liquid when the lid is closed eliminates the “washing out” of useful components from the ingredients, which allows them to preserve their valuable properties to the maximum extent.
Many housewives and cooks are confused by the fact that simmering requires a serious investment of time. However, it should be noted that simmering various dishes for many hours does not require practically any effort from the housewife - you can leave several dishes in cast iron pots at once, which will “arrive” at night or over several daytime hours. If you want to try faster reviews, we recommend
What else can you cook stewed dishes in?
More beautiful? Maybe. But the most delicious and healthy stewed dishes are made in cast iron pots (cast iron pots)Stewed dishes in the oven
The Internet is full of tips for preparing stewed dishes in the oven. But we must keep in mind that the true taste of stewed dishes in the oven comes from cooking in cast iron dishes! First, the dish is cooked in the oven in a cast-iron pot (a patch or duck pot will also work), then the oven is turned off and the oven is left to “finish” without opening the door. In thin-walled dishes, even with slight heating, the dishes will turn out to be stewed over low heat.
Stewed dishes in ceramic pots
Before real simmering, the earthenware will not have enough heat capacity. Therefore, most recipes for clay pots involve baking. To each his own.
Stewed dishes in a slow cooker
Many multicookers have a simmering mode for three hours. But you remember that you need to start with other modes, and set the languor to “get there.” A small plus is a call about readiness. A small minus - the cast iron can be placed on the table, including in the garden of a country house - and it looks beautiful and does not get cold; This number will not work with a multicooker. Simmering dishes in a slow cooker gives you the closest possible approach to the ideal, compared to a cast iron pot. After all, not all wines are aged in oak barrels. Among those aged in bottles, there are quite decent specimens.
Stewed dishes in the microwave or pan.
This does not happen, you were deceived. This combination sounds something like a high-speed tractor or a fur bikini.
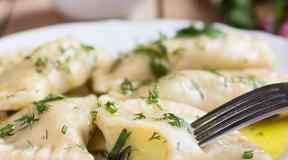
A delicious and simplest recipe for a side dish stewed in a cast iron pot.
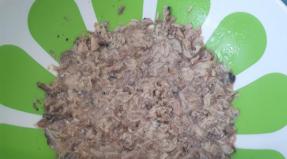
This is a way to get a very tasty and healthy side dish from almost nothing. Imagine an ordinary situation - you bought meat for frying or baking. And in the process, you've created a decent amount of sauce from the juices that flow out. This most often happens with chicken and pork. It smells delicious, you can’t throw it away, and you still can’t drink it in its pure form, especially among fans of a healthy lifestyle. Pour into a cast iron pot, add a little boiling water and pearl barley. Yes, yes, the most common cheap pearl barley, which every housewife has in stock for mushroom soup or pickle soup. Mix. Heat it up (literally a minute or two from the liquid boiling at the bottom). Mix again. Let it simmer in a warm place. Once ready, stir again. However, household members will come running to the smell earlier, and they will mix it up. If you have time to save, sprinkle with fresh finely chopped dill.
Using materials prepared by Andrey Kisly
Despite the wide range of kitchen utensils made from a variety of materials, cast iron cookware has still not lost its relevance. This is explained by the fact that cast iron has high heat capacity and durability. It heats up slowly, but maintains a high temperature for a long time and gradually releases heat to the food being cooked. If you take proper care of your cookware, cast iron will serve you for many years.
The thickness and solidity of cast iron make this cookware ideal for preparing dishes that require long simmering or slow frying. In the winter season, when we want hot, flavorful food, cast iron cookware comes in handy. A dish cooked in cast iron will remain warm for a long time and retain an attractive aroma. We know 6 recipes for hot dishes for cast iron cookware that are perfect for a cold winter evening.
- Roast beef with vegetables -
Ingredients for 4-6 servings:
230 gr. carrots, cut into small pieces
300 gr. potatoes, peeled and chopped
3 cloves garlic, crushed
2 tbsp. olive oil
1 kg. beef (thick edge)
2 tbsp. butter
1 shallot, thinly sliced
1 cup dry red wine
1 tablespoon cornstarch mixed with 1 tablespoon water
Salt pepper
Preparation:
Preheat oven to 220°C. Place potatoes, carrots, garlic on a large baking sheet and drizzle with olive oil. Season with salt and pepper. Roast vegetables for about 30-35 minutes or until tender. Transfer to a plate; keep warm.
Salt and pepper the meat. In a large cast iron skillet over medium heat, melt the butter. Add the meat and brown it, about 6 minutes. Place the meat in the oven and roast for 20 to 25 minutes, until a thermometer inserted into the thickest part registers 48°C. Transfer the meat to a board and let rest for 10 minutes.
Drain all but 2 tablespoons of excess fat from the pan. Add chopped shallots and cook over moderate heat until lightly browned. Add red wine, bring to a boil and simmer until the volume is reduced by half. Bring the sauce to a boil, add the corn slurry. Cook the sauce over moderately high heat until thickened. Season with salt and pepper. Cut the meat across the grain. Serve with sauce and roasted vegetables.
- Ryan Angulo's chicken recipe -

Ingredients for 4 servings:
1/2 cup walnuts
1 tbsp. olive oil
1 small red onion, thinly sliced
1 cup black lentils
1 bay leaf
1/2 cup balsamic vinegar
3 tbsp. butter
1 tbsp. Dijon mustard
Kosher salt, pepper
2 tbsp. olive oil
1.8 kg. chicken cut into pieces
1 tbsp. butter
Salt pepper
1/4 cup nut butter
2 tbsp. sherry vinegar
Kosher salt, pepper
Preparation:
In a medium saucepan, toast the walnuts over moderate heat until lightly golden, about 5 minutes. Chop the nuts and place in a small bowl. In the same pan, heat the olive oil. Add onion and cook over moderate heat, stirring, until golden brown, about 3 minutes. Add lentils, bay leaves, balsamic vinegar and 1.5 cups water and bring to a boil. Cover with a lid and simmer over low heat for 15 minutes. Remove the lid and cook, stirring, until the liquid is absorbed and the lentils are tender, about 15 minutes. Add butter and mustard, season with salt and pepper. Keep warm.
Preheat the oven to 200°C. Heat olive oil in a large cast iron skillet. Season the chicken with salt and pepper and place in the pan, breast side down. Cover with foil. Cook the chicken over moderate heat for about 6-8 minutes. Turn the chicken over and transfer to the oven. Bake until done. Transfer chicken to a cutting board and let sit for 5 minutes. Add butter to the pan, mix it with juices, salt and pepper. Strain and heat over low heat.
In a small bowl, whisk together the walnut oil, sherry vinegar and parsley. Season with salt and pepper. Mix roasted walnuts with lentils and place on plates. Place chicken, pour sauce over and serve.
- Salmon on skewers -

Ingredients for 8 servings:
2 tbsp. maple syrup
2 tbsp. fresh lemon juice
1 tbsp. Dijon mustard
1 tbsp. grain mustard
3 tbsp. vegetable oil
1 kg. skinless salmon fillet, cut into small pieces
16 wooden skewers, soak in water for 1 hour
Salt pepper
Preparation:
In a small bowl, whisk together maple syrup, lemon juice, both mustards, and 1 tablespoon oil. Place fish on skewers, season with salt and pepper. Heat 1 tablespoon oil in a large cast iron skillet. Place half of the skewers. Cook over moderate heat until the fish is browned on the bottom, 1 to 2 minutes. Turn skewers and cook, basting with mustard glaze and turning occasionally, until fish is glazed, about 5 minutes. Repeat with remaining oil and fish. Place the fish on a platter and serve immediately.
- Ben Vaughn's Baked Mac and Cheese recipe -

Ingredients for 6-8 servings:
700 gr. pasta (horns or penne)
3 cups heavy cream
1/4 cup finely chopped sweet onion
2 cloves garlic, minced
1/4 cup flour
280 gr. goat cheese
170 gr. white cheddar cheese, grated
1 cup grated Parmesan
1/4 cup sour cream
1 tbsp. finely chopped parsley
2 tsp chopped thyme
1.5 tsp. grated lemon zest
Salt and freshly ground white pepper
3 large egg yolks
Preparation:
Preheat the oven to 200°C. Grease a cast iron skillet with butter. In a large saucepan of boiling salted water, cook pasta until al dente. Drain the water and leave the pasta in the pan.
In a large saucepan, bring the cream, onion and garlic to a boil. Transfer 1 cup cream to a bowl and add flour; return mixture to pan. Cook over moderate heat until mixture thickens, 5 minutes. Remove from heat and stir in goat cheese, cheddar cheese, and half the Parmesan cheese. Add sour cream, parsley, thyme and zest, season with salt and white pepper. In a bowl, whisk 1 cup of the sauce with the egg yolks, then pour the mixture into the pan.
Pour the sauce over the pasta and stir until it completely covers the pasta. Place the pasta in a cast iron skillet and sprinkle with the remaining Parmesan. Bake for about 45 minutes, until golden and bubbly. Let the pasta sit for 15 minutes before serving.
- Polenta with pumpkin and cheese -

Ingredients for 8 servings:
1 squash, weighing about 900g, peeled, seeds removed and cut into 2.5cm pieces
2 tbsp. olive oil + for frying
1/3 cup pine nuts
1 large onion, finely chopped
1/2 tsp. dried sage, crumbled
6 cups water
2 cups wholemeal polenta
Unsalted butter
110 gr. smoked Gouda cheese, grated
1/4 cup + 2 tbsp. grated hard cheese
Salt and freshly ground pepper
Preparation:
Preheat the oven to 190°C. Place the pumpkin on a greased baking sheet and bake for about 30 minutes until done. Transfer the squash to a bowl and roughly mash to a puree. Place the pine nuts on a baking sheet and bake in the oven for 4 minutes until golden brown. Coarsely chop the nuts.
Heat 2 tablespoons of olive oil in a frying pan. Add onion and sage and season with salt and pepper. Cover and cook over moderate heat, stirring, until golden brown, 25 minutes. Add a few tablespoons of water if the onions look dry.
Bring 6 cups of water to a boil in a saucepan. Whisk in polenta and 1 teaspoon salt. Cook over very low heat, stirring frequently, until tender, about 35 minutes. Add 1 tablespoon of butter along with the pumpkin puree, pine nuts, onion, Gouda cheese and half the grated hard cheese. Transfer polenta to a large cast iron skillet. Lightly smooth the top of the polenta, leaving some space around the edge. Refrigerate polenta until set, about 3 hours.
Brush the polenta with melted butter and sprinkle with the remaining grated cheese. Bake in the oven at 190°C for 1 hour, until the top and sides are browned and crispy. Let stand for 20 minutes, then cut into pieces. Before serving, polenta can be supplemented with fried mushrooms.
- Steak according to Alain Ducasse's recipe -

Ingredients:
2 ribeye steaks on the bone
2 tbsp. rapeseed oil
4 tbsp. unsalted butter
4 sprigs thyme
3 cloves garlic
1 sprig rosemary
Salt, freshly ground pepper
Cooking:
Season the steaks well with salt and pepper. Leave the meat at room temperature for about 30 minutes. Heat canola oil in a large cast iron skillet. Once the oil is hot, add the steaks. Fry over high heat for about 5 minutes, then turn over and add the butter, thyme, garlic and rosemary. Cook for 5-7 minutes, depending on weight, until medium-rare, basting with aromatic oil. Transfer the finished steaks to a board and let rest for 10 minutes. Cut the meat from the bone across the grain and serve immediately.
What could be tastier than the dishes from the Russian oven that our grandmothers prepared for us in childhood? This taste cannot be confused with anything else, it is impossible to forget the aroma of hot pies, rich borscht, stewed potatoes or milk porridge - you immediately remember a carefree childhood, the warm hands of your grandmother. But not everyone enjoyed food prepared with care and love in childhood; not everyone adopted the secrets of truly Russian cuisine. Nowadays, ancient traditions are being revived: many people have a Russian stove at their dacha, but not everyone knows how to cook food in it correctly, tasty and safely.
Collapse
The Russian oven produces surprisingly tasty dishes that have unique healthy and nutritional properties. If you know how to cook this ancient way, you can enjoy delicious and flavorful food all year round.
The main secrets of the special “homey” taste of food from a Russian oven are the temperature and cooking time. Over low heat, dishes simmer rather than simmer like on a stove; the downside may be a long cooking time, but if you are patient, the result will not disappoint.
What kind of cookware should I use?
We cook in a Russian oven and definitely use it for this. If your grandmother’s dishes have been preserved in the house, you will notice that they are predominantly cast iron, with a small bottom area and thick walls. In addition to cast iron, the optimal material for stove cookware is ceramics or clay. Nowadays, many people have heat-resistant glass utensils in their kitchen; these can also be used, but it is cast iron, ceramic or clay utensils that will give dishes a special taste. It is better to use pots without handles because they are inconvenient to wash.
It is worth paying attention to the quality of the dishes; you do not need to skimp on your health - the layer inside the clay pot may contain lead and other harmful substances.
Also, for the convenience of cooking in a Russian oven, you need to have special tools - frying pan grips, a grip, wooden spatulas and a poker.
Safety precautions
To cook in a Russian oven and not start a fire or get burned, it is enough to know how to properly heat the oven and follow the rules for cooking in an oven.
How to light a Russian stove:
- It is necessary to stack the firewood in the firebox as closely as possible to each other; add firewood after the first batch has burned out.
- During kindling, the damper must be closed, the stove damper slightly open, and the ventilation damper closed.
- Do not forget to provide access to oxygen in the stove - to do this, just stir the firewood with a poker.
- During combustion, the ash door should be open approximately 7 cm.
How to cook in a Russian oven:
- The stove must be heated well and the wood must be allowed to burn out; only coals without open fire and well-heated walls should remain.
- The first dishes are prepared in ceramic pots without handles.
- Since the food in the oven simmers and does not boil, pour a little water into the container, no more than one quarter.
- All dishes except bread can be prepared together. The bread is cooked separately with the door closed until baked.
- When cooking in the oven, it is important to use oven mitts, towels or gloves to avoid burning your hands. It is better to place and remove dishes with a special wooden shovel or grip.
Recipes for dishes in a Russian oven
When you have a real Russian oven, special high-quality cookware, and all the rules for safe cooking have been studied, all that remains is to figure out what to cook in a Russian oven. There are many recipes for delicious, traditional or original dishes. Cooking in a Russian oven will be very simple and enjoyable if you know good recipes. How to cook in a Russian oven: recipes and instructions for beginners.
Porridge in a Russian oven
Ingredients
- Millet – 100 g,
- Sugar – 1 tbsp,
- Salt – ½ tsp,
- Milk – 1l
Cooking method
Rinse the millet thoroughly, drain the water and let the grain dry. Pour the millet into a dry cast iron pot, add salt and sugar, without stirring, pour in the milk. Then cover with a lid and place the cast iron in the oven. It is best to leave this porridge in the oven overnight and enjoy a delicious, aromatic breakfast in the morning. Instead of millet, you can use any other grain, the only difference is the cooking time.
Millet porridge
Soups
Shchi is a favorite Russian soup; it was cooked in the oven for many generations of our ancestors. Let's try to cook an ancient dish - sour cabbage soup in a Russian oven.
Ingredients
- Beef broth
- Sauerkraut
- Potato
- Tomato paste
- Salt, pepper to taste
Cooking method
If the cabbage is too sour, it must be washed. Initially, fry the onion with the addition of tomato paste at a higher temperature. Later, cook the beef broth; the meat should separate well from the bone. Add diced potatoes and cabbage to the broth. When preparing sauerkraut, bay leaves and pepper are used, so seasonings do not need to be added to the soup.

Cooking cabbage soup in a Russian stove
Shashlik
Everyone is used to cooking shish kebab on the grill, but cooking kebab in the oven is different. The meat is baked at high temperature for 15 minutes; it must be turned over during cooking. Cut the meat into pieces, marinate with the addition of your favorite spices, grind the onion in a meat grinder and add to the meat, mix thoroughly. Let stand for 15-20 minutes and put into the oven. Remember to turn the meat about every five minutes.

Shish kebab in a Russian oven
Mutton
Pamper your family with delicious lamb and potatoes in pots.
Ingredients for two servings
- Lamb – 200-300 g.,
- Potatoes - 2 medium,
- Carrots – 1 pc.,
- Onion – 1 pc.,
- Parsley root – 1 pc.,
- Dried herbs - to taste
- Vegetable oil for frying,
- Mayonnaise – 1 tbsp.,
- Salt, pepper - to taste
Cooking method
Cut the lamb into cubes into small pieces, also chop the potatoes and put them in pots. Parsley root and carrots - in circles, onions - in half rings, sauté the vegetables. Add dried herbs and seasonings to taste. Then pour boiled water, not forgetting to leave space on top. At the end add mayonnaise and mix. Cover with a lid and send to the oven.

Lamb in cast iron
Village Varenets
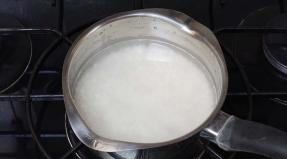
Real village Varenets cannot be compared in taste and beneficial properties to what everyone is used to buying in stores. To prepare this wonderful drink, it is better to find natural cow's milk and homemade sour cream. Purchased low-fat milk will not make real Varenets.
The milk must be kept in the oven all day (this will result in baked milk). Afterwards, let the milk cool, but it should not become completely cold. Afterwards, all you need to do is add sour cream to the cast iron pot and leave in a warm place for 12 hours. Real Varenets from the Russian oven is ready!

Varenets from a Russian oven
Country-style pork roll
Ingredients
- Pork belly without bone – 2 kg,
- Carrots – 2 pcs.,
- Onions – 2 pcs.,
- Garlic – 3 cloves,
- Salt and pepper to taste.
Cooking method
Beat the meat thoroughly, add salt, add your favorite spices and rub with garlic. Form into a roll and tie with string. Cook in a casserole - pour water and pre-chopped vegetables into it, and add the roll there. The meat takes 3-4 hours to cook.

Pork roll
Pumpkin in a Russian oven
Ingredients
- Pumpkin – 500g,
- Garlic – 1 clove,
- Rosemary
- Cinnamon
- Coriander
- Red pepper to taste
- Salt to taste
Cooking method
Peel the pumpkin, remove the seeds, cut into pieces. Place the pumpkin in a deep container. Squeeze or grate the garlic, mix spices to taste and add to the pumpkin. To make the pumpkin more juicy and tender, you can add olive oil, a tablespoon is enough. Cook the pumpkin for about 45 minutes in a deep skillet covered with foil.

Pumpkin pieces
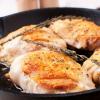
Hen
Ingredients
- Chicken thigh – 1.5 kg.
- Potatoes – 6 -7 pcs.,
- Onions – 2 large
- Carrots – 2 pcs.,
- Salt, pepper to taste
Cooking method
You can use a regular baking sheet and line it with foil. Place onions on the bottom, and on top chicken (do not remove the skin), chopped potatoes and carrots, salt and pepper. Place the baking sheet in the oven, close the door and simmer the dish for about two hours. If the heat in the oven is too high, it is better to cover the top with foil, but remove the foil before cooking so that the chicken has a crispy crust. The simmering time for the aromatic chicken is 2 hours.

Chicken with potatoes
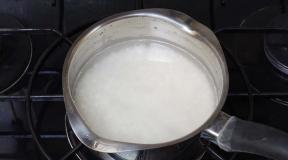
Baked milk
Baked milk is very easy to prepare in a Russian oven. No ingredients other than milk are required. This delicious drink is prepared in clay pots or cast iron. It is better to take full-fat village milk; store-bought milk is also suitable, but the taste will be different. The milk must be poured into a container and placed in the oven for 12 hours (all night), in the morning you can already enjoy delicious baked milk.

Baked milk
Pizza
Ingredients
For the test:
- Water – 600 ml,
- Flour – 1 kg,
- Yeast – 25 g,
- Salt – 1.5 tbsp.,
- Sugar – 2 tbsp.
Pizza toppings can be anything you like; the recipe uses tomato sauce as a base, tomatoes, mushrooms, cheese and basil.
Cooking method
Knead the elastic dough, put it in a container greased with olive oil, cover with a lid and leave for 3-4 hours. Then divide the dough into equal parts and roll out. First of all, the dough is covered with a base - tomato sauce. Then sprinkle with grated cheese. Finally, toppings are added - tomatoes and mushrooms. To ensure that the pizza is aromatic and acquires a refined Italian taste, fresh basil is added. The pizza is placed on parchment and put into the oven with a spatula. Bake the pizza for about 30 minutes, but check that it is done.

Pizza from a Russian oven
Conclusion
Cooking in a Russian oven will become a favorite pastime for anyone. Dishes prepared in this ancient way will be the best and most delicious delicacy for the whole family.
Our ancestors cooked food in the oven all their lives; nowadays this method of cooking is rare and very original. It is difficult to find someone who is really good at this type of cooking. But don’t despair, a little patience and this secret will be revealed to anyone. Learning to cook correctly in a Russian oven, in compliance with all rules and safety precautions, is a huge gift for the body, because such food is very good for health. Just think about it – stewed food, without frying or excess oil! This does not harm the figure and the digestive system. Cook in a Russian oven with pleasure!
←Previous article Next article →Cast iron cookware people have been using it for a long time, from about 4-6 centuries BC. It is difficult to say in which country such utensils first appeared - in North Africa (tajin), and in Central Asia (cauldron for pilaf), and in Europe (cast iron pots), ancient kitchen utensils made of cast iron, cast at approximately the same time, were found. It is reasonable to assume that this utensil began to be widely used among those peoples who by that time had learned to smelt metal from ore.
Previously, hot food was cooked in clay dishes, but gradually cast iron products replaced it from everyday use, because... cast iron had much better qualities and characteristics than clay. In poor families, cast iron pots were highly valued not so much for the taste of the food cooked in them, but for their beneficial practicality, durability and good quality, which allowed such dishes to be inherited by several generations.

What to cook in cast iron cookware
Any meat, vegetable, mushroom or fish dishes that require long-term heat treatment at low temperatures, all kinds of soups, sauces and cereals are best prepared in cast iron dishes. High taste qualities of dishes prepared in such dishes are obtained due to the special properties of the alloy from which cast iron is made. It consists of iron and carbon with the addition of phosphorus and silicon, which provide it with reduced thermal conductivity, due to which the heating of cast iron cookware occurs gradually and equally over the entire surface of the walls, bottom and lid, this is its advantageous difference from similar cookware made of aluminum, steel or glass Shortly before the end of cooking a dish in a cast iron pan, it should be removed from the heat and left to simmer until cooked - low thermal conductivity does not allow the pan to cool too quickly, so the dish “cooks” under the influence of low temperatures, which has a beneficial effect on the quality of the finished product.
This cookware can be used on any heating element, including open fire, it is suitable for glass ceramics and induction, and without previously removing the wooden or bakelite handles, it can be safely placed in the oven.
Advantages of cast iron cookware
All kitchen utensils made of cast iron - frying pans, duck pots, cauldrons, cauldrons, roasting pans, saucepans, saucepans, woks - are superior in many qualities to utensils made from any other material, which makes them desirable in every kitchen:
- Cookware made of cast iron will last longer than any other, it is almost impossible to spoil it. The only possible option for damage is that it can split from a blow or fall from a height onto a stone or other very durable surface, but dishes made of any materials will not withstand such tests;
- With proper care, the food in this dish does not burn; it only gets better over the years. Before you start cooking, cast iron cookware must be heated well over the fire for at least 3-5 minutes to prevent food from burning;
- Cookware made of cast iron is wear-resistant and perfectly resists deformation, keeps its shape at any temperature - from the lowest to the highest;
- The main advantage of this cookware is the delicate and unique taste of the food cooked in it.

Minor Cons
- It is known that cast iron is quite heavy; it is not easy to cook, for example, a pile of pancakes for a large family, constantly raising and lowering a heavy pancake pan;
- Cast iron products may rust. To avoid this, wash dishes should be wiped dry or heated over a fire. But if this does happen, you need to carefully scrub the rusty area with a hard brush, and then repeat the procedure for preparing to use new cast iron cookware (calcinate with salt and grease with oil). Cast iron cookware coated with enamel does not rust, but chips may form on it;
- Cast iron is afraid of an acidic environment, so you should avoid cooking with it, for example, dishes with tomatoes;
- It is not recommended to store cooked food in such containers, because... Cast iron strongly absorbs aromas; after cooking, food should be transferred to a container and the dishes should be washed immediately - they are easier to clean when they are hot.
Caring for cast iron cookware
Before the first use, the dishes must be washed with hot water and a sponge to wash away possible residues of grease, which manufacturers can use to treat them to avoid rust. Fry over a fire until the color changes from black to gray, rinse under cold water, put back on the fire, dry and cover with a thick layer of coarse table salt. Continue frying for at least 10 minutes until the salt begins to flutter characteristically, then pour it in and wash the dishes thoroughly again with cold water. Heat again over the fire, remove and while still warm, generously grease with vegetable oil, which will instantly fill the pores. Next, you need to heat it upside down in an oven preheated to 180 degrees for about 3 hours - then the oil will dry and form a strong protective film over the entire surface.
It is recommended to wash cast iron cookware immediately after cooking; then it can be easily washed using a regular kitchen sponge and running hot water. It is very undesirable to use detergents - they wash away the protective fatty film, which will have to be restored using the labor-intensive method described above to avoid food burning.
Classic solid cast iron has become as essential an attribute of any kitchen as an electric kettle or microwave. And not only because a steak cooked in such a frying pan meets all the canons of meat cuisine. Cast iron holds heat well and is not afraid of high temperatures, which opens up wide possibilities for preparing various dishes both on the stove and in the oven. We have 7 ideas of what you can cook in a cast iron frying pan besides classic steak.
Dutch pancake Dutch baby -
Ingredients for 4 servings:
3 large eggs at room temperature
180 ml whole milk at room temperature
3 tbsp. butter, melt and cool slightly
1/2 cup flour
2 tbsp. corn starch
1/2 tsp. coarse salt without additives
1/2 tsp. freshly ground black pepper
Filling options:
Fried eggs, avocado, ham;
Smoked salmon, creme fraiche and chopped onion;
Sauteed Kale, Crispy Bacon, Aged Cheddar
Preparation:
Place a cast iron skillet in the center of the oven and preheat the oven to 230 degrees. Allow the pan to heat for at least 25 minutes.
Blend the eggs in a blender on high speed until foamy, about 1 minute. With the engine running, gradually pour in the milk, then add 2 tbsp. oils; stir for another 30 seconds. Add flour, cornstarch, salt, pepper and mix.
Carefully remove the pan from the oven and, swirling it, pour in the remaining butter and spread it over the surface. Immediately pour the batter into the pan. Bake pancake until edges are brown, 20-25 minutes. Before serving, add the filling.
Crispy chicken -

Ingredients for 4 servings:
2 tbsp. coarse salt
2 tsp plus 1 tbsp. freshly ground black pepper
1.5 tsp. paprika
3/4 tsp. cayenne pepper
1/2 tsp. garlic powder
1/2 tsp. onion powder
One chicken weighing 1.4-1.8 kg, cut into 10 parts, spine and wing tips removed
1 cup buttermilk
1 large egg
3 cups flour
1 tbsp. corn starch
High smoke point oil for frying
Preparation:
Mix 1 tbsp in a small bowl. salt, 2 tsp. black pepper, paprika, cayenne pepper, garlic powder and onion powder. Season the chicken with the spices, place in a medium bowl, cover and refrigerate overnight.
About an hour before cooking, remove the chicken and let it sit at room temperature. Whisk buttermilk, egg and 1/2 cup water in a medium bowl. Mix flour, cornstarch, remaining salt and pepper.
Pour oil into a cast iron frying pan to a height of about 2 cm. Heat oil to 175 degrees; Set a rack in a large baking sheet.
Working in batches, dip chicken pieces into buttermilk mixture, allowing excess to drip back into bowl. Then dip into flour. Place 4-5 pieces of chicken in the pan. Fry, turning the pieces with tongs every 1 to 2 minutes and adjusting the heat to maintain a constant temperature of 150 to 160 degrees, until the skin is golden brown and a thermometer inserted into the thickest part registers 74 degrees, about 10 minutes for the wings. and 12 minutes for thighs, legs and chest.
Using tongs, transfer chicken to prepared baking sheet with rack. Repeat with remaining parts; Allow chicken to cool for at least 10 minutes before serving.

Ingredients:
Ready dough for one pizza
Ham slices
Marinara sauce
Grated cheese
Salt, freshly ground pepper to taste
Preparation:
Preheat the oven to 250 degrees. Roll out the dough to the size of a large cast iron skillet. Place the frying pan itself on the stove over high heat and heat it up (the pan should be hot, but not smoking yet). Dust the pan with flour, place the tortilla on it and extend the sides up the sides of the pan. Brush the dough with olive oil and return the pan to medium-high heat.
Once the dough begins to bubble, season it with salt and pepper and spread 55-85 g of marinara sauce over the tortilla. Place slices of ham on top, sprinkle with grated cheese and place the pizza in the oven. Bake the pizza for 10-15 minutes until the cheese is melted and bubbly.
Remove the pizza from the oven and let cool slightly.
Frittata -

Ingredients for 6-8 servings:
1-2 tbsp. olive oil
1/2 cup chopped onion
1 clove garlic, minced
4-5 small potatoes, cut into cubes about 1 cm thick
2 cups kale or spinach, stems removed, leaves torn into small pieces
6 large eggs
1/2 tsp. salt
1/2 tsp. pepper
2 cups chopped broccoli florets (can substitute cauliflower, zucchini, asparagus, etc.)
1 cup chopped tomatoes
1/2 tomato, cut into slices
1/4 cup grated mozzarella
2-4 tbsp. grated parmesan cheese
Preparation:
Add enough olive oil to a cast iron skillet to coat the bottom of the pan and heat it over medium heat.
Reduce heat to medium low. Add onion, garlic, potatoes, add a pinch of salt and pepper. Cook, stirring, until the onion is soft and the potatoes can be pierced with a fork without resistance, about 10 minutes. Increase heat to medium-high and continue cooking until potatoes are lightly browned, about 5 minutes. Transfer potatoes and onions to a plate and set aside.
Reduce temperature to medium. Heat a teaspoon of olive oil. Add broccoli and kale. Cook, stirring, until the broccoli is crisp and the kale is wilted, about 5 to 7 minutes. While the cabbage is cooking, crack all the eggs into a bowl and whisk with salt and pepper. Set aside.
Add the chopped tomatoes to the pan and cook for 1-2 minutes or until the tomatoes begin to soften. Return the potatoes and onions to the pan and stir until all the vegetables are evenly distributed. Pour eggs over vegetables. Place tomato slices on top. Sprinkle with mozzarella and Parmesan cheese. Reduce heat to medium-low, cover and cook for 10 to 15 minutes or until eggs are set around the edges but still runny in the center.
Turn on the grill in the oven. Once hot, place the frittata in the oven for 1-3 minutes or until the eggs are completely set and the cheese is melted and beginning to brown.
Lasagna -

Ingredients for 6 servings:
One 800-gr. can of chopped tomatoes
One 230 gr. can of tomato sauce
60 ml. water
1 tbsp. olive oil
1 medium yellow onion, diced
4 large cloves garlic, minced
1/2 tsp. coarse salt
1/4 tsp. coarsely ground black pepper
1/4 tsp. crushed red pepper flakes
340 g minced meat
110 g raw Italian sausages
8 lasagne sheets, cut into thirds
1/2 cup ricotta
110 g fresh mozzarella, cut into small slices
Preparation:
In a large bowl, combine crushed tomatoes, tomato sauce and water. In a cast iron skillet, heat a tablespoon of olive oil over medium heat. Once hot, add the onion and cook until soft. Add chopped garlic and fry for one minute. Add salt, black and red pepper. Stir and cook for another 30 seconds.
Add the minced meat and gut the Italian sausages. Cook, stirring, until the meat is browned and completely cooked. Place a layer of pasta plates on top of the minced meat and pour in the sauce. Bring to a boil, then reduce heat to medium-low.
When the pasta reaches al dente consistency, add the ricotta and stir lightly to break up the cheese. Place the mozzarella pieces, cover and let the steam melt the cheese, about 5 minutes. Before serving, garnish the lasagna with chopped herbs.
Whole chicken -

Ingredients for 6 servings:
One chicken weighing 1.4-1.8 kg
Coarse salt, freshly ground black pepper
60 ml olive oil
2 tbsp. butter
3 tbsp. fresh lemon juice
1/4 tsp. crushed red pepper flakes
2 cloves garlic, crushed and peeled
Preparation:
Preheat the oven to 200 degrees. Using kitchen scissors, cut along the backbone of the bird and remove it. Place the chicken, skin side up, on a work surface and flatten. Pat dry with a paper towel; generously salt and pepper.
Heat a large cast iron skillet over high heat. Add 1 tablespoon olive oil and 1 tablespoon butter. Place chicken skin side down. Fry without touching the bird for about 3 minutes. Turn the chicken over, being careful not to break the skin; place the pan in the oven.
Roast the chicken until golden brown or until a thermometer inserted into the thickest part registers 73 degrees. Place chicken on a cutting board and let rest for 10 minutes.
Pour juice into another skillet and add 1 tablespoon lemon juice and remaining tablespoon butter; mix. In a small bowl, whisk together the remaining 3 tablespoons olive oil, 2 tablespoons lemon juice, red pepper flakes, garlic and a pinch of salt. Cut chicken into pieces and serve with flavored olive oil and pan sauce.
Hashbrown -

Ingredients for 6 servings:
5-6 potatoes (total weight about 1.4 kg), peeled and coarsely grated
1.5 tsp. coarse salt
1/4 tsp. freshly ground black pepper
8 tbsp. vegetable oil
2 bunches green onions, white part only, finely chopped
Coarse sea salt (such as Maldon)
Sour cream for serving
Preparation:
Place the potatoes in a colander and rinse under cold running water until the water runs clear. Squeeze to remove excess liquid and place in a large bowl. Add salt and pepper, stir.
Heat 6 tablespoons oil in a large cast iron skillet over medium heat. Add half the potatoes; spread into an even layer and press down lightly. Sprinkle white onion on top. Top with remaining potatoes; press lightly. Fry until golden brown on the bottom and sides, 10 to 15 minutes.
Carefully turn over and add remaining 2 tablespoons oil. Fry until golden brown, 10 to 15 minutes; transfer to a plate and sprinkle with sea salt. Serve with sour cream.
http://steaklovers.menu/food/16597
Read also...
- How to cook in a Russian oven and recipes for beginners
- Chicken with pineapples in the oven - recipe with photos
- Cucumber and onion salad is a great winter appetizer and an ingredient for sandwiches Preparing cucumbers and onions for the winter
- Lenten dumplings How to make lean dumplings with potatoes