What to mold from the test on March 8. Crafts from salt dough: instructions and master classes for sculpting crafts with your own hands
The long-awaited spring has come! And as we know, International Women's Day is celebrated in spring - March 8th. And of course, we immediately think about what to give our mothers and grandmothers. Of course, there is no better gift made with your own hands. We offer you a composition of salted dough "Volume postcard for March 8" (see photo. 1).
So, let's begin. To decorate a postcard, you can use decorative items purchased in a handicraft store, or get along with improvised materials.
1. Thick cardboard (size depends on the number of parts).
2. Salty dough (see preparation here).
3. A glass of water.
4. Brushes (for painting and gluing parts)
5. Toothbrush, ruler (for the "splatter" effect).
6. Watercolors and acrylics.
7. Varnish (you can use furniture).
We take the ready-made salted dough and pinch off the middle piece. This will be the figure eight. Next, we divide it into 2 parts and roll them out. It turned out two "sausages". For gluing to the cardboard, moisten one side of the "sausage" with a brush and attach it to the cardboard.
Salted dough flowers, a rose (photo. 2), a daffodil and a tulip (see how to make a rose, only here it will be larger).

Photo. 2 Flowers from salt dough. Salted dough rose.
For a daffodil from salted dough (photo 3), you need to make the middle of the flower. This is a small flattened ball. The petals are also small flattened balls, only elongated. We glue them from the bottom of our middle.

Photo. 3 Salted dough flowers. Salted dough daffodil.
For a tulip made of salted dough (photo 4), you also need a middle and the same elongated leaves. We glue these leaves in a circle with water.

Photo. 4 Flowers from salt dough. Salted dough tulip.
And so, it remains to make a sprig of mimosa from salted dough and decorate our picture with various curls. Let's make a "sausage" and attach it to the bottom right corner. This is a twig. Next, we make the "balls". To do this, pinch off a middle piece from the dough. We pinch off this piece a little more, and make small circles. We attach them to the water to a branch (photo 5).

Photo. 5 Salted dough mimosa.
Then, we lubricate all the items with water so that there are no cracks, and set to dry for about 4-6 days.
The scum had dried up by March 8th. It remains to make the background and color the work. We will make the background with the help of "splatter".
To do this, take an old toothbrush and a ruler. We moisten the brush in water, just not strongly, otherwise there will be huge traces of paint. We take a brush and apply any color you like to the brush.
Watercolors are needed. Now, take a ruler in hand. We put the brush slightly at an angle. And with a ruler, moving towards ourselves, we draw on the brush (see photo 6).
You can try it on a piece of paper first. This card used 4 splash colors: yellow, ocher, green and cherry.


Phot. 6 Performing the "spraying" technique.
When the paints are dry, you can cover everything with gloss varnish.
Irina Smychkova

So, let's begin.
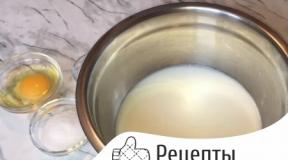
There are many recipes for cooking salt dough... I always use one:
1 glass of finely ground salt "Extra", 1.5 glasses of flour, 1 tbsp. a spoonful of non-greasy face or hand cream (can be replaced with vegetable oil, 0.5 cups of warm water.

Mix salt and flour in a container. Add cream to water, mix. Gradually pouring water into salt and flour, mix until smooth.

In order to avoid drying out, we wrap the finished dough in cling film.

In this form dough can be stored in the refrigerator, for example, waiting for the next arrival of inspiration (I have - for this the craft took about 1/3 of the test, the rest awaits next weekend).
Next, we take the foil (paper is not useful here, because it will stick to our product during the drying process) and a rolling pin. Roll out our 1/3 test to about 0, 5 - 0.7mm. We cut it out with a regular stack. You can use a template, but I did without it.

We make jewelry. I have 3 roses and 3 leaves. You can also make other flowers, it all depends on your desire and imagination.


We glue the jewelry to the main workpiece with a brush and plain water. We also process the edges of the product with a brush and water in order to remove flaws.

Our product is ready for drying. I dry in the oven at 120-130 degrees for about 40-50 minutes. Drying time depends on the thickness of the product. V natural conditions can dry up to several days.

We paint with gouache, wait until it dries. We cover with a colorless varnish in order to avoid further staining of fingers or clothes in contact with the product, as well as to make the product shine.

We enjoy the result!
Thank you for your attention!
Related publications:
New Year's time is a time of miracles, magic and the fulfillment of desires. New Year's time is the most fabulous time of the year. But the New Year's mood itself.
Everyone knows that didactic games are both a teaching method, and a form of teaching, and independent play activity, and a comprehensive tool.
In one of my posts, I offered a master class on making a snowman from salt dough. Today I want to offer a master class on sculpting a caterpillar.
The autumn season is coming to an end, the time of harvesting. And I want to leave vivid memories of this period - a period of abundance! Then it's worth a try.
After visiting the Russian Hut Museum, I suggested that my parents make souvenirs with their own hands. Modeling is a very rewarding activity. Thanks to sculpting.
To make such a cockerel we need: - salted dough; - foil; - stacks; - pattern for cockerel; - gouache and brushes; - beads and buttons.
Salted dough crafts have become popular not so long ago, although their origins lie in the most ancient layers of Slavic culture. Work with this.
Greetings to my beloved blog readers and guests !! Sometime in the distant past I worked as a teacher in a kindergarten, a very interesting job, but little paid ... But today we will not be talking about that !! It's just that whoever worked in this system knows that all materials that we use in creativity with children must be environmentally friendly or certified. Therefore, home-made tools come to the aid of purchased stationery. And the simplest means for development is salty dough.
Salted dough has been familiar from ancient times and is popular in our time, because it is very easy to make it, and sculpting from such a soft material is a pleasure. And what kind of crafts! Just a lovely sight !! I have not worked in the garden for a long time, but at home with my baby we often do modeling, and what was my surprise that not everyone knows how to make dough and what you can get out of it. Therefore, I decided to write an article on this topic.
And for a change, you can also make New Year's crafts from scrap materials, ideas with your children.
First of all, we need to understand the process of making our safe material. In fact, there are not so many recipes, but I will introduce you to a method proven over the years.

We need:
- Small salt - 1 tbsp.;
- Flour - 1 tbsp.;
- Water -125 ml;
- Vegetable oil - 5 tablespoons.

Manufacturing process:
Take a deep bowl and mix the salt and flour in it. Next, pour in a small amount of water and vegetable oil. Stir well and refrigerate for 2 hours. The sculpting dough is ready. You can leave it in that color, and after making the work, paint it in the desired color. Or you can immediately add natural or synthetic dyes: choose gouache or vegetable juice (carrots, beets), you can also use cocoa.

On a note!! To sculpt thin shapes, add glue to the dough. And remember that when it dries, our mass loses color, so add more dye.
Step-by-step instructions for making dough crafts for beginners
Now that you know how to prepare material for creativity, it's time to start the sculpting process itself. We'll start with the simplest. I will show you step by step how you can easily and quickly make a beautiful thing. We will sculpt a cute bear with you.

We need:
- Flour;
- Salt;
- Water;
- Cup;
- Acrylic paints or gouache;
- Brush.
Manufacturing process:
1. First, knead the dough: mix half a glass of flour and half a glass of salt, add a little water and mix everything well. Then we wait for 2 hours, at which time the dough is in the refrigerator.

2. Now we start sculpting the figure: we make one medium-sized ball for the head, a larger one for the body and 7 smaller ovals for the legs, ears and nose. We connect everything together. Then we put the product in the oven and dry it for an hour. After drying, take out the craft and cool it.


Advice!! Cover the finished souvenir with varnish. This will make the craft brighter and more practical !!
Thus, a step-by-step instruction for sculpting products from salt dough is as follows:
- knead the dough;
- we sculpt the necessary elements and connect them together;
- we dry the work in the oven;
- paint and wait for drying.

And remember that the main sculpting techniques are balls and sausages. 😉

How to make a souvenir from salt dough with your own hands
As you understand, this process is very exciting, and not only children, but also adults like to make crafts. Therefore, if you try and dream up, you can make an excellent gift or decoration element.
And for the coming New Year, I suggest you make a craft in the form of a dachshund dog, it will be very symbolic.

We need:
- Salted dough is universal;
- Cardboard, pencil, scissors;
- Paints and brush;
- A piece of rope;
- Clear nail polish;
- Toothpick;
- Foam sponge;
- Glue.
Manufacturing process:
1. Print the dachshund drawing on a printer or draw yourself. Transfer to cardboard and cut out the outline.

2. Roll out the dough 5 mm thick and attach the template, cut out the outline of the dachshund along it. Remove the trimmings.

3. Now blind two balls and form from them the oblong eyes of the dog. Glue them on a drop of water to your head. To remove unevenness in the workpiece, moisten all fingers with water and iron them along the contour.


5. In order to add volume, roll an oval out of the dough, glue it on the ear and smooth the joint with a wet finger.

6. Also add volume to the back and ponytail.

7. With a toothpick, make dents around the perimeter of the shape.
8. Dry the workpiece in a warm oven. The dry product must be painted with black paint, where there are dents.

9. When the black paint is dry, take the yellow paint on the foam sponge and paint the whole body, leaving the dents black.

10. On the dried dachshund, draw eyes and make any inscription.

11. On the back side, glue the string onto the glue.

12. Cover the product with transparent varnish and let it dry.
And here are some other cool gifts you can make from this budget material:
- Angel girls

- Magnetic cats

- Puppy with a bunch

Master class on making crafts for children
And since most of us do little creativity, those who have children try to come up with interesting activities for them, so that joint activities are very exciting.
I suggest that you, together with your daughters and sons, perform such a funny hedgehog, look for photo instructions further.

We need:
- Salty dough;
- Scissors;
- Beads
- Paints.
Manufacturing process:
1. From a piece of dough we make a drop-shaped blank.

2. Make the beaded eyes and nose.

3. Now we will make needles, for this we take nail scissors and make small cuts, lifting them slightly upward.

4. The next row is performed in a checkerboard pattern and so on, until the entire back is in needles.

5. Dry the finished toy in the oven. We paint at the request of the hedgehog.

It is also very easy to make a bird and decorate it with legume grains, it is not only easy, but also useful for the development of fine motor skills in children. Watch the video plot of the manufacture of this craft:
Of course, there are a lot of options, and if you surf the Internet, you can find a whole storehouse of ideas, and your leisure time with your child is guaranteed. I share souvenirs that I personally liked:
- Magic fish

- Ladybugs

- Princess Frog

- Mouse

- Snail

- Blue elephant

DIY Christmas gifts from salt dough (pictures inside)
And on the eve, I want to surprise and pamper my family and friends. And if you decide to make surprises yourself, then here's a couple more gifts to choose from.
- Snowman

We need:
- Salt;
- Flour;
- Water;
- Toothpick;
- Blue gouache;
- Brush.
Manufacturing process:
1. Knead the salt, water and flour dough. We make one ball white, and in the other we add blue gouache.

2. From the white ball, pinch off a piece for the head and flatten it to the shape of a cake. Under this cake we place another piece of cake - the body of a snowman. Use a toothpick to gently shape your mouth and mark the location of the eyes.
3. Make two small balls, and moisten the eye area with a brush dipped in water. Press down on the eyes, but not hard.

4. Take blue dough and mold very small balls, make pancakes out of them. These will be the pupils. Make eyebrows from the sausages and form a carrot-nose.

6. Dry the snowman in a sunny window. Cover with clear varnish. A magnet can be glued on the back. It turned out to be a great gift !!

- Or you can make such funny figures.

- Pendant Santa Claus
- Excellent frame

- Or such funny Christmas tree toys

- Option for simple toys

- Magnets

- Candlestick


- Do not forget about the symbol of the year - the dog


It's time to finish writing. And I think that if you were not familiar with the technique of sculpting from salt dough before, then after reading the post, you will definitely want to try it.
And how children love to make such crafts, because here is not only modeling, but also drawing, but the most exciting thing for children is drying the product in the oven. A storm of joyful emotions is guaranteed for you !! Create, fantasize with the whole family!
Master class "A gift for mom" in the technique of modeling from choux salted dough.
author: Nazarova Tatyana Nikolaevna teacher of additional education MBU DO DDiU, MillerovoThe master class is intended for teachers of additional education, teachers of technology, for those who want to make gifts with their own hands.
Purpose: gift for March 8.
Target: making a decorative cutting board using the technique of molding from chouxed salted dough.
Tasks:
Educational: master the technique of making a decorative cutting board using the molding technique from choux salted dough;
Developing: develop accuracy, artistic thinking, the ability to arrange items from the dough on the board;
Educational: instill a love of modeling;
Required material:

Cutting board, stack, cutting for marzipan “leaf”, “flower”, “cloud”, “circle” diameter 7 cm, garlic press, rolling pin, simple pencil, brush, PVA glue, felt-tip pen cap.
For choux pastry: 1 glass of premium flour, 0.5 glass of Extra salt, 0.5 tablespoon of citric acid, 0.5 tablespoon of vegetable oil, 1 glass of water.
Salted choux pastry recipe.
Combine salt and flour in a bowl, stir until smooth. Pour 1 cup of water into a small saucepan. Add vegetable oil and citric acid to the water. Put on fire. As soon as large bubbles begin to appear, pour the water in a small stream into a bowl of flour. The dough will be brewed and rolled into a large lump. The dough will cool down a little, start kneading it for 5-7 minutes. You should get an elastic lump. Let the dough cool slightly and place in a plastic bag. You can get to work.
Progress:

In the process of work, all the elements of the choux pastry are glued to each other with PVA glue.
Form several thin flagella. Glue the board and glue the trunk of the tree, then the branches. Stack the veins along the tree trunk.

Put a small lump of dough into the garlic press and squeeze out thin flagella. Cut off several flagella in a stack and glue the nest on the upper branch. Roll up two lumps and glue two eggs into the nest.

Glue the crow next to the nest. Form three different sized leaves. The largest leaf is the belly of a crow. The middle leaf is the head. The smallest wing. Glue the ponytail, eyes.

Glue the kitten to the lower branch. The cat is holding onto a branch with its front legs. Form a small lump and glue the head. The head rests on a branch. Glue the eyes, antennae, ears. Glue the front legs next to the head. Since the kitten is hanging on a branch, it is completely invisible. A tummy peeps out from under the branch. Glue a lump that looks like a volumetric drop. Make the hind legs a little larger.

Let's start sculpting mom. Form a small oval cake. Stack the sides with cuts. Get hands. Cut the bottom edge of the oval to form the length of the dress. Glue on your feet, sandals. Put a small lump of dough into the garlic press and squeeze out short flagella. Glue on your hair. Use a simple pencil to push through the eyes. Glue on a small spout.

Roll the dough out with a rolling pin. Punch out a circle. Cut the circle in half with the stack. Use a felt-tip pen cap to push through the patterned bottom of the umbrella. Push the knitting needles in a stack. Glue the handle to the umbrella. Mom holds an umbrella in her hand.

We sculpt the girl in the same way as the mother. Only the oval should be smaller.

Glue a small kitten near the girl. The kitten's abdomen looks like a leaf. Small ponytail. Blind the head the same as that of a kitten that is hanging from a branch.

Glue the sun on the top of the board. Glue the rays of the sun only at the top. Glue the nose to the sun. Clouds will close the sun to the very nose.

Roll out the dough thinly. Cut out two clouds by cutting. Glue the clouds so that the clouds cover the sun up to half. To the very spout. Use a pen without paste to push through the eyes of the sun. Form small cords and glue the handles. The sun is holding on to the clouds with her hands.

Form some small droplets and glue on the rain.

Roll out a small ball of dough. Cut out the weed and glue at the very bottom of the board. Make notches on the grass in a stack.

Cut out a few flowers by cutting and glue them onto the grass.

Roll out the dough thinly. Cut a few leaves by cutting and glue them to the tree. Glue a small caterpillar to the tree trunk. The main work has been done. Leave the decorative board to air dry for 4-5 days and only then can you paint it with paints. After the dough and paint are completely dry, cover the board with a glossy varnish.
A gift for mom is ready.
Hello everyone, hello !! Today, everyone's expected topic is on the agenda - crafts for International Women's Day. Indeed, immediately after February 23, we begin to prepare for March 8. Therefore, dear educators, teachers, parents and children, we will rather start viewing this post, choose a gift and start tinkering !!
Let me remind you that there is already a selection for making spring postcards for March 8, so if you missed it, let's take a look. Well, in this article we will analyze the most popular hand-made crafts and it will not only be flowers !!
We will start with the newest ideas for making congratulations. Indeed, on this wonderful spring day, we really want to please our mothers, grandmothers, sisters, girlfriends, teachers. Therefore, for you, a small selection of the most interesting photos for the current year !!
How do you like such green horseshoes for good luck, decorated with flowers made of ribbons and beads ?! Isn't it very beautiful !!

Or such voluminous beaded flowers ?? But here you need special skills in beading.

But gentle felt eights are also very useful.

Look what a delicate basket of flowers made of satin fabric, it looks very festive !!

Volumetric eights made of paper are always in place, especially if you know how to work with such delicate patterns.

Well, this beauty is made using the quilling technique, it looks amazing !!

Awesome firebird that brings happiness to your home !!

Or a simple chamomile in a pot. Such a present is easy to perform and very harmonious in appearance.

And what lovely lilies of the valley from buttons, I think you will definitely surprise those around you with such a gift.

I also really liked the idea of a needle bed, and we get not only a needle bed, but also a jar for storing various little things. Look how easy it is!

Of course, the female sex is very fond of sweets and flowers. I decided to combine these preferences and make such a nice present.
- Basket of flowers
We need: a box of chocolates (preferably with chocolates), colored paper, cardboard, colored table napkins, scissors, glue stick.
Manufacturing process:
1. Use a whole rectangular box of chocolates as a background.
2. Take two sheets of colored paper of different shades of brown, cut them into strips 1 cm wide.
3. Now weave stripes of different shades perpendicular to each other (fig. 2).

4. Cut an oval 13 cm long and 10 cm wide from cardboard of any color.
5. Glue this oval to the woven rug from the wrong side (fig. 3).

7. If the ends protrude from the canvas, then tuck them in and glue them to the oval from the wrong side. You should have our basket.
8. Stick it on the candy box.
9. Now take 6 napkins of different colors and, when folded, cut out circles with a diameter of 4-5 cm. Glue these circles, make a circular cut.
10. And out of yellow paper, cut out circles with a diameter of 1-1.5 cm and also make a circular cut. These centers need to be glued to the center of the flowers.
11. Using the stencil given below, cut out 9-10 leaves and stick them on the basket (fig. 5).

12. Stick flowers between the leaves and your congratulation is ready!

How do you like this idea ?! In my opinion, it is very excellent and original, as they did it with their own hands, they also treated it to sweets.
Crafts from paper and cardboard from the first to the senior group of kindergarten
I cannot aside leave creativity for our children. As always, paper and cardboard are popular materials, well, and various additions. In general, I will not torment for a long time, now you will see everything with your own eyes !!
Excellent butterflies-flowers made of folded paper in a fan, the background can be painted with watercolors.

But the original bouquets, make a base tube of green cardboard and glue the cut out buds and leaves on it.

Or such cute hearts. For pots, you can use sour cream jars.

And here is an interesting clearing of ordinary straws for juice and colored paper.

And these eights are made from a toilet sleeve, cut off, glued on the cardboard bottom, and decorated. By the way, if you do not connect the circles, you will get caskets.

Craft from paper plates, looks very impressive.

Well, how can you do without voluminous postcards, I think you have already learned how to make them !!

These beautiful paper flowers can be framed and you get a picture.

Again cute, amazingly beautiful pots !!

Or you can make postcards from colorful napkins.

And do not forget about origami, in the picture is a diagram of folding daffodils.

And if you want something special, then I suggest making such a paper cake.

We will need: colored xerox paper, colored paper napkins, beads for decoration, a stapler, glue.
Manufacturing process:
1. Make cakes out of paper, folding them like an accordion, then folding them in half and gluing them together. One cake will need 6 sheets.

2. Make three cakes in total.

3. Make flowers out of napkins.

4. Large peony.

5. And small roses.

6. Connect everything together by decorating with beads.

Here is such an inedible beauty!
We make souvenirs with our own hands from corrugated paper
Also, do not forget to make handicrafts from corrugation, from it all the actual bouquets are obtained as living, real !!
I do not give a detailed step-by-step description, if you are interested, go to the article, there you will find master classes for bouquet and flower products. And now a small selection and video plot.


And as promised a small video on how to make a bouquet of roses with your own hands from corrugation.
The most beautiful crafts for March 8 from felt
Well, those who love to sew and are familiar with such an amazing material as felt know that there are a huge number of different souvenirs for the spring holiday. Look at what I liked, maybe you can sew something from the proposed options.
- Multicolored flowers

- Cute birds

- Heart Keychains

- Cheerful bouquet

- Red eight

- Ladybugs Charm

- Photo frame made of flowers

And you can also sew the following potholders:

Or make a needle cushion in the form of this insect))
We need: red and black felt, threads, cotton wool or synthetic winterizer for filler, thread, needles.
Manufacturing process:
1. Cut out the template and transfer it to the fabric. Make felt blanks.

2. Sew together all parts, leaving a small hole.

3. Fill the cow with litter and sew up the rest.

4. Your needle bar is now ready.

And here is the template for making it:

Master class on making a gift for mom from salt dough
Do you remember that I once told you about making and how you can make a large number of souvenirs from it, including for March 8 ?! So, if you missed this article, then be sure to stop by, take a look, maybe choose interesting ideas for congratulations.
Well, now I suggest that you make such lovely presents for our mom and remind you of the technology for the production of salted dough. 😉
- "A present for happiness"
We need: flour - 2 tbsp., Salt - 1 tbsp., Water - 1/2 tbsp., Gouache, colorless varnish, ribbons, templates.
Manufacturing process:
- Use the recipe above for the salty dough.
- Roll out a layer from the mass and cut out a heart and a horseshoe according to the template.
- Decorate souvenirs according to your imagination.
- Next, let the crafts dry. Ideally, let them sit for 5 days.
- Then paint with gouache, let dry again.
- Cover with colorless varnish, insert the ribbon.

Let's see what else you can sculpt with this great creative material.
Multi-colored eights, decorated with flowers and sparkles, you can glue a magnet and get a great gift.

You can make a bouquet of any flowers, it is also always relevant.

Heart with an inscription, decorated with buds of your favorite flowers.

Simple photo frame. This kind of work is within the power of little guys.

Spring suns, very funny and warm !!

The real picture !!

But the funky candlestick looks insanely beautiful !!

Or maybe you like cute cats or a bunny ?!


Or are these little angel girls ?!

And how do you like such a dog with a gorgeous bouquet ?!

In general, it all depends on your imagination, and the rest will work out !!
Video plot on how to make roses from cotton pads
And don’t say, but the main gift on International Women's Day are flowers, and most often they give roses and tulips.
It turns out that beautiful bouquets can be made not only from paper, but also from cotton pads. And this is done very simply, I think you will be convinced of this when you look at the following plot:
Well, impressed ?! And now we will see what types of flowers can still be made from this improvised material.


I would never have thought that such masterpieces could be made from ordinary cotton pads !!
DIY bead crafts for children
You know, I also remembered how as a child I weaved various baubles, bracelets, chains and pendants. And I thought that unusual and festive souvenirs could be made from beads.
I studied the Internet and it turned out that flowers are the most popular in beading on March 8, who would doubt it !! I have selected the most attractive work options for you.
You can weave such a bunch of mimosa from a thin wire.

Such an eight made of ribbons, decorated with blossoming flowers.

Here is such an original decoration.

Or a cute heart-shaped topiary.

A simple postcard: we spread the drawing with glue and lay out the beads.

You can also weave such a basket, it turns out a real gift.

Floral applique option.

How do you like such cute jewelry ?! In spring, wonderful !!

A bunch of not blossoming tulips !!

Here is such a charming selection of beaded crafts !! Beauty in one word !!
Interesting ideas for congratulations from threads
While doing this article, I came across very magical and soft-looking work made from threads. Mostly they take fluffy threads for knitting. The manufacturing technology is simple, it is either applique or bundling and cutting to the desired shape.
Here's a look at how you can make such a yellow dandelion in stages.

On the basis of cannons, you can also make a sprig of mimosa.

Or applique: draw a plot on the basis, and, winding threads, glue along the contour.


And if you know how to knit or crochet, then make just such a lovely box and decorate with beads.

DIY templates for March 8
According to the tradition that I have developed when preparing similar articles, in the end I offer different options for stencils and templates. So hold, circle and get creative !!
- Paper flower

- Wreath with butterflies

- Birds. Can be made as an applique or sewn from felt

- Flower vase

- Apron postcard

- Floral mug card

Well, that's all my dear friends and lovers of creative work. Hope you enjoyed the 8 March craft ideas. Write your reviews, I will be glad !! And see you !!