Sweet pies with wet yeast. Step by step recipe with photo
Divide the finished dough into two parts, roll into a ball, cover with cling film and let rest for 10 minutes.
At this time, prepare the filling. Peel the ginger. Wash the lemon, cut into segments, if there are seeds, remove. Mash the lemon and ginger in a blender. Add sugar and stir.
Roll out the dough into two layers. Grease one with lemon filling. Sprinkle the second with cinnamon and brown sugar. 
Grease oblong muffin loaf with vegetable oil. Cut the dough into squares of a suitable size (according to the size of the mold). Fold the pieces of dough into a horizontal stack, alternating pieces with different fillings. Slightly "ruffle" the tops of the pieces of dough. 
Cover the dough with cling film and let rise for 1 hour. 20 minutes before the end of the time, put the oven to preheat to 200 degrees. Before baking, grease the roll with the yolk of one egg and sprinkle with sugar. 
Bake the loaf for about 40 minutes on a medium level at 200 degrees. Check for blush. Take out the finished roll and cool for about 10 minutes. Remove from the mold and cool on a wire rack.
Butter buns are very often present on our table. And how can you do without them if friends have come and you want to treat them to tea?
They love yeast dough buns for their airy structure and great taste.
And what they look like depends only on the hostess, who decided to show off her culinary talent.
Some nuances of making butter dough buns that you need to remember
How to make buns to wow your guests. In a good sense of the word, of course. There are a few secrets you need to keep in mind.
Firstly, airy buns are obtained if dough was used for their preparation. This is a mixture of warm milk, yeast, a small portion of sugar and three to four tablespoons of sifted flour.
The dough is infused in a warm place for 15 minutes (if you have dry yeast at your disposal) or half an hour (if the yeast was pressed) and only then the rest of the ingredients at room temperature are added to it.
The dough is considered ready when you notice a foamy "cap" of air bubbles on its surface. When the dough is kneaded and lags well behind the walls of the dish, cover it with a towel and set it to rise for two hours.
During this time, you need to visit the dough twice and knead it with your hands. After the third rise, the mass is spread on the work surface and buns or other pastries are formed.
Flavored yeast buns with vanilla, extracts, citrus zest.
You can get buns with a glossy shine by smearing the surface with sugar water, milk or whipped yolk. The process is carried out before leaving the baked goods in the oven.
Formed yeast buns (they can be with or without filling) are laid out on a baking sheet and allowed to separate. Depending on the size of the pastry, you need to wait 15-30 minutes, and only then send it to the oven.
Some of the recipes for delicious pastries you will learn today. All of them do not differ in complexity, and you will find products if in the kitchen, then certainly in the nearest store.
Poppy burgers recipe

In a delicious bun dough, place:
half a kilogram of flour; some salt; a glass of milk; a spoonful of vanilla sugar; 7 tbsp. tablespoons of sugar; dry yeast - small bag; 100 g butter; 1 egg.
The filling consists of: 100 g of poppy seeds; 70 g is small; 180 g sugar and one egg.
Buns Recipe:
- Chop up the dough. Heat the milk, then add dry yeast, 2 tablespoons of flour and a spoonful of granulated sugar. Swirl the mixture until smooth and allow time to rise.
- When foam appears on the surface, continue kneading the dough and melt the butter first.
- While it cools, grind the egg with sugar, vanilla and salt.
- Pour flour into a bowl, make a funnel and send the egg mixture, liquid oil and dough there.
- Knead to a soft batter. If you need more flour, you can add a little more. The main thing is that the yeast dough does not stick to your hands.
- Form the yeast dough into a ball, place in a large saucepan and cover.
- In an hour, the mass will come up and be ready for the formation of blanks.
- Start preparing the filling by steaming the poppy seeds. Pour the poppy seeds, sorted and washed, with boiling water into a deep plate. Soak for 10 minutes under the lid, then drain the liquid and crush the poppy seeds in a mortar. If you decide to do everything with a blender, it will go faster. Add sugar and mix well.
- Remove the matched yeast dough from the pan and divide in half.
- Roll out a layer 5 mm thick and lubricate with soft oil.
- Spread the poppy filling over the surface, smooth with a spatula and roll up the roll.
- Divide the roll into 2 cm wide rolls and place on a baking sheet with the cut edge down.
- Let the buns stand under a napkin for a quarter of an hour, and when they are "grown up", brush with a beaten egg.
- For full readiness, it will take 20 minutes if the oven was 200 degrees.
You can find recipes for baking with poppy filling on other pages of my site.
Sweet Cinnamon Rolls Recipe
The yeast sweet buns stuffed with ground cinnamon and sugar won't take up much of your time. Sweet yeast dough can be easily made from simple products; fortunately, the era of scarcity is far behind.
The baked goods received a second name - buns, and they are obtained with a sweet crispy crust. You just need to follow my recommendations, the rest can be done by time and kitchen appliances.
Ingredients for making butter buns:
Half a glass of vegetable oil; one glass of milk; a bag of dry yeast or 40 g pressed; 40 g sugar; 1/3 teaspoon of salt; 40 g sugar; 10 g baking powder and half a kilo of white flour. This is for butter dough. Prepare the filling from: 1⁄4 pack of butter; Sugar and cinnamon take to taste.
Knead the yeast dough:
- Combine milk and butter in one bowl, heat.
- When the food is heated to 40 degrees, remove from the stove and add dry yeast, powdered with granulated sugar.
- Sift flour, then mix with baking powder and salt.
- Gradually add the mixture to the diluted yeast.
- Knead a tender and soft dough, which in no case should be too tough.
Then cover the dish with the dough with a towel and let it rise for 30-40 minutes.
If you want to cope with kneading yeast dough faster and without problems, then entrust this work to the bread maker - in an hour and a half you will have a tender mass ready to form buns.
We make delicious buns with yeast:
- Pound the dough and divide into equal balls. The most convenient way to do this is as follows: roll 2-3 rollers out of yeast dough and cut them into pieces 3 cm wide.
- Roll out cakes from balls, grease them with oil and sprinkle with a mixture of sugar and cinnamon. Adjust the amount of filling at your discretion.
- Roll up the rolls, fold the edges inward.
- Make cuts on opposite sides (as in the photo) and turn them up and to the sides. The result is a bun resembling a butterfly with spread wings. Very beautiful!
- In the same way, do the work with all the blanks, and immediately put the buns on a baking sheet.
Until you finish the formation of the baking, the first buns will already be parted, they will need to be greased with yolk and put to bake.
Recipes for baking from yeast dough suggest the following action: before you get ready-made fluffy buns from a baking sheet, cover them with a towel and let them rest for 15 minutes.
Yeast Dough Orange Buns Recipe
To make butter dough you will get from: 5 and a half glasses of flour; packs of oil; vanilla sugar; a large glass of whole milk; four eggs; 0.5 tsp salt; 9 g loose yeast; 2.5 tablespoons of sugar.
For the filling, you should have the following products: 0.6 kg of dark sugar; 70 g of nuts; 130 g of honey; 0.350 kg of oil; 20 g of orange peel and 60 ml of orange juice; 2 bags of vanilla sugar.
Step by step cooking:
- Knead the dough in the bowl of a food processor. To do this, add sifted flour there, add soft butter, eggs, all loose ingredients.
- Turn on the technique at a slow speed and pouring in warm milk little by little, knead the dough.
- Do not stop the combine and keep it switched on for another 10 minutes. The result is a smooth, homogeneous mass that needs one hour to lift. Cover it with a napkin to keep it from weathering.
- Place all ingredients for the filling except the nuts in a mixer bowl and beat until a homogeneous mixture is formed. Put it in a cold place, but for now, take care of the nuts. Dry the nuts in the oven, cool and chop in a tight plastic bag using a rolling pin.
- Take a baking dish and line it with baking paper, but so that it protrudes over the sides (as in the photo).
- Spread out 2/3 of the filling, level the surface.
- Separate a third of the chopped nuts and sprinkle on top.
- Form a rectangle out of the yeast dough, lay out the remaining filling.
- Grind the surface with nuts and roll the roll, and in turn divide it into parts. There should be 12 of them.
- Put the delicious tasty buns in a mold on the filling, press a little with your palm, as if melting.
- Cover the mold with a napkin to keep it dry and leave in a warm place for one hour.
- Preheat the oven by setting it to 180 degrees. Place the buns and wait until cooked, identifying it by the resulting ruddy surface.
For recipes for baking in the oven, which is cooked at the same time as pouring, see other pages of the site.
Yeast Dough Honey Buns Recipe
The aroma and taste of honey baked goods remains in the memory for a long time. To bake this dish, you will need:
2.5 teaspoons of loose yeast; 1 egg and 1 yolk; a glass of milk; 100 ml of vegetable oil; 2 large spoons of honey; one and a half teaspoons of salt; 3.5 cups white flour.
Make the glaze from: a tablespoon of honey; one third of a glass of white fine crystalline sugar; two tablespoons of melted butter and one protein.
Knead the dough using simple processes:
- Heat the milk to 37-38 degrees, pour into a large bowl.
- Add dry yeast, honey, vegetable oil, egg with yolk and salt there.
- Shake well to smooth the mixture.
- Introduce flour in parts so that the mass does not "clog" and get a delicate consistency.
- Finish kneading by placing the dough on a floured table and rolling into a ball.
- Cover it with a clean kitchen towel and let sit for 10 minutes.
- Grease dry and clean baking trays with vegetable oil and fill with round blanks, of which you should get 24 pieces.
- Cover the baking sheets with napkins, put them in a warm place for half an hour.
- When delicious buns rise and increase in volume by about two times, turn on the oven, it requires heating up to 180 degrees.
- In the meantime, make the frosting. Combine all ingredients required by recipes in a small saucepan or saucepan. The mixture does not need heat treatment, so immediately apply it with a brush to raw buns.
- In the oven, the baking will spend from 20 to 25 minutes, that is, until it acquires a golden shiny crust (see photo).
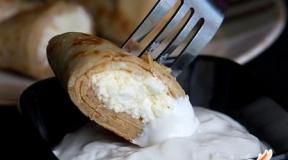
Puffy sweet buns with cottage cheese made from yeast dough
Required ingredients: 0.450 kg fine flour; 0.150 l cream; 5 g fast-acting yeast; three eggs; 60 g coconut flakes; half a glass of milk; 400 g of sour milk cheese; 6 tbsp. tablespoons of white crystalline sugar; 70 g of peasant butter and 100 g of sour cream.
Step-by-step cooking:
- Pour dry yeast and sugar (2 tablespoons) into milk heated to 37 degrees. Stir and soak the mixture for 30 minutes under a napkin.
- Sift flour into a deep bowl, make a depression in the center and beat in the eggs.
- Then send softened butter and diluted dry yeast.
- Mix thoroughly, cover the resulting mass with a towel, transfer to a warm place and stand for 40 minutes.
- Without wasting time, make a curd filling. To do this, stir in the cheese, eggs, coconut and sugar with a spatula. You should get a homogeneous smooth mass.
- Roll out the dough on the table, giving it a rectangular shape.
- Spread the filling over the surface and smooth it out.
- Roll up the roll, pressing the layers tightly.
- Divide into 3 cm wide pieces, and place each piece in a greased round dish.
- Place the sweet rolls on the wire rack in the oven. At 180 degrees they will be ready in half an hour.
- Take out the pan, but it's too early to serve the tastiest treat. Pour the baked goods with cream, sprinkle with granulated sugar and keep in the oven for another 10 minutes.
- To make the yeast buns very tender and airy, be sure to let the dough rise well.
- Flour for sweet baked goods must be of the highest grade.
- You can add gloss and shine to baked goods by brushing the surface with milk or beaten egg. Only after this procedure, send delicious buns to the oven.
My video recipe
Let's cook today butter yeast dough for savory pastries.
This test produces excellent pies, kulebyaki, pies, With donuts in dough, tortillas and bagels.
I will cook a double portion, this is almost 3 kg. ready-made dough.
And in the recipe, which will be at the end of the video and in the description, I will indicate the number of products per serving.
Ingredient List:
For 1 portion (1.4 kg of dough)
- 700 gr. flour +50 gr. flour for sprinkling
- 250 ml. milk
- 125 gr. sour cream
- 100 g butter
- 50 gr. vegetable oil
- 50 gr. Sahara
- 2 eggs
- 1/2 tsp salt
- 30-35 gr. fresh yeast (or 11 grams dry yeast)
Butter yeast dough for savory pastries - step by step recipe:
Let's start cooking.
Pour warm milk into the bowl in which we will knead the dough, add a spoonful of sugar and add fresh yeast.
Stir thoroughly to dissolve the yeast.
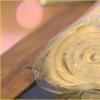
Pour in a few tablespoons of sifted flour and mix well with a whisk.
We prepare the so-called dough to activate the yeast.
We remove the bowl to a warm place and literally in 10-15 minutes, if the yeast is fresh, a lush yeast "cap" will appear on it.
Add salt, the remaining sugar, eggs slightly beaten with a whisk, sour cream and pour the melted butter into the bowl, it should be warm, but not hot.
Mix everything thoroughly so that the salt and sugar are completely dissolved.
Then add the sifted flour in parts and begin to knead the dough.
While the mass is liquid, it is convenient to stir it with a whisk, as soon as the dough thickens, we continue to knead with our hands.
Do not add all the flour at once, because flour is different for everyone.
You can also knead the dough in a planetary mixer, but I like to do it by hand.
As soon as the dough absorbs all the flour, pour half of the vegetable oil into it and begin to knead intensively.
Knead the dough for at least 5 minutes, then grease the bowl and the dough itself with the remaining vegetable oil so that it does not dry out and does not form a crust.
We cover the bowl with cling film, a damp towel or, as in my case, a lid and put it in a warm place to come.
As usual, I use the oven with the light on or the "minimum heat" mode for this.
In this case, with the oven door closed, a temperature of 35-40 ° C (95-104 ° F) is created, which is optimal for proving the dough.
After 40 minutes, our dough came up perfectly, we take it out.
The dough turned out to be very fluffy!
Sprinkle flour on the work surface, carefully lay out the dough from the bowl, select the edges to the center and turn over.
Our pastry yeast dough is ready!
If you paid attention, then I did not do a single kneading dough.
I give him a good approach only once, because with each pounding, the yeast loses its strength.
From a well-matched dough, shape the product, and the second time the dough will fit during their proofing.
In order not to miss new, interesting video recipes - SUBSCRIBE to my YouTube channel Recipe Collection👇
👆 1-click subscription
Dina was with you. Until next time, until new recipes!
Butter yeast dough for savory pastries - recipe video:
Butter yeast dough for savory pastries - photo:
I don’t know about you, but I’m in a constant search for a good pastry dough. All the time I try new recipes, trying to change something in cooking for a better result, I rummage on the Internet, I ask all my acquaintances grandmothers and girlfriends, I read the books of Molokhovets and Zelenko ... And it seems to me that this cycle and constant search will never end!
The best yeast dough for pies and buns so far is the recipe for which I will share today. I use it for both sweet and savory pies in the oven (I like it when the dough is not bland, but a little sweet, even in pies with hearty filling). That is, such a dough is perfect if you want to make pies with cherries, with or with.

So let's start cooking?
The most delicious pastry for buns and pies
- Warm milk - 250 ml.
- Flour - 500 g (the amount of flour varies, maybe a little more or less)
- Dry yeast - 7 g (a little more than half of a small bag) If you do it on fresh, then take 20 g
- Chicken egg yolk - 1 pc.
- Salt - 1 tsp
- Sugar - 1/2 cup
- Butter - 75 g
- Vegetable oil - 25 g
From this amount of dough, 16-18 medium-sized patties are obtained, if you need more, double the ingredients.

How to make delicious dry yeast dough
Now, be careful and follow the cooking technology, this is very important. Heat the milk (250 ml). It shouldn't be at room temperature, but it shouldn't be very hot either. If you own a pastry thermometer, check the temperature of the milk with it, it should be 40 ° C. If there is no thermometer, dip your finger, the milk should be in a pleasant, comfortable state, slightly hot, but not scalding. We will combine milk with yeast, which are known to be living organisms. Our task is not to kill them with hot temperatures, but also not to inhibit them with cold milk. Only at a comfortable and pleasant temperature will yeast begin to actively multiply and raise the dough for buns.
You can see it in a separate article (click on the active link to go).

Prepare everything for the dough in a separate bowl. Put salt (1 tsp),

sugar (1/2 cup), dry yeast (7 g), mix with a spoon and pour in milk.
 We also send the egg yolk here. Stir, tighten with cling film and set for 20-25 minutes in a warm place where there are no drafts. I put it in the oven (while it is off). The closet is the perfect atmosphere for the test: calm, quiet, no wind =).

After a while, we take out the dough (I will immediately warn you: you will not see any frothy cap, too much milk for the visual effect of yeast growth), but nevertheless this time is necessary for the yeast to "play" and awaken. Now add flour. Sift the flour in advance - this will add airiness to our dough. All the pies and buns that we will make from it will receive porosity and airiness. But, of course, just sifting the flour is not enough. For airy pastry, you need to follow the cooking technology and everything else.

Pay attention to the consistency of the dough when adding flour. Add flour little by little, in portions, so as not to accidentally exceed the norm. After all, if you add too much of it, the dough will become dense, it will not rise well. You can knead the dough with your hands or with a planetary mixer with a special dough attachment. There are also special attachments for a hand mixer (they look like a hook). I love to knead with my hands (although, I will not hide, it is a little tiring, it takes effort to knead perfectly). But all my bright thoughts and energy that I put into the process will definitely interfere with the dough and the pies will be tastier. Even my grandmother always said: "dough loves hands."
First, you need to knead with a spoon or spatula.

Then dust the surface with flour and put the dough on the table, start kneading the dough further. After adding flour, the dough should be left directly on the table for 10-15 minutes so that the flour is properly soaked in milk, the gluten swells. This is a very important point. All textbooks on the technology of making yeast dough write that oils should be added last.

While you melt the butter (75 g) and measure out the vegetable (25 g), the dough lies, rests, the flour swells. And in all other recipes, girls, where oil is indicated, do the same. First, mix the flour with the liquid, and only then, when the flour is moistened, add the fats. In today's recipe, liquid is milk, in some other recipes - water or kefir, it doesn't matter. If we immediately pour fat into dry flour, the fat particles will begin to envelop the gluten molecules in the flour, and then it becomes very hard to wet. The dough will end up being rough and airy. When I learned this subtlety, I began to apply it in practice with all types of dough: pizza dough, dough for pies, and even when I cook, I also do this. I let the flour soak, its starches swell, and only then I add the oil. The result is much better.

And now, when the dough has rested, we begin to stir in the butter. Do this in a tablespoon, in small portions. At first it will seem to you that the butter cannot be mixed in, that it “crawls” over the dough, that “the butter is separate - and the dough is separate”. Yes, it is, but only for the first 1-2 minutes. The more you knead, the better the ingredients will combine and the end result is a smooth, soft, elastic dough that is comfortable and easy to work with.

And now we grease the bowl, in which the dough will be brewed, with vegetable oil and put the dough bun in the bowl. Tighten with cling film and put in a draft-free place. If your apartment is cold, you can do this: heat the oven to 50 ° C and turn it off. Put the yeast dough in a slightly preheated oven and close it quickly. Remaining heat will help the dough rise.

The yeast dough should be proofed for 1 hour. You don't need to crumple and re-stand it in this recipe! We immediately begin to cut the well-suited dough into buns or pies. If for some reason the dough does not rise in an hour (it is too cold in the apartment, you are in a bad mood, low-quality yeast, etc.), give it more time. Be guided in recipes (not only mine, but in general, in all recipes), not for time, but for the state of the dough. If it took me an hour to proof it, this does not mean at all that absolutely everyone who will cook according to this recipe will also spend an hour. This time may be longer, maybe a little less. But in an ideal situation (if the yeast is of high quality, you have not overheated the milk and created a warm environment for raising the dough), it takes no more than an hour to proof it.

To make the pies the same in size, you can divide the dough like this: first, cut it into two equal parts.

Then divide each of the two into two more parts, it turns out four. Each of the four - two more. Thus, you get as many pieces (future pies) as you need and they will be very similar in weight. For a more accurate weight, use a kitchen scale.

From this norm of dough, I get 16 pies (or buns). That is, the pieces that you see in the photo, I usually divide by two each, and it turns out 16.

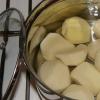
Today I will spend my batter on potato pies and cherry pies. Despite the fact that the dough is sweet, I love how it sets off the flavor of the filling, so I use it for both sweet and hearty pies.
We form pies from yeast dough
When you shape the patties, make sure they seem small to you. The pies grow very much in size when they are parted, then "grow" additionally in the oven. Therefore, if you now make them medium in size, you will end up with sandals. Sculpt small patties for medium patties after the oven.
So, lightly roll out a piece of dough with a rolling pin. You can not roll it out with a rolling pin, but flatten it with your palm - as you are used to. We spread the filling (a little).

We connect the edges of the dough and press firmly to each other. It turns out a seam along the pie.

Now we connect the opposite ends to get a round patty.

This is how you see in the photo. You can crush the barrel a little more in the finished pie, giving it an ideal round shape. The surface of the pie should be smooth, beautiful, without a single crack.

Now put the pies on a baking sheet covered with good quality parchment or on a silicone mat. The pies should be seam down. When the patties are formed, cover with a light towel and leave directly on the table for 15-20 minutes to rise properly.
Don't skip this step, even if you're in a hurry. The lack of proofing of the pies leads to tearing of the dough (often cracking on the sides, at the base).

Before sending the pies to the oven, brush them with the yolk of one egg mixed with 2 tbsp. spoons of water. Be careful when lubricating! The dough is very tender and airy: rough touches can deflate or disrupt the shape of the pie.

So, the pies are ready to go to the oven!
Attention! Put the pies in a well-preheated oven. If you will be a convection oven, set it to 180 ° С, if without it - 190 ° С. I bake at 180 ° C for 17-20 minutes. The surface of the patty should be glossy brown. When I put the oven on preheating, on the lowest level I put an empty baking sheet that I will use for steam.

I bake pies with steam. If you have such a built-in function in the oven, use it! If not, I'll tell you how I do it. With a special puller (I bought one for flowers, but I use it only for the kitchen), I slightly spray the surface of the pies. Then, I set a baking sheet with pies to the middle level, and on the lower empty baking sheet, which will stand under the pies all the time of baking, I pour a glass of water and quickly close the oven.
The steam and moisture generated in the oven at this time prevents the surface of the baked goods from drying out. It remains as soft as baby's skin.

Remove the baked pies from the baking sheet onto the wire rack, cover with a towel until they cool.

Pies and buns from this pastry are tender, airy, very tasty.
I will show you the bottom of the pies - it does not burn, it is beautiful and ruddy.

The dough inside is airy and very tender.

I am very interested in what kind of pies you made. Let us know and show in the comments! (you can attach a photo to your comment).

I really hope that everything turned out well, and this rich yeast dough delighted you with its taste and airiness!
For those who prefer video recipes, I recorded a step-by-step master class and posted it on the You Tube channel, I wish you a pleasant viewing:
If you plan to post a photo of pies or buns according to this recipe on Instagram, please indicate the tag #pirogeevo or #pirogeevo, so that I can find your photos on the network and share your joy! Thanks!
In contact with
Hello, our dear readers! Frankly, this article turned out to be voluminous, but for those who want to learn how to make butter dough, I recommend reading it in full, since it details all the nuances and step-by-step photographs.

Now I have prepared for you several recipes with yeast dough - these are delicious yeast pies with different fillings, sweet pastries and buns. Honestly, the procedure is always the same for such recipes, so I decided to describe in detail the process of how to make yeast pastry dough for pies in a sponge way. I remember how I was afraid to cook anything from yeast dough at all, it was heavy, clogged, and the baked goods did not rise. It is a pity that in my youth there was no Internet and I had to learn from my mistakes.
Yeast dough can be rich, plain and flaky. What is the difference? We will not discuss puff pastry now. From ordinary yeast dough, such products as bread, pizza, tortillas, fried pies, pies in the oven with salty filling, etc. are prepared. And sweet buns, cheesecakes, rolls, pies with fruits, with jam, etc. e. These are different recipes and differ in the amount of baking.
In simple words, baking is eggs, sugar, butter, sour cream. Since such components complicate the process of yeast reproduction, then yeast is added to the butter dough by 1.5 - 2 times more than in the usual one. In other words, the richer the amount of baking, the more you need the amount of yeast. The dough for Easter cakes is considered the most rich dough.
Butter yeast dough for buns, as a rule, is prepared in a sponge way, it all depends on the amount of baking. Yeast needs to be given a "push" to start working, but I'll talk about this a little later. Okay, something I delved into the theory, I will tell you more clearly and in practice I will show the whole process. The recipes are different, all slightly different in the amount of sugar and butter, but the processes are always the same.
Recipe for butter yeast dough on dough
Here's my tried and tested favorite yeast dough recipe that I always use to make sweet yeast pies and tarts:
Dough ingredients
- Milk - 250 ml
- Yeast - 30 g (or 11 g dry)
- Sugar - 1 tbsp. a spoon
- Flour - 3 tbsp. l. with a slide
Ingredients for baking
- Sugar - 100 g
- Eggs - 2 pcs.
- Butter - 100 g
- Salt - a pinch
- Vanilla sugar - optional
- Vegetable oil - 1 table. a spoon
- Flour - 3 cups (250 ml volume) = approximately 450 g flour
Preparation
First, we prepare the dough. Add a spoonful of sugar, yeast (see the amount according to your recipe) and a little flour to a warm liquid 35 - 40 ° C. Stir everything to dissolve the yeast and sugar.

I usually cook with milk, while the baked goods are soft, airy, sometimes with kefir or sour milk. There is an opinion that pastries do not stale for a long time on kefir. In practice, it was not possible to check, usually the sweets do not stay stale for a long time, they are eaten quickly. Sometimes, when there is no milk or kefir, I take a glass of water and dissolve a couple of tablespoons of sour cream.

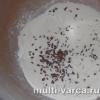
Leave the dough in a draft-free place for 30 minutes. During this time, the yeast will begin to "work" and you will get such a magnificent "hat".

Later, the cap will begin to fall off, and such bubbles will appear. This means that the dough is ripe. Now, in a separate bowl, mix all the baked goods: eggs, sugar and soft butter. You do not need to whip strongly into foam, just stir so that the components combine.

When the dough has come up, combine the dough with the baking and mix. If the recipe provides for the addition of vanilla sugar, salt, then add it at this moment.

Sometimes in books they write that when kneading dough, liquid components are added to dry ones, make a slide out of flour, make a hole in it and ... I don't do that. Explaining! Different flours work differently and absorb liquid, so I gradually add the sifted flour one glass to the liquid and stir with a spoon in one direction.

For some reason, it is believed that the yeast dough should be mixed in one direction. In general, hostesses have accumulated a lot of warnings and recommendations: you need to cook in a good mood, with love, and not on critical days. Yes, the mass is alive, but what, I wonder, does it make a difference to the yeast what days the hostess has?


To prevent the dough from clogging up with flour and sticking to my hands, I use vegetable oil. I just grease my hands with vegetable oil and knead. It doesn't stick to my hands either, and I don't add extra flour. You need to knead for about five minutes to make it smooth, elastic, but soft and fluffy. The consistency must be learned to determine intuitively, it is difficult to describe, well, like the soft part of the earlobe. After a couple of successful kneading, your hands will remember what density should be. I wrote the approximate amount of flour in the recipe, but sometimes it turns out to be not enough. For pies and pies, I knead a soft dough, and for yeast rolls, a little denser. Our yeast dough is mixed, but it's not ready yet. I put the mixed smooth lump in a bowl or saucepan, cover it with a clean towel, put it in a warm place for 1 - 2 hours.


Now you can knead it, knead it again (do not add flour) and you can use it, make various pretzels-loaves from it. The yeast dough for pies can be set twice. After the first dump, I dress it, put it on the proofer and bake it.
- Milk (or other liquid: kefir, yogurt, whey) for dough should not be overheated, otherwise the yeast will burn and will not rise. Try the temperature in such a popular way as checking the formula before giving it to the baby - drop a drop of the warmed liquid on your wrist, if not hot, then that is what you need.
- To make the dough fluffy, light, the quality of the flour is important. Choose flour of the highest grade and be sure to sift it. Pastry chefs advise sifting the flour twice to enrich it with oxygen.
- The butter should be at room temperature, you can melt it, but the butter should not be added to the dough hot.
- Butter can be substituted with margarine or a vegetable-butter mixture.
- Be sure to pay attention to the expiration date of the yeast, it must be fresh. As, however, all products.
- If you have kneaded the dough, and the mass does not fit in any way, put it in the refrigerator for 20 minutes, and then in a warm place. The temperature drop should "wake up" the yeast.
- Yeast dough is afraid of drafts and noise, the best place for it is the oven. I don't heat up the oven, I just put the bowl in there and wait.
- In order not to oversaturate the dough with flour, instead of burning your hands and the table, grease with vegetable oil while kneading. Vegetable oil should be odorless and very slightly. Then the buns from yeast dough will be fluffy, airy.
At what temperature should yeast dough be baked?
- Usually it is necessary to bake at a temperature of 160-180 degrees. It is advisable to use the "Pastry baking" mode, this mode is available in modern models.
- Place baked goods in the middle. If you bake at a very high temperature, then the product may turn out to be fried on the outside and damp on the inside.
- Before cutting dough products, turn on the oven to warm up. At this time, they put the blanks prepared for baking on a proofer so that they rise in front of the oven. After 15-20 minutes, the products are smeared with whipped egg yolk and sent to the oven.
- At first, in no case should you open the oven, otherwise the dough will sink from the flow of cold air. When the dough is already browned and seized with a crust, then you can already open the door and move the baking sheet or the baking dish.
- The baking time is usually from 20 minutes to an hour, depending on the size of the baked product. Small pies, for example, can be baked in 25 minutes, a roll with poppy seeds for about 40 minutes, and for a loaf it will take even longer.
Dear readers, hostesses, do not be afraid to cook from yeast dough, just a couple of practices and you will learn to please your loved ones with awesome aromatic lush pastries. Hope this sweet yeast dough recipe helps you. Next, I plan to teach you how to cook yeast dough for pizza and for fried pies, whitewash, do not miss new articles.