Paper cupcake tins. How to bake Easter cakes in paper molds, do you need to grease the molds? Preparing the dough and baking Easter cake in paper form: a delicious recipe
A paper baking dish is a unique modern invention, without which many housewives cannot imagine preparing delicious desserts. Universal cups vary in size, density and color, but they are all multifunctional, environmentally friendly and cheap. From this article you will learn everything about paper baking dishes: how to use and what their advantages are.
Muffin and cupcake tins
There are many types of small pastries made from dough. The most convenient ones are those made of thick paper (it can be corrugated or smooth), since you can bake cupcakes directly in them. If the paper baking pan is made of thin material, then it should first be placed in an aluminum or silicone mold and only then should the dough be placed into it. Prepare delicious muffins with us using a simple recipe:
- In a suitable saucepan, heat 100 grams of butter, 40 grams of chocolate and two tablespoons
- Beat 130 grams of sugar with three chicken eggs.
- Combine four tablespoons of cocoa, a glass of flour, 60 grams of grated chocolate and a teaspoon of baking powder.
- Mix all prepared ingredients thoroughly and then place the dough into small paper molds. Please note that the cups should only be filled 2/3 full.
Bake the treat in the preheated oven for about 15 minutes. Ready-made muffins can be decorated with icing or powdered sugar. When they have cooled a little, serve them with tea or coffee.

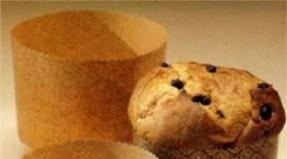
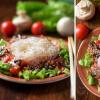
Baking Easter cakes in paper form
Even in the last century, our mothers and grandmothers baked Easter cakes in tins or despite all the difficulties that accompanied the cooking process. Nowadays, paper baking pans have replaced them, which have a number of advantages. Firstly, it is quite dense and does not require additional support. Secondly, the cake will never burn in it, and the paper will not get wet during the cooking process. And thirdly, you can easily decorate the finished dish by cutting the paper to the desired mark. Baking Easter cakes in paper form will not create any difficulties for you. To see this, prepare the dish according to our recipe:
- Lightly heat one and a half glasses of milk and dissolve 40 grams of dry yeast in it.
- Add 500 grams of sifted flour to the bowl and mix.
- While the dough is rising, separate six eggs into whites and yolks. Beat the yolks with sugar (a glass or one and a half is enough) and vanilla (to taste) until thick and dense foam.
- Combine all the products, add another 300 grams of soft butter, a little salt and 500 grams of flour.
- Knead the dough and leave it in a warm place until it increases in volume. Add washed raisins, chopped candied fruits and nuts to the risen dough.
After this, you can start baking. Please note that the paper baking pan should only be filled one-third full. When the dough has risen to half, the future cake can be placed in a preheated oven.

Baking Easter in paper forms
To prepare another irreplaceable dish for a light meal, you will also need disposable forms. Thanks to them, the dish will look beautiful on your table. Recipe:
- Rub one kilogram of fresh cottage cheese through a sieve twice.
- Add two eggs, sugar to taste (0.5-1 cup), 100 grams of soft butter, vanillin and 200 grams of sour cream to a bowl. Beat the products for about ten minutes until they turn into a homogeneous mass.
- Add chopped candied fruits, raisins, nuts to Easter and mix everything well again.
- Line a colander with damp gauze, pour the curd mixture into it and place it on a pan of a suitable size. Place the structure in the refrigerator overnight.
The next day you will need a paper baking dish - press Easter tightly into it and place the dish on the festive table.

Conclusion
As you can see, disposable forms have become an integral part of our lives and have become indispensable assistants in the kitchen. They are suitable for both traditional and new ones - cupcakes and muffins. Make cupcakes in them, and use bright paper cups to decorate your favorite sweets.
Easter cakes are a traditional Easter pastry, which not every housewife will undertake to prepare on their own, because this process requires a lot of patience. Anything can fail: from products and recipes, and ending, banally, with a baking dish. And, if you have already chosen a successful Easter cake recipe, it’s time to puzzle over the choice of shape. Easter cakes are seasonal baked goods; we bake them only once a year, so only a few get special molds for Easter cakes. This is where disposable paper forms come to the rescue. The cost of such molds is relatively low. Sizes - for every taste, from giant Easter cakes to small and neat cupcake-sized ones. Plus, such shapes always look very nice. And the most important thing is that they do not need to be coated with oil or sprinkled with flour or breadcrumbs; Easter cakes in paper molds do not stick to the paper, bake perfectly and brown evenly both on top and on the sides. In this recipe we will tell and show how to bake Easter cakes in paper forms.Ingredients
- milk 2.5% – 250 ml;
- egg – 3 pcs.;
- butter – 100 g;
- sugar – 150 g for dough + 100 g for glaze;
- fresh yeast – 25 g;
- raisins (any other filling to taste) – 100-150 g;
- salt – 0.3 tsp;
- vanillin – 1 sachet (1 g);
- flour – 500-600 g;
- confectionery sprinkles - as needed;
- + disposable paper pans for baking Easter cakes.

Preparation
We begin kneading the dough by preparing the dough. In a bowl of suitable size, mix 2-3 tbsp. l. sugar (from the amount indicated on the dough), crumbled yeast.

Fill them with half of the slightly warmed milk. Stir until both ingredients are completely dissolved, then add sifted flour to the resulting mass - 3-4 tbsp. l. will be sufficient. Knead everything again until smooth and set the bowl aside until the volume of the dough has at least doubled.

This is the kind of hat you should get. Depending on the yeast, this may take from 15 to 30 minutes.

When the sponge “cap” has grown enough, mix sugar and egg yolks in a larger bowl. Egg whites do not go into the dough; without them, the cakes will turn out more airy, light and tender. We will use the whites to prepare the glaze, so it is better to store the whites in the refrigerator until needed.

Using a whisk (mixer), beat the yolks with sugar until a fluffy white mass is obtained, then add the remaining milk into the bowl. Add some salt to the dough. Add vanillin to it.

Stir the contents of the bowl, then add the sponge “cap”. Stir again until smooth.

And thicken the dough with sifted flour. Flour, since its moisture content may vary, is introduced carefully: 0.5-1 tbsp.

At this stage, the dough turns out slightly sticky, with a heterogeneous structure. It's time to add oil to it. The butter should be soft enough so that it mixes easily with the butter dough. Plus, while mixing in the oil, the structure of the dough changes right before your eyes. It becomes soft, plastic, homogeneous.

We round the kneaded dough and place it in any deep bowl, the walls and bottom of which should be greased so that during the rise the dough does not stick to anything. Cover the dough with film or a light napkin and leave to rise for about 1.5-2 hours.

After the first rise, knead the dough; after the second, it is ready for shaping.

Before shaping, the dough must be filled with filling. To do this, oil the work surface and rolling pin a little. Roll out the dough into a layer 1-2 cm thick; in fact, the size and thickness of the layer is not particularly important. Roll out as convenient. Sprinkle the layer with raisins.

We fold the layer 3-4 times, then roll out the layer again and sprinkle it with raisins.

We repeat the procedure until the number of raisins in the dough seems sufficient to you. After the last pouring, roll the dough again and round it into a ball. There is no need to knead anything, just round and divide the dough into the required size parts - so that a piece of dough fills the mold by 1/3.


And place the pieces in disposable paper molds. Such forms are convenient because they are made from already oiled paper, so there is no need to coat them additionally or sprinkle them with flour.

Let the dough in the molds rise somewhere to the edge of the mold, or about 1 cm short of it, no more. During the baking process, the Easter cakes will grow another 2-3 cm.

Now let’s move on to baking Easter cakes in paper forms, let’s look at the nuances in more detail.
Bake the cakes in an oven preheated to 180 degrees. It is better to cover the tops with foil or a sheet of baking paper folded in half. For the first 10 minutes we leave the temperature at 180 degrees, then reduce the heat to 160-170 degrees. and bake until the top is golden brown. Small cakes are baked in about 40 minutes, large ones in 1 hour. Baking times are approximate, as much depends on the characteristics of your oven. We check the readiness of the cakes by piercing them in several places with a skewer. Dry is a sign of a finished cake.

Leave the finished cakes until they cool completely, then cover with glaze. You can use your favorite recipe or use an egg white frosting (so that the leftover egg whites don't go to waste). To do this, beat the chilled whites with sugar until clear, relief patterns appear. Dip the top of the cake into the resulting glaze. It is not necessary to remove them from paper forms for this; I take some out, others leave. I leave the paper molds on and remove them before cutting the cake.

Immediately apply powder to the glaze in the desired quantities and leave the cakes for 3-5 hours so that the glaze dries. The thicker the layer of glaze, the longer it will take to set.

We serve Easter cakes (we give them as gifts, we treat them) right in the molds! Happy Easter to you!

There is less than a week left until Easter. The last and strictest week of Lent is underway - passionate. It's time to start preparing for the holiday and audit your kitchen equipment. Of course, many people already have metal or silicone molds in their household. Some people are used to using paper ones. And someone thinks that “I still bake once a year,” I’ll make do with it. Or perhaps the reader of our article is baking his first Easter cakes and has not yet had time to acquire the necessary equipment.
What should I use to bake Easter cake?
1. Metal cake pan with detachable or non-stick coating, pastry ring for small diameter cakesThe stores offer a wide selection of such forms. And individually and as a set, and in different sizes. You should look in the kitchenware departments or large hypermarkets such as Auchan. The molds are not greased before baking. To make it easier to remove the finished cake, you can lay a circle of suitable diameter from baking paper on the bottom. Of the following, this is the most expensive option. If you plan to bake 1-2 Easter cakes, you will need to purchase several sets, and this is expensive. Or bake one at a time, dragging out the process for the whole day. Or combine several methods. For example, non-stick molds + homemade or paper. In addition, the molds are of non-standard size and, as a rule, are not suitable for baking charlottes and other simple homemade pies and muffins. You will have to store the “wealth” for a whole year until next time.

It is easy to then remove the finished cake from the springform pans.


You should also take care of the “clothing” of the Easter cake. Easter cakes decorated with ribbons, strips of paper, wrapped in lace or in paper “baskets” look very beautiful.


2. Silicone molds for baking Easter cakes
Just like metal ones, they are sold in different sizes, in sets and individually. The new form is greased with vegetable oil only once. There is no need to lubricate or seal anything in the future. Easter cakes are convenient to take out. I myself rarely use silicone, but friends who use such “helpers” say that over time they become deformed.

This option solves several problems at once:
1) price - the forms are very affordable. Retail from 4 rubles/pcs. Before Easter they are sold in any supermarket. If you buy in larger quantities, you can find even cheaper ones.
2) you don’t need to think about “where to store your wealth for a whole year.” The forms are disposable - throw it away and forget it.
3) What to wear for Easter cake. Easter cakes are served directly in the molds. The pattern can be chosen to suit your taste. There are traditional ones with temples and patterns, as well as brighter ones with funny designs.

Paper cake pans are made of special thick paper and have a reinforced bottom. They do not deform when baked and do not need to be kept in shape. They don't get wet. They easily come away from the cake without leaving any traces. There is no need to grease the pan before baking.

For me personally, this is the most convenient option.
4. Pots and ladles of suitable diameter.
By the way, I also started with this option :-) I unscrewed the plastic handles from the saucepans, baked, then screwed them back. Some, especially suitable in size, have since remained without handles.

It is better not to grease the sides of the pan, as this will make the dough rise worse, sliding along the surface and the product will turn out less fluffy. It is recommended to lay a circle of parchment of the required diameter on the bottom. Cool the finished cake in the pan, then turn it over. If the cake does not come off, carefully go along the edge with a knife.

I was writing an article and remembered that my husband told me how he and his brothers baked Easter cakes as children. Mom kneaded the dough in a large five-liter saucepan and left to run errands. She asked the children to put the Easter cakes in the oven. They did! The entire five-liter saucepan! :-) They say that it was even baked. Then we ate such a big Easter cake :-)
5. Cans
It can be difficult to find a ready-made silicone or metal mold of the right size. It is not surprising that many housewives like the height and diameter of Easter cakes baked in cans. Plus, they don't cost anything. On the eve of the holiday, it is enough to stop throwing away suitable jars. from beans, peas, coffee, baby food.

When baking, line the sides of the pan with a strip of baking paper or foil. It is better to also put a paper circle of a suitable diameter at the bottom.
6. Glass jars and glasses

I won’t lie, I’ve never tried this method and I’m not sure of its safety. However, while I was selecting a photo, I found many options online for buns and muffins in glass jars and glasses. In any case, be careful!

Perhaps one of the readers has baked Easter cakes, buns or muffins in this way and will share with us the nuances. Are the jars/glasses regular or special?
7. Homemade foil molds.
I rolled up a pastry ring for baking in a similar way. For constant use, it is cheaper to buy a ring. But if you bake Easter cakes once a year, perhaps this option will be suitable.

In short, you take a jar of the desired size and wrap it in foil, folded several times. Press the bottom and carefully remove the base. You can see the process in detail with step-by-step photos.
8. Homemade paper forms
I found several options online. Like this:

Let me remind you that this is just an idea. And with a 100% guarantee, I cannot promise that the mold will not fall apart during baking or will not stick. I would use thick cardboard lined with baking paper.
I also came across this option. It seems more reliable to me.

The manufacturing process is described.
9. Cupcake pans
And you don’t have to bake a traditionally shaped Easter cake. You can make portioned cakes in cupcake molds (paper or silicone). To be honest, it is not necessary to bake yeast cake at all. Any festively decorated cupcake will do.


10. Bread maker/multi-cooker
You can also bake Easter cakes in a bread machine or multicooker without additional molds.
You can see the recipe for the slow cooker.

I hope you find a suitable option for yourself! Or maybe they came up with something else. Share your finds in the comments! Which method do you prefer?
The holiday chores are about to begin... Some are already rummaging through their notes, bringing out old, time-tested and experience-tested recipes for Easter cakes, while others, on the contrary, are looking for new recipes, asking them from friends, leafing through culinary magazines and scouring the vastness of the world wide web. An audit of spices and seasonings has been carried out, candied fruits, nuts and dried fruits have been purchased... It's just a matter of little things - we need molds for baking Easter cakes.
Our housewives are divided into two categories: those who prefer to use unsightly homemade forms, tested in practice, and those who would rather go and buy a new, beautiful, safe and practical form in the store. All types of Easter cake molds have their advantages and disadvantages, and therefore the Culinary Eden website offers you a short overview.
 First, let's turn our attention to the forms sold in stores. The huge variety of shapes from a variety of materials is literally dizzying. Therefore, before you go to the store or market to buy new cake pans, you need to decide for yourself how often you will use them.
Kulich is a special product, that’s why it needs a special form; you can’t prepare ordinary baked goods in it. Therefore, many housewives follow the path of least resistance and buy ready-made paper forms for Easter baking. These forms have many advantages. Paper forms are easy to use - just fill them 1/3 full with dough and leave to proof. Before baking, paper pans do not need to be pre-greased or lined with oiled paper. After baking, Easter cakes do not need to be removed from the molds - in paper forms, the baked goods do not become soggy, they cool evenly, and the patterns on the outside of the molds are additional  decorating Easter baked goods. Paper molds come in a variety of sizes; you can bake both mini Easter cakes weighing 200 grams and large kilogram Easter cakes. Paper forms are sold individually or as a set. When buying a set, remember that you need to place the large cake deep into the oven, and the small ones closer to the door, this will make it easier for you to control the baking process and make it easier to remove small cakes without disturbing the big one. To bake Easter cakes in paper forms, it is advisable to reduce the temperature from the traditional 180ºC to 160ºC. There is only one disadvantage to paper forms, but it is significant - Easter cakes in paper forms will not be tall. For those for whom authenticity is not so important, paper forms are quite suitable.
 There is another option for lightweight disposable forms - these are aluminum foil forms. A slight difference between these forms and paper ones is that you still have to grease them from the inside with vegetable or butter (some use rendered pork fat) and remove the cakes almost immediately after baking, as they can become damp when cooling. Forms for Easter baking from foil also differ in shape (sorry for the tautology). If a classic Easter cake should look like a round tall bread with a cap on top, then in aluminum forms it turns out to be trapezoidal in shape with a narrow bottom and a wide top, like a cupcake.
 Some housewives use corrugated metal cake pans to bake Easter cakes. Strictly speaking, the result is not quite a cake, since in shape (but not in taste!) it is exactly a cake - with corrugated sides, a narrow bottom and a wide top, and you have to decorate it by turning it upside down. If this approach to the idea of Easter cake is possible for you, bake in these forms, just remember that in order to avoid burning and sticking, the bottom and walls of the form must be thickly greased with softened butter and sprinkled with fine breadcrumbs.
 The industry also produces special metal molds for Easter cakes. These are non-stick pans and springform pans. Forms with non-stick coating are somewhat reminiscent of multicooker bowls - low, made of light, durable alloy and coated on the inside with a special composition. There is no need to grease the molds before placing the dough. In order for the cake to rise higher, fill the molds not to 1/3 of the volume, but to 2/3, just make sure that the top does not burn. To do this, cover the top of the cake with white paper immediately after it has browned.
 Springform pans for Easter baking are similar to biscuit pans, only much narrower and taller. The principle of working with such forms is the same as with sponge cakes: the bottom and walls need to be lined with oiled paper, and after baking, carefully remove the sides and let the cake cool completely. Split pans are good for baking fluffy, airy cakes that tend to collapse if you try to remove them from a regular pan.
 Such an embarrassment will never happen with baked goods prepared in silicone molds. Silicone is the latest fashion and the last word of science in the kitchen. Baking in silicone molds brings only joy and pleasure, because they do not need to be pre-greased or covered with oiled paper; Easter cakes, even the most delicate ones, literally jump out of the mold without losing their attractive appearance, and even if an oversight happens and the cake burns, it will not you will have to tear it off the walls and bottom. Silicone molds for Easter cakes come in tall sizes - just what you need for a real Easter cake. The price of springform molds and silicone molds is about the same, but the advantages of silicone often outweigh.
For housewives with children, small-sized molds on one sheet are suitable - such molds are often bought for baking small cupcakes. It’s fun for the kids, it’s comfortable for mom, and these Easter cakes are great for gifts.
 But sometimes it can happen that you think about Easter baking molds at the last moment, when everything is either sold out, does not fit the mold, or the stores are simply closed. In this case, we use our old, proven “forms” made from a wide variety of containers. Our people are very creative, you can’t argue with that, and in support of this statement, our site provides several options for homemade products that successfully replace specialized molds for Easter cakes for our cooks.
The most common form used for baking Easter cakes is canned food cans, and their volume can vary from minimum to maximum. Small forms are good for children and gifts for relatives and friends, large ones are good for a festive feast. Tin cans should be opened with a special canning wrench to avoid having to break off jagged edges. The bottom and walls of the molds must be lined with oiled paper or special baking paper - this way you will protect your baked goods from sticking, smooth out the corrugated sides of the cans and you can increase the height of the cake by extending the paper above the walls of the mold.
 Another proven option is old pans with metal handles. Pans can be enameled, metal or aluminum, but the latter must be lined with oiled paper on the inside. Easter cakes in pans turn out squat, which can be easily corrected by releasing the paper above the level of the walls.
For lovers of small Easter cakes, there are steel or enamel “camping” mugs. The height of the cake can also be adjusted by increasing the walls with paper. The mugs are easy to remove from the oven, as they have fairly large handles.
 If you don’t have any pans or tin cans, you can make cake pans from foil and baking paper. To do this, you will need a glass jar of the desired volume from 500 ml to 1.5 liters, a roll of food foil, baking paper and metallized tape or a stapler. Place foil on the table, baking paper on it and another layer of foil on top of it. Place the jar, leaving 5-7 cm at one end to form the bottom, and roll it up in foil and paper. Seal the joint with metallized tape or remove the resulting tube and secure the joint with a stapler. Fold the foil to form the bottom, and also seal it with tape or secure with a stapler. Cut off the excess height and the shape is ready. Cover the bottom and walls with oiled paper and fill the mold with dough to 1/3 of the volume. You can also make paper forms using the same method.
Some craftsmen bake Easter cakes in clay or ceramic flower pots, lining the inside with foil or oiled paper. If you have glass jars without hangers, you can bake the cake in them. And if you just immediately roll up the baked Easter cakes with sterile lids, then your Easter baked goods will last for about a year (but this is an option for particularly thrifty owners).
These are the different Easter baking dishes. It's your choice!
Happy Sunday and love to you!
Larisa Shuftaykina
Today, many housewives prefer to use paper cupcake pans. They have many advantages:
- low price;
- large quantities in one package;
- ease of use (no need to wash);
- made from environmentally friendly material;
- are able to withstand any temperature, which allows you not only to bake food in them, but also to freeze them (the temperature range can be from -40ºС to +220ºС);
- the dough bakes in them evenly, quickly and does not burn;
- the possibility of cooking in them in a microwave oven;
- You can take cupcakes in them to nature or for a walk;
- have an attractive appearance.
How to bake cupcakes in paper forms?
Because paper muffin pans are designed for one-time use, they may not bake as smoothly as silicone or metal muffin pans. Therefore, it is recommended to prepare the dough with a thicker consistency, put 2-3 molds into each other and fill them halfway with dough. You can also recommend using special metal stands.
Many people have a question: do paper muffin tins need to be greased? Thanks to the material from which they are made, the molds do not need to be lubricated with oil. The products do not burn in them. In addition, you can save vegetable oil.