Recipes for making the perfect baking dough. How to make simple dough quickly - recipes for smart housewives
This is a wonderful dough, just a lifesaver. Cooking it is simple, probably 10 minutes is a lot... and the result is incredible, soft and at the same time crispy, flaky and tasty. You don’t need to layer or roll anything out, you don’t need a lot of movements. I just mixed everything one by one and put it in the refrigerator. If you are going to cook something for several days, it will be perfectly preserved in a bag in the refrigerator; if you are preparing for future use, you can put it in the freezer. Another advantage of it is that the ingredients are approximate, we can easily replace sour cream with kefir or yogurt, add flour if it sticks a little to our hands. We also use any fat or combine it, you can take margarine, butter, lard, whatever. Rolling out is very easy as the dough is soft and elastic. From this norm you will get puff tongues with a caramel crust, 4 baking sheets. My friend prepared kurnik from this dough and said that she would never cook with store-bought dough again, it turned out much tastier. The recipe is from my mother’s culinary notebook, for which I thank her very much.
Dough for baking in the oven can be rich, puff pastry or shortbread, sweet or unleavened, yeasted or yeast-free - there are a great many recipes. Ultimately, everything is determined by the specifics of the dish and its place on the common table. We have put together five of the most successful, in our opinion, recipes that will help diversify the menu and will pleasantly surprise you with their originality, simplicity and taste.
This recipe is suitable for cooking with potatoes, liver, mushrooms and other hearty fillings. The pie will turn out soft, tender, with an appetizing crust. You will need:
First, mix the flour with baking powder and sift through a fine sieve. Pour sour cream into a large bowl, add egg and salt, beat thoroughly until smooth and mix it with melted margarine. To make the taste of the pie more vibrant and rich, you can use butter instead of margarine. All that remains is to add flour, knead the dough and put it in the refrigerator for 45-60 minutes. Two thirds will serve as the bottom crust, one third will cover the filling on top. You can leave a little dough for decoration.
For a pie with sweet filling
This melt-in-your-mouth sponge dough will be best combined with fruits and berries: pears, plums, apricots, currants. An excellent filling would be thick or jam, chocolate or condensed milk, so the recipe can safely be called universal. The following ingredients are needed:

Separate the whites from the yolks and put them in the refrigerator. Gradually mix the melted butter with sugar, vanilla sugar, and yolks. Add sour cream and mix with a mixer until completely homogeneous. Gradually add the flour mixed with baking powder, stirring constantly. In a separate bowl, beat the egg whites until they form a stable white foam, add them little by little and fold them into the dough. If the filling is fruity, you can limit yourself to one cake layer, lightly pressing pieces of fruit into it. The dough, rising in the oven, will envelop them with crispy crusts.
If the filling is soft, bake the sponge cake separately, cut it into two layers, going deeper towards the center, and place the filling between the layers.
1. Always add diluted potato starch to the dough - buns and pies will be fluffy and soft even the next day. The main condition for delicious pies is fluffy, well-risen dough: the flour for the dough must be sifted: foreign impurities are removed from it, and it is enriched with oxygen .
2. To any dough (except dumplings, puff pastry, choux, shortbread), that is, dough for pies, pancakes, bread, pancakes, always add semolina to half a liter of liquid (about a heaping tablespoon). The nuns taught: “Previously, the highest quality bread was made from semolina. It did not dry out for a long time and was lush. Now there is no grit. Now add some semolina and you will always have good baked goods.” This advice is so priceless.
3. Add half a glass of mineral water to the dough, in addition to milk. Dilute a teaspoon of soda in half a glass of water and lightly quench it with citric acid or vinegar. The baked goods really turn out great. Even the leftovers the next day are fluffy.
4. There should be no draft in the room where the dough is cut: it contributes to the formation of a very dense crust on the pie.
5. When kneading yeast dough, all products should be warm or at room temperature; products from the refrigerator will slow down the rise of the dough.
6. For yeast products, the liquid should always be heated to 30-35? C. Since yeast fungi in a liquid that has a lower or higher temperature lose their activity.
7. When you knead the dough, your hands should be dry.
8. Before putting the product in the oven, let it rise for 15-20 minutes. Allow the dough to proof completely before baking. If the proofing is not complete, it does not rise well and the pies do not bake for a long time.
9. Bake pies on a baking sheet over medium heat so that the filling does not dry out.
10. It is best to add unmelted butter to the dough (yeast and unleavened dough). Since melted butter worsens the structure of the dough.
11. Pies made with milk are more tasty and aromatic, the crust after baking is shiny with a beautiful color.
12. Yeast for dough should be fresh, with a pleasant alcoholic smell. Test the yeast in advance. To do this, prepare a small portion of the dough and sprinkle with a layer of flour. If no cracks appear after 30 minutes, then the quality of the yeast is poor.
13. If there is excess sugar in the dough, the pies quickly “brown” and even burn. The fermentation of yeast dough slows down, and the pies turn out less fluffy.
14. Fats, softened to the consistency of sour cream, are added at the end of kneading the dough or when kneading it, from
This improves the fermentation of the dough.
15. To make the finished pies more tender and crumbly, add only yolks to the dough.
16. Tall pies are baked over low heat. This way they cook evenly.
17. The dough for a pie baked on a baking sheet is rolled out as thin as possible so that the taste of the filling can be clearly felt.
18. To keep the bottom of the pie dry, lightly sprinkle the bottom layer of the pie with starch, and then add the filling.
19. Neither the dough nor the dough should be allowed to rest, as this causes a deterioration in the quality of the dough. 3 hours is enough, but be sure to keep it warm.
20. Yeast dough pies can be greased with milk and, if desired, sprinkled with salt, poppy seeds, and caraway seeds.
21. Covered pies are brushed with beaten egg, milk, and sugar water before baking. Thanks to this, an appetizing gloss appears on the finished cake. The best shine is obtained when lubricated with yolks.
22. Pies that are sprinkled with powdered sugar are also greased with butter. It gives them a pleasant aroma.
23. Pies brushed with egg white acquire a shiny golden brown crust during baking.
24. The more fat and less liquid in the dough, the more crumbly the products are.
25. If you add baking soda to the dough, the cake will turn out a darker color. And with an unpleasant smell.
26. Roll out the thin dough easily by wrapping the rolling pin in a clean linen rag.
27. If the dough is too wet, place a sheet of parchment paper over it. And roll it straight through the paper.
28. Shortcrust pastry pies should be removed from pans when cooled. Do not forget.
29. Before adding raisins to the dough, they need to be rolled in flour.
30. Salt is always added to flour only when the dough has already fermented.
31. The more fat and less liquid in the dough, the more crumbly the products are.
32. If the dough has already risen and you don’t have time to put it in the oven, cover the dough with well-moistened paper. But first shake off the water from it.
33. The more fat and less liquid in the dough, the more crumbly the products are.
34. It’s better not to cut a hot pie. But if this is necessary, you need to heat the knife in hot water, quickly wipe it and cut it.
35. If the cake does not come off the baking sheet, separate it from the baking sheet with a thread.
Irina Kamshilina
Cooking for someone is much more pleasant than cooking for yourself))
Content
Do you want to pamper your household with piping hot fragrant homemade baked goods, but you have neither the time nor the desire to tinker with yeast? Then prepare something original using yeast-free dough, because it is also perfect for various baked goods: you can use it to bake a delicious oven-baked or luxurious pie with any filling, as well as aromatic fried chebureks, crumpets, buns. The main thing is to know some of the subtleties of kneading different types of dough without yeast, which you can learn about below.
How to make dough without yeast
Preparing a yeast-free baking base is very easy and quick, because you don’t need to give it time to rise - you just have to knead it and you can immediately start shaping the products. True, in some recipes it is better to use chilled dough, but, as a rule, this process does not take more than 20-30 minutes. Do you think baked goods made from yeast-free dough cannot be fluffy and airy? How can it, because the main ingredient responsible for raising products in the oven or in a frying pan is baking soda, which will give them the desired fluffiness.
Soda is not used only for simple unleavened dough; other types of baking base without yeast require its presence in the composition. Depending on the main ingredients used in a particular recipe, quick dough without yeast is divided into the following varieties:
- Fresh– kneaded from a minimum amount of ingredients: water, salt, flour, although some recipes include an egg in the dough. Universal for dumplings, dumplings, pasties, pizza, noodles.
- With kefir, milk, yogurt or fermented baked milk– the lightest, softest and most tender dough for pies without yeast. Due to the reaction of soda with the main liquid milk ingredient, such baked goods turn out fluffy and airy.
- - a type of yeast-free base, which assumes the presence in the baking composition of eggs, sugar, sour cream, fats of vegetable or animal origin. Suitable for baked pies with sweet fillings, muffins, biscuits.
- Custard– prepared by heating and mixing the main ingredients over a fire. Unleavened custard base is used for dumplings, pasties, and pies. Eclairs, cakes, and profiteroles are baked from the variety with fat and eggs.
- Puff– thanks to a special kneading technology and the presence of butter in the recipe, baked goods made from a puff pastry without yeast base are tender, porous, and crumbly.
- – a yeast-free base made of flour and sugar with added fat, but without baking powder. Due to the large amount of fat, baked goods made from it are crumbly, crumbly, and unusually airy. Suitable for cookies, tarts, cheesecakes.

Yeast-free dough recipe
Every experienced housewife in her culinary arsenal has a proven good recipe for dough without yeast for different types of baking. If you are just starting your journey to the heights of confectionery art, you can use the step-by-step recipes below for yeast-free bases with photos, which are suitable for both delicious pies with meat, fish, vegetables or other savory fillings, and for fragrant buns with jam or berries, cheesecakes, cookies and even pizza.
On kefir
- Cooking time: 30 minutes.
- Number of servings: for 1 pie or for 18-20 pies.
- Calorie content of the dish: 215 kcal.
A yeast-free base for baking with kefir is considered an ideal dough for fried pies, pies and pies in the oven, buns, pizza, and bread. Many call it lazy, because this option is characterized by quick preparation and a minimal set of ingredients. Beginning housewives can try the following simple and very easy recipe.
Ingredients:
- kefir – 400 ml;
- baking soda – 1 tsp;
- salt – 2/3 tsp;
- sugar – 1.5 tbsp;
- chicken egg – 1 pc.;
- vegetable oil – 80 ml;
- wheat flour – 0.5 kg.
Cooking method:
- Pour kefir into a deep container.
- Add soda and mix thoroughly so that it is well quenched in an acidic environment.
- Place salt, sugar, egg, vegetable oil in a bowl. Stir with a fork along with kefir until smooth.
- Begin gradually adding the pre-sifted flour, constantly stirring the mixture with a fork.
- When it becomes difficult to mix with a fork, switch to kneading by hand until you get a soft, not very stiff dough.
- Gather the mixture into a lump, wrap in cling film and leave for 20 minutes.

With milk
- Cooking time: 25 minutes.
- Number of servings: 1 serving.
- Calorie content of the dish: 236 kcal.
An excellent analogue of kefir yeast-free base for pies is dough without yeast using milk. The absence of acid in the liquid does not spoil it at all, but makes it more tender, crispy and aromatic after baking. The kneading technology differs slightly from the previous version in the order of mixing the products.
Ingredients:
- wheat flour – 3 tbsp;
- salt – 1/3 tsp;
- soda – 1/3 tsp;
- chicken egg – 1 pc.;
- vegetable oil – 2 tbsp;
- milk – 1 tbsp.
Step-by-step preparation:
- Heat the milk to 35-40 degrees.
- Sift all the flour into a deep bowl and make a well in the top.
- Add salt and soda.
- Beat in the egg, pour in the vegetable oil and stir.
- Then pour warm milk into the egg-flour mixture in a thin stream.
- Begin to gently knead the dough in the bowl using a silicone or wooden spatula, then transfer it to a floured work surface and continue kneading with your hands. The mass should be soft, elastic and manageable.
- Cover with a thin, clean towel and leave for 10-15 minutes.

Yeast-free pizza dough
- Cooking time: 8 minutes.
- Number of servings: 2 servings.
Do you want to pamper your family with a delicious and interesting dish? Why don't you make some pizza for dinner? Different types of yeast-free bases are suitable for it, but it will give it not only an impeccable taste, but also help make the crust thin and crispy, like in a real Italian restaurant. The main thing is to strictly follow the following recipe.
Ingredients:
- premium wheat flour – 2 tbsp.;
- salt – 0.5 tsp;
- vegetable oil – 1 tbsp;
- boiling water - 1 tbsp.
Cooking method:
- First, sift the flour and mix it with salt.
- Then add vegetable oil to a small hole and stir.
- Pour a glass of boiling water into the dry base, then quickly mix with a wooden spatula.
- After two minutes, the mass is transferred to the work surface and the dough is kneaded, which remains manageable, but does not stick to your hands.

Butter
- Number of servings: 1 serving.
- Calorie content of the dish: 261.5 kcal.
Yeast-free butter mixture is perfect for baking muffins, cupcakes, sponge pies and other sweet dishes intended for dessert. The necessary fluffiness for baked goods is provided by soda or baking powder, which is not afraid of all the “heavy” ingredients in the composition - sugar, eggs, fats. This yeast-free base turns out incredibly light, sweet, and aromatic.
Ingredients:
- eggs – 3 pcs.;
- sugar – 2/3 tbsp.;
- drinking yogurt – 0.5 tbsp;
- margarine – 75 g;
- salt - a pinch;
- baking powder – 1 tsp. with top;
- flour – 2.5 tbsp.
Cooking method:
- Pre-sieve the flour, mix it with salt and baking powder.
- Melt and cool the margarine slightly.
- Beat the eggs with sugar until stiff foam using a whisk or mixer.
- Add fat and drinking yogurt (or other fermented milk product) to the sugar-egg mixture.
- While beating the liquid at minimum speed, gradually add the dry mixture, bringing the consistency of the mass to a thick, homogeneous state.

Puff
- Cooking time: 3 hours.
- Number of servings: 1 serving.
- Calorie content of the dish: 272 kcal.
If you love puff pastries, but hate fiddling with dough, be sure to take into your cookbook a recipe for making the most delicate puff pastry with margarine and yogurt without using yeast. From this base you can bake puff pastries with different fillings, rolls of cream, baklava, or use it to make one large, beautiful pie.
Ingredients:
- flour – 0.5 kg;
- cream margarine – 250 g;
- chicken egg – 2 pcs.;
- salt – 1/3 tsp;
- curdled milk – 200 ml.
Cooking method:
- Grate the pre-chilled margarine onto a coarse grater directly into the sifted flour.
- Beat the eggs into a cup, add salt, beat a little with a fork.
- Add eggs and yogurt to the margarine-flour mixture, stir quickly until a thick, homogeneous mass is obtained, but do not knead.
- Transfer the lump into a plastic bag and place in the refrigerator for several hours.
- After a couple of hours in the cold, the base is rolled out with a rolling pin into a layer 2-3 ml thick, a small piece of butter or margarine is rubbed on top of it, folded into an envelope and rolled out again.
- To obtain a beautiful layered structure, you will have to roll out, sprinkle with grated butter and fold the dough into an envelope 5-6 times.

Yeast-free dough with cottage cheese
- Cooking time: 10 minutes.
- Number of servings: 1 serving.
- Calorie content of the dish: 311.5 kcal.
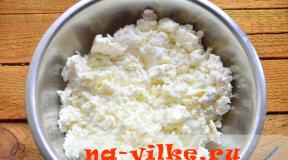
Products with a yeast-free curd base are tender, crumbly, and melt in the mouth, from which you can prepare bagels, cookies, rolls and other pastries with or without filling. The recipe is very simple and easy, even a young schoolgirl housewife can handle it. For a successful test, you need to choose the right cottage cheese - take small, soft, crumbly one, or first rub it thoroughly.
Ingredients:
- flour – 2 tbsp;
- sugar – 0.5 tbsp;
- cottage cheese – 200 g;
- soda – 1 tsp;
- salt - a pinch;
- sunflower oil – 75 ml;
- liquid sour cream – 75 ml.
Cooking method:
- Sift flour into a separate bowl and mix with soda.
- In a deep container, mix sugar, sour cream, salt, fat.
- Add cottage cheese to the previous ingredients and grind thoroughly.
- Gradually adding the dry mixture, knead a soft but not sticky dough.

What can you make from yeast-free dough?
Considering the fact that yeast-free baking base comes in many varieties, you can use it to prepare a huge number of tasty and healthy dishes. It can be:
- , berries, cottage cheese, vegetables;
- or other savory meat pies;
- and other types of baked goods with fish;
- fried pies, flatbreads;
- sweet buns, sochniki, cheesecakes;
- bagels, croissants, rolls;
- , brushwood;
- cupcakes, muffins, sponge cake layers;
- and many other delicious baked goods.
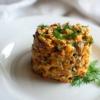
A pie with cabbage
- Cooking time: 50 minutes.
- Number of servings: 4 servings.
- Calorie content of the dish: 263 kcal.
A classic of the genre in Russian cooking is cabbage pie. The vegetable can be taken fresh or used fried, stewed or pickled. In any case, such baked goods will appeal to all cabbage lovers without exception. If you want to prepare a light yeast-free version, it is better to use liquid pie dough without yeast, with sour cream. You can use the following recipe.
Ingredients:
- cabbage – 250 g;
- butter – 40 g;
- spices - to taste;
- flour – 2 tbsp;
- sour cream - 1 tbsp.;
- chicken eggs – 2 pcs.;
- soda and salt - 0.5 tsp each.
Cooking method:
- Finely chop the cabbage, simmer in a frying pan or in a slow cooker with butter until soft.
- Salt and add spices to taste.
- For a yeast-free base, mix sour cream, salt, soda, eggs and flour. Mix thoroughly.
- Grease a baking dish.
- Lay out all the cabbage, then pour in the prepared liquid base.
- Bake at 200 degrees for 25-30 minutes.

Fried pies
- Cooking time: 55 minutes.
- Number of servings: 5 servings.
- Calorie content of the dish: 286.6 kcal.
The most delicious childhood dish is always grandma's pies with different fillings, fried in a frying pan. Preparing such a delicacy will not be difficult, and it will not take much time. Moreover, yeast-free pies turn out to be no less tasty and fluffy than their counterparts prepared with yeast. The most affordable option is made from kefir dough. You can use completely different fillings according to your taste and discretion.
Ingredients:
- kefir – 350 ml;
- salt – 1 tsp;
- soda – 1 tsp;
- sugar – 3 tsp;
- sunflower oil for the base – 2.5 tbsp;
- flour – 400 g;
- oil for frying – 200 ml.
Cooking method:
- Mix kefir with sugar, salt and soda.
- Add oil, stir.
- Gradually add pre-sifted flour. Knead until you get a soft elastic mass.
- Cover with cling film and refrigerate for 25-30 minutes.
- Divide the entire lump into 20 identical balls.
- Roll out each ball not very thinly into a flat cake, put a tablespoon of filling in the middle, pinch the edges and form a pie.
- Fry the pies in a frying pan in a large amount of fat until golden brown on both sides.

Kurnik
- Cooking time: 1 hour 30 minutes.
- Number of servings: 6 servings.
- Calorie content of the dish: 412 kcal.
Another traditional Russian pie is kurnik. Our great-grandmothers prepared such a delicacy as a decoration for the holiday table and even instead of a wedding cake. The filling for it always remains the same - it is pre-cooked chicken meat. If desired, it can be mixed with other products - boiled eggs, rice, herbs, fried onions, mushrooms, each time adding new interesting notes to the taste of the dish. Below is a classic recipe with onions and mushrooms on a yeast-free milk base.
Ingredients:
- milk – 350 ml;
- salt – 1 tsp;
- soda – 0.5 tsp;
- chicken eggs – 3 pcs.;
- margarine – 100 g;
- flour – 4 tbsp;
- chicken fillet – 700 g;
- mushrooms – 300 g;
- onions – 2 pcs.;
- butter – 80 g.
Cooking method:
- Prepare the filling: cut chicken fillet, mushrooms, and onions into large cubes.
- Fry everything in butter until done. Salt and season with spices to taste.
- Melt the margarine. Cool it a little.
- Sift flour into a large bowl, add salt and soda, mix.
- Add the eggs and carefully pour in the heated milk. Mix with a spatula.
- Add margarine and knead the dough.
- Let the base stand for 20 minutes, covered with film or a clean towel.
- Divide the mass into two uneven parts - approximately 2/3 and 1/3.
- Roll out most of it with a rolling pin into a layer 1-1.5 cm thick. Place in a mold greased with vegetable oil, making low sides.
- Place the filling in the form of a slide on a yeast-free base.
- Roll out the rest of the mass into a layer 1 cm thick and cover the crust with the filling.
- Pinch the edges and make a small cross-shaped cut on the top of the pie with a knife.
- Place in an oven preheated to 180 degrees. Bake until golden brown for 40-45 minutes.

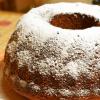
Pie with apples
- Cooking time: 65 minutes.
- Number of servings: 8 servings.
- Calorie content of the dish: 398.4 kcal.
All kinds of apple pies are very popular all over the world: strudels, pies, charlottes, tarts, classic poured pies. All are based on a yeast-free, light base with different ingredients. The most delicious and aromatic pie is made with apples and cinnamon in the shape of a shortcrust pastry basket. Such a simple, but incredibly tasty and beautiful treat is worthy of any holiday table.
Ingredients:
- flour – 2 tbsp;
- sugar – 300 g;
- chicken eggs – 2 pcs.;
- salt and soda - 0.5 tsp each;
- butter – 200 g;
- apples – 4 pcs.;
- cinnamon - two pinches.
Cooking method:
- Wash the apples, remove the peel, remove the seed pod. Then cut into small slices.
- Mix chopped apples with 100 grams of sugar and cinnamon, set aside.
- For the crust, mix soft butter with 100 grams of sugar and salt.
- Beat in two yolks and mix well.
- Add soda, gradually add flour. Knead into a soft, fatty mass.
- Leave for 15 minutes, covering with a napkin to prevent airing.
- Meanwhile, beat 2 egg whites with the remaining 100 grams of sugar into a strong foam.
- Grease the prepared round pan.
- Roll out the dough into a layer 1 cm thick, place in a mold, forming sides 2.5 cm high.
- Lay out the apples and then pour in the egg whites.
- Bake in an oven preheated to 200 degrees for about half an hour.
Video
Found an error in the text? Select it, press Ctrl + Enter and we will fix everything!The dough turns out better with eggs and also faster!
sachet (10-11g) dry yeast
1.5 cups warm milk
4 (or 2) tablespoons sugar
6 tablespoons +3-4 cups flour
2 eggs
a pinch of salt
2/3 cup (two thirds cup, or approximately 140 ml) sunflower oil
(this quantity of products makes about 20 pies) I think there will be those here who contemptuously reject dry yeast, so I’ll make a reservation especially for them. Instead of dry yeast, you can take 50 g of fresh yeast. The cooking process will increase by only 30 minutes - nothing for yeast dough, right? ;)
First we prepare the dough (don’t be alarmed, everything is elementary). For the dough, mix yeast, milk, sugar, 6 tablespoons of flour. We do this: slightly heat the milk (to “steam” temperature), mix flour, sugar and dry yeast in a bowl, slowly add milk and stir, you will get a dough without lumps, like liquid sour cream. This is our dough.
If the yeast is fresh, dilute it in milk and add everything else mentioned in the previous paragraph.
Let the dough sit in a warm, draft-free place for 15 minutes (or 30 minutes for fresh yeast).
Time has passed, the dough has foamed. Now all that remains is to knead the dough. I will knead with a mixer. But, of course, you can do it with your hands.
But first, beat 2 eggs with a pinch of salt in a separate bowl - not to a stable foam, as for a sponge cake, for example, but simply to a light, homogeneous mass. Add eggs to the dough and mix. Add 3 cups of flour, start kneading, gradually adding vegetable oil (2/3 cup). You need to knead a dough that is not stiff (not like dumplings!!), but elastic and does not stick to your hands, leaving the sides of the bowl and kneaded into one lump; it will take 5-6-7 minutes of working with a mixer. If you knead by hand, trust your feelings, the dough should not stick to your hands. The dough will definitely take three glasses of flour, the fourth is additional, you can add a little from it if it seems necessary.
Is the dough ready? If it has fresh yeast, cover it and leave it on the board for 15 minutes. If you use dry ones, you can immediately make pies and place them on a baking sheet.
The following point is important here: we try not to weigh down the dough with flour anymore. That is, lightly dust the board and hands with flour, it should not stick (we kneaded it well :)) Or this method: grease the table and hands with vegetable oil, and sculpt like this, the dough is guaranteed not to stick either to your hands or to the table.
So, light the oven, let it heat up to 180-220 degrees, and let the baking sheet with pies stand for 20-30 minutes in a warm place. When the pies are ready to bake, brush the tops with a lightly beaten egg for a nice color. And - into the oven!
By the way, this quick pie dough is not only quick to prepare, it also bakes quickly, 20, 25, maximum 30 minutes.
I hope you will find this recipe for quick yeast dough for pies useful more than once;)
By the way, it is also great for buns and large pies.