Shortbread baskets with cream recipe. Step-by-step recipe for making “Basket” cake
How many are there, they say, waiting for what was promised?? Half a year? Well, that’s how long I’ve been trying to publish the recipe for these masterpieces. shortbread baskets with cream. No way. But this is, perhaps, even for the better, because over time this recipe has been repeatedly optimized and improved.
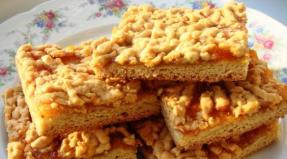
So what do we have as a result? Crispy, the most delicious of all possible, shortbread dough, lightened custard with whipped cream and pieces of berries and fruits covered with a thin jelly glaze.
So I’ve never been able to take a good picture of these baskets...
Collectively, we have incredibly delicious baskets with cream, which are always in short supply. But no problem. Shortbread dough can be frozen for future use and taken out as needed. It's just a matter of cream.
Initially, I made these baskets with regular custard. But in the course of my professional activity, I had the opportunity to work with an improved version of this wonderful cream of all times. In confectionery circles, this cream is called “Diplomat”. And, of course, I couldn’t help but sneak this recipe into my sweet journal.

So, the secret is that the custard is mixed with whipped cream in equal parts. But that's not all. The whipped cream itself is prepared from a mixture of vegetable and animal cream, also in equal parts. This way, a lighter, more delicate and airy cream is obtained, and due to the presence of natural cream, the cream is more tasty and rich. Here it is important not to beat the cream and warn the moment when it decides to curdle. I recommend reading about how to whip cream correctly.
No less important in this process is the choice of the right shortcrust pastry. I also experimented with it a lot. In the end, I settled on the most delicious shortcrust pastry of all existing ones (I already talked about it in point No. 2 “THE MOST DELICIOUS, IN MY VIEW, RECIPE FOR SWEET TARTALETS”).
This dough is a little more expensive compared to simpler shortbread dough options. but it's actually worth investing a few extra pennies into!
In short, in order not to be verbose, I will only say that everyone who was lucky enough to taste these incredible sand baskets with cream, unanimously admired that these were the BEST BASKETS OF THEIR LIFE!
What I like most about this dessert is that the unsweetening airy cream is combined with a rich, sweet shortbread base.
Ingredients:(for 22 medium-sized baskets)
For shortbread dough:
- flour - 250 gr.
- butter, softened - 150 gr.
- powdered sugar - 200 gr.
- egg yolks - 5 pcs.
- a pinch of salt
- zest of ½ lemon
For cream:
- milk - 250 ml
- sugar - 60 gr.
- vanilla - ½ pod or 1 pinch of vanillin
- egg yolks - 40 gr. (2 pcs.)
- corn starch - 30 gr.
- vegetable cream - 125 ml
- natural cream, fat content more than 30% - 125 ml
For the jelly frosting (optional):
- gelatin - 4 gr.
- water - 125 ml
- sugar - 2 tbsp.
For decoration:
- strawberries - 11 pcs.
- kiwi - 1 pc.
- apricot 1 pc.
- mint leaves - 22 pcs.
Preparation:
- For SAND BASKETS Mix the flour with powdered sugar and pour this mixture into a heap onto a work surface sprinkled with flour.
- Make a hole in the center of the slide and add a pinch of salt, grated zest of ½ lemon and butter at room temperature.
- Knead the butter with your hands, combining it with the rest of the ingredients until you obtain the consistency of fine bread crumbs. (*This procedure can also be performed using a blender. In this case, simply mix all the ingredients together in a blender, while the oil should be cold).
- Again make a well in the center of the mixture and add the egg yolks. Use your hands to knead a homogeneous plastic dough, but this must be done quickly! Otherwise the dough will be tough.
- Form the resulting dough into a ball, wrap it in cling film and place it in the refrigerator for at least 1 hour.
While the dough is cooling, prepare the CUSTOM CREAM.
- In a small saucepan, mix milk, half the sugar (30 g) and vanilla (if using vanillin, add it at the very end of preparing the cream) and bring to a boil over moderate heat, stirring occasionally with a whisk.
- Meanwhile, in a separate bowl, mix the remaining 30 grams. sugar, egg yolks and starch.
- After the milk boils, reduce the heat to low, pour 1/3 of the milk into the egg mixture and stir with a whisk. Constantly and intensively stirring, add the resulting mixture into the pan with the remaining milk.
- When the mixture begins to thicken and turns into a homogeneous cream without lumps, remove the pan from the heat.
- Transfer the finished custard to another bowl (to cool faster) and cover with cling film so that it adheres closely to the surface of the cream. Let the cream cool slightly and place in the refrigerator until completely cooled.
After the dough has rested and the cream has cooled in the refrigerator, we begin to BAKE the shortbread baskets.
- Preheat the oven to 180º. Pinch off a piece of dough according to the size of your molds and distribute the dough with your hands along the bottom and walls of the mold. Carefully press the dough with your fingers onto the surface of the mold, paying special attention to the sides, to form a thin, even layer of dough. The maximum thickness of the dough should be no more than ½ cm. Simply clean off any excess dough with your hands.
- We pierce the dough with a fork in several places so that the dough does not rise more than expected. Place the ramekins on a baking sheet and bake in the preheated oven for 18-20 minutes or until the tartlets are lightly browned.
- Leave the finished tartlets in the molds for 5 minutes, then remove them from the molds and transfer them to a wire rack to cool completely.
After that we prepare JELLY FOR FRUIT COATING. This jelly slows down the darkening of fruits and makes them more attractive. It does not affect the taste in any way, so, in principle, you can do without it. I use a professional jelly coating on agar agar. But ordinary colorless cake jelly (for example, Dr. Oetker) is also perfect for these baskets. If you have a tendency toward perfectionism, I recommend making this jelly yourself, especially since it won’t be difficult to do.
- In a small saucepan, mix gelatin, water and sugar and bring to a boil. After the jelly boils and becomes transparent, remove the pan from the heat and cool.
After the custard has cooled completely, proceed to the final stage:
- Using a mixer, whip the vegetable cream into a stable cream ( It’s important not to interrupt!). As soon as a clear trace of the whisk begins to remain on the cream, carefully, in small portions, but quickly add the animal cream, continuing to whip.
**Do not pour cream directly onto a working whisk. There is a danger of “getting caught” from a fountain of white splashes. - Immediately after the cream acquires the stable consistency we need (), stop the mixer and check the stability of the cream. If the whipped cream does not fall off the whisk, then our cream is ready.
- Now all we need to do is fold the cooled custard into the whipped cream VERY GENTLY. I will dwell on this point in more detail:
I’ll be honest, it wasn’t the first time I learned how to mix custard with whipped cream so that the cream didn’t cut out.
It is very important here to do everything as quickly and accurately as possible.
- The first step is to place the custard in a large bowl. The larger the bowl, the more convenient it will be to mix.
- Place whipped cream on top of the cream and mix the 2 mixtures with a pastry spatula, or better yet, with your hand, moving from bottom to top, from the walls to the center, as if collecting the cream from the bottom and folding it in half. And so on around the entire perimeter of the bowl until both creams combine into a homogeneous mass.
- The fewer movements we need to mix the cream, the less likely it is to misfire.
- Transfer the finished cream into a pastry bag and fill the cooled baskets.
- Cut the fruit into small slices and place on the cream.
- Using a brush, apply a little cooled jelly to the fruit.

All. Shortbread baskets with creamy custard are ready to eat.
I'll tell you a secret: this cream is perfect for filling cakes, for example, sponge cake.
It is not difficult to explain its widespread popularity: preparation does not require much time, anyone can cope with the task, and the result always pleases loved ones and guests. In addition, the very “form factor” of this appetizing snack determines its universal acceptance - small portions of filling or sauce quickly warm up the appetite, they are convenient and practical. Preparing them is not difficult; the recipes for the baskets require basic culinary skills and a desire to use your imagination.
The five most commonly used ingredients in recipes are:
For those who like to experiment, there are wide possibilities for combining ingredients and preparing a presentation. Often cheese, vegetables, meat or fish are used as the main filling component. Greens will look beneficial - both whole leaves and finely chopped ones. However, everyone’s favorite Olivier salad can also be an excellent filler. The list of products used to fill the baskets can probably be continued indefinitely: caviar, red fish, shrimp, crab sticks, chicken, mushrooms, ham, liver, hearts...
1.First of all, you need to prepare the shortbread dough. Make sure the butter is soft. To do this, you need to remove it from the refrigerator in advance. Place the butter in a bowl, add granulated sugar and vanilla sugar, add one yolk. Beat the ingredients with a mixer. Mix flour and baking powder, sift and add to the mixture you prepared earlier. Knead the dough.
 2. Divide the dough into small pieces and place in the molds. Use your hands to stretch it into shape. The number of finished products will depend on the size of your molds.
 3. Preheat the oven to 200 degrees and place the pieces in it. Bake them. Leave the finished baskets to cool.
 4. Let's start preparing the meringue. Combine sugar and water in a saucepan, place over medium heat. Stirring the liquid, bring it to a boil. Next, the syrup needs to be boiled. In time it's about five minutes. If you have a thermometer, then the required temperature of the boiling syrup should be 120 degrees. If it is not there, then you can do a test on the ball. To do this, place a bowl of cold water nearby and scoop out some syrup. Dip into the water and remove from the spoon with your hands. If the density of the ball resembles soft plasticine, then the syrup is ready. If the ball is easily wrinkled like dough, then the syrup is undercooked; if it is completely hard, then it is overcooked.
 5. While the syrup is boiling, beat the whites until foamy. Add vanilla sugar and continue beating. Then pour the finished boiling syrup into the protein mass. Don't stop whipping.
 6.Add a couple of drops of lemon juice and beat for another two or three minutes.
 7.When the mass is ready, transfer it to a cornet with a nozzle.
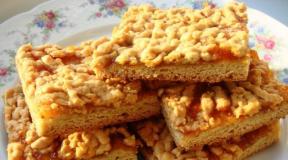
Many people remember “Korzinki” cakes from childhood. In Soviet times, they were sold in all cafes. They were decorated in the form of mushrooms, flowers, strawberries or even chicken. How delicious they were... The shortbread baskets simply melted in your mouth. And he was very gentle. We would like to bring to your attention a recipe for making such cakes at home. The process is not too labor-intensive, and such a treat will bring a lot of joy to the children. So...
Dough for baskets
To prepare the dough for the baskets, we need to stock up on the following products:
- Butter - 150 g.
- Sugar - 100 g.
- Vanilla sugar - 10 g.
- One egg.
- Sour cream - 1 tablespoon.
- Flour - 250 grams.
- Baking powder - one teaspoon.
- Metal molds.
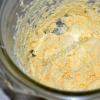
So, let's start making the dough for the baskets. To do this, beat sugar with butter and vanilla sugar until fluffy. Then add sour cream and egg, mix well.

It is better to sift the flour and then add it to the mixture. Mix. But you shouldn’t knead it for a long time, because it doesn’t like it. Baskets are a delicate cake, and therefore the “cups” should be crumbly. Wrap the resulting mass in cling film and put it in the refrigerator for about one hour. After some time, we take out the dough and, cutting off a small part of it, roll it into a sausage. Cut it into pieces, each of which needs to be rolled out into a thin flat cake. The size should be approximately the same as the diameter of the baking pan. Each such circle must be placed in a mold, pressed firmly against the walls and bottom. The bottom part can be pricked with a fork so that the basket does not become deformed during baking. We would like to warn you that the dough turns out to be very sticky, and therefore you will have to use flour. Here are our sand baskets and they are ready. All that remains is to bake them.
Place the molds with the dough on a baking sheet and put them in the oven. It is better to bake at a temperature of 200 degrees. Seven minutes is enough. Baskets are delicate cakes, they cook quite quickly, so be careful not to overcook them in the oven.
Now you can proceed to preparing the cream.

Cream ingredients
As you know, baskets are cakes with cream, although today there are many ways to decorate them: with fruits under jelly, with nuts covered in honey, with berries... We will now focus on the first option. And first of all, we need to decide what kind of cream we will make. The classic recipe involves using protein. To prepare it, let's take:
- Whites from three eggs.
- Sugar - 250 grams.
- Water - no more than 90 grams.
- Citric acid - one third of a teaspoon.
Preparing cream for cakes
You can start preparing the delicious cream. To make it tight, you must remember two rules:
- The dishes must be completely clean. The pan in which the syrup will be prepared can generally be cleaned with powder in advance.
- Under no circumstances should whites be mixed with yolks. The fact is that the yolk is fat, which will prevent the whites from whipping properly.

Separate the whites from the yolks and place them in a mixer bowl.
Next, pour water into the pan and add sugar, put it on the fire. You can stir it a little once to prevent it from burning. The syrup is cooked for about four minutes. You need to add a little citric acid to it. Mix everything again. You can check readiness very simply - to do this, drop a little sweet mass into a plate of cold water. If the drop does not spread, it means it is ready.
Important! While checking the syrup, remove the pan from the heat. It needs to be light in color: if you overcook it, it will turn out creamy and will be bitter, and this can spoil the cream, but we want it to be white, with a dense texture.
Are you sure everything is in order? Great! At this point you can start. The peaks should be very strong. And at the final stage, with the mixer running at full speed, you need to carefully pour in the syrup in a very thin stream. The mass will begin to increase in volume right before your eyes. You need to beat for another ten minutes until the cream has cooled. It should have a dense and uniform consistency and hold its shape well. Here the cream for the cakes is ready. Now there's just a little bit left to do. We need to collect our cakes. And then you can move on to tasting.
How to collect baskets?
Do you remember that there was always dark jam at the bottom of the cakes your mother bought you as a child? It seemed terribly tasteless. When making our baskets, we will, of course, follow the recipe, but we will put delicious jam or jam with berries on the bottom. For example, cherry. If you want, add a little boiled condensed milk. Or chopped prunes. Spread the cream on top using a culinary syringe. If you want, you can then sprinkle the cake with a little chocolate or sprinkles. The amount of food taken should make twenty-four baskets. You can start tasting.

As you can see, if you wish, you can prepare the “Basket” cake with cream at home, and believe me, the result will delight you and your children, because the delicacy will be no worse than what is sold in a cafe. Your household will appreciate such a culinary masterpiece. And they will ask you to make more sweets.
What other cream can you make cakes with?
We discussed how to prepare the “Basket” cake, so to speak, according to the classic recipe. But you understand that there are many variations on this theme. Do not limit your culinary imagination and try all new options.

Instead of protein cream, for example, you can make a cake with cream and marmalade, pour seasonal fruit with jelly (strawberries, red currants), decorating with cream. In general, there is room for your imagination to run wild.
Brownies with whipped cream
If you want to quickly prepare an excellent dessert, then this option will certainly suit you. Whipped cream will add a festive touch to your sweet dish. Just think how delicious the baskets will be with cream! The cake will turn out exquisite, beautiful and very tender.
When buying cream, make sure it is fresh, this is very important. In addition, their fat content must be at least thirty-five percent. At home, before pouring them out of the package, shake them well so that all the fat does not remain in the corners.
Remember one trick: the container in which you will beat the cream must be very cold. Therefore, cool the mixer bowl and cream well in the refrigerator in advance.
In addition, wash and dry the dishes very well. This is also important for the final result. And it’s better to take powder, not sugar, which needs to be sifted in advance so that it is free of lumps and turns out light and airy. You need to add it in small portions, after the cream itself has whipped into a stable foam.
And one more piece of advice. Start whipping the cream at the lowest speed, gradually increasing it to the maximum, and finish in the reverse order.
Do not make the whipping process itself long, as inclusions may appear on the surface of the cream, which will spoil the appearance. You can finish when, having stuck a spoon into the mass, you see that the hole does not close.

Of course, you can also use thickeners or gelatin. They are introduced during whipping. Using all these tricks, you will get excellent results. Well, let's move on to practice?
Cooking with gelatin
To prepare “Baskets” cakes at home, take the following ingredients:
- Heavy cream - 600 ml.
- Gelatin - 20 grams.
- Powdered sugar - three tablespoons.
- Vanilla sugar - one packet.
Beat cold cream with powder and vanilla sugar until peaks form. Dissolve gelatin in water according to the instructions written on the package. Very quickly you need to mix a couple of tablespoons of cream with the resulting solution. Next, whisking, slowly add it into the cream. Our cream is ready. It is better to cool the mixture a little before use. And then put them in baskets. Ready-made cakes are stored in the refrigerator. By the way! Remember that cream absorbs extraneous odors very well.
And further. You can decorate the cakes with homemade marmalade or buy ready-made ones.
Baskets with butter cream
The cakes are very tasty. To prepare, take one hundred grams of butter and four tablespoons of condensed milk.
Mash the butter until it becomes thick sour cream and start beating with a blender, mixer or whisk. You should get a fluffy white mass. Next, you need to slowly pour in the condensed milk and continue whisking for another ten to fifteen minutes. The cream will be homogeneous. It needs to be cooled a little and then you can put it in baskets. It is recommended to decorate the finished cake with slices of fresh fruit.

Combining cream fillings for “Korzinochka” cakes
In fact, each cream can be used either independently or combined with other fillers. For example, first put the protein mass in a basket, and then make an oil rose with a leaf on top. It will turn out beautiful and tasty.
If you made gelatin, you definitely need to decorate it with some kind of cream on top.
And another option is possible. But you'll have to tinker with it a little longer. Place cream, for example, protein cream, in a basket, combining it with fruit in a gelatin shell. Berries are picked according to the season. Strawberries and raspberries, even currant branches, look very beautiful in such cases. The cake is not very sweet, because the cream is combined with fruity sourness. And there’s no need to talk about the beauty of such baskets. They turn out very bright. A real culinary masterpiece.

Instead of an afterword
As you can see, it is not at all necessary to buy sweets in stores and cafes - if you wish, you can prepare a wonderful dessert yourself at home. We hope that the recipes given in our article will definitely be useful to you, and you will decide to make baskets for the first time. This cake from childhood will surely please your children. Enjoy your meal!
Delicious cake recipes
1 hour
370 kcal
5/5 (2)
Each taste evokes some associations in us. They can be both good and bad. But there is something that simply cannot evoke bad memories and associations. This is exactly what I want to tell you about today. Everyone remembers the wonderful taste of those cakes that we tried in childhood. Many of them remain our favorites throughout our lives. Therefore, I consider it my duty to teach you how to cook the “Korzinochka” cake at home. This will require a minimum of expenses, but what memories will come flooding back to you! Let's continue the glorious tradition and prepare such a delicious dessert dish for our children.
Recipe for “Korzinochka” cake with protein cream
Kitchen appliances: m ixer or corolla, m Ito, e uhovka.
Ingredients
For the test:
For cream:
How to choose ingredients for such a dish?
Such an unpretentious dish still requires some respect. To make an original cake, you will need to be sure to use premium wheat flour and the highest quality products.
Step-by-step recipe for making “Basket” cakes from shortcrust pastry
Before you start creating a culinary masterpiece, you will need to take the butter out of the refrigerator so that it warms up a little. Only after this can you start preparing the “Korzinochka” cake according to GOST.
Dough
- Place the butter in a deep container and beat for 4 minutes with a mixer or whisk.

- After whipping, you need to add 140 g of sugar. Start the whisking process again and continue until the sugar is completely dissolved. You will have to spend 5 minutes on this.

- Separate the yolks from the whites and add the yolks to the container with the butter. Beat for about 5 more minutes.

- After this, add 1 teaspoon of baking powder, a pinch of salt and a few drops of rum or vanilla essence.

- Mix all the ingredients of the future cake well.

- At the very end, add 350 g of flour. Before this, you will need to sift it through a sieve to get rid of unnecessary foreign objects. Start the dough kneading process. You will need to knead it until smooth to get the perfect shortbread dough.


- Place your finished shortbread dough in cling film and place it in the refrigerator for 40 minutes.

- You definitely need to roll out the already chilled dough using a rolling pin into a layer whose thickness is about 7 millimeters.

- Now you need to distribute all the dough into metal molds.


- Once you've done this, remove any excess dough that peeks over the edges so that the dough itself is slightly larger than the sides of the pan.

- Using a fork, poke many holes in the dough that is in the bottom of each ramekin. This should be done to prevent air bubbles from forming during baking.

- Place the prepared forms in the freezer for 15 minutes.
- Preheat the oven to 215 degrees and bake the baskets for about 15 minutes.

- Let the dough cool and remove the pieces.

Cream
- Now let's get down to the interesting process of preparing the cream. To do this, mix sugar in water.

- Start the process of boiling the syrup.

- Boil the syrup to a temperature of 120 degrees. This is approximately 5-6 minutes.

- At a temperature of 110 degrees, add citric acid to the syrup.

- Start beating the egg whites thoroughly with a pinch of salt. If you use a mixer, beat at medium speed.

- When the mixer blades or your whisk leave marks on them while beating the egg whites, begin to slowly pour in the syrup in a thin stream. After you add the syrup, you will need to increase the mixer speed. At this speed you need to beat this entire consistency for 7 minutes.


- Distribute the cream into cooking bags, and place a very small amount of jam or preserves on the bottom of each basket.

- Now you can use your imagination and fill the baskets with cream in any manner. By using different attachments you can create different patterns or exposures.


- Now your lovely “Basket” cakes with cream are ready.

Video recipe for pastry “Basket” with protein cream
In this video tutorial for preparing the dish described above, you can find a detailed description of how to prepare the correct dough for the Basket cake.
Cake “Basket” with fruits
- Cooking time: 60 minutes.
- Number of servings: 6 servings.
- Kitchen appliances: m ixer or corolla, mmetal molds in the form of baskets, with ito, e containers for your ingredients, d ear chamber.
Ingredients
For the test:
For filling:
Step by step recipe
- Melt all the margarine in the microwave.

- After this, you will need to mix margarine with granulated sugar and mix.

- Add the eggs one at a time into the margarine mixture. You need to add them as you stir.

- In a small container you will need to extinguish the soda with a tablespoon of vinegar.

- After this, add soda to the dough.

- Add the flour to the remaining ingredients and begin stirring with a spatula. When the spatula becomes difficult to knead, use your hands.


- Hide the dough in the refrigerator for 30 minutes. After this, you need to distribute all the dough into metal forms in the form of baskets.

- Preheat the oven to 200 degrees and bake for 10 minutes.

- Cool the baskets completely and prepare for the next steps.

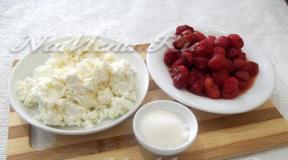
- Pour a tablespoon of curd into each basket and arrange the fruit as you like.


Now you know thoroughly how to make a “Basket” cake at home!