How to make a big bow from fondant. Mastic bow: master class step by step with photos and videos
Mastic is a sweet mass that resembles plasticine in consistency. Thanks to it, you can decorate various confectionery products, from pastries to cakes. Mastic makes beautiful figurines of animals, people, interior items, decorations (bow, inscription), musical instruments (accordion, violin and others).
One of the most favorite and beautiful decorative elements for a cake is a bow. They can decorate any holiday confectionery product and give it personality. Thus, a cake with a bow made from a sweet mass will be an excellent birthday dessert.
Preparation of mastic
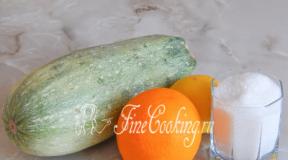
Before you understand how to make a bow from cake mastic, you need to prepare the source material. It is best to use marshmallows as a base. Thanks to it, you can easily sculpt not only a bow, but also any other figure. To prepare mastic you will need the following products: 4 packages of white marshmallows, lemon juice, powdered sugar, multi-colored food coloring.
The cooking process is simple and includes the following steps:


Before you make a bow from mastic on the cake, you need to paint the finished mass in the desired color. As a rule, mastic is made from a color contrasting with the cake. This will highlight the finished bow more clearly and increase the visual volume of the confectionery product.
Making a bow
Despite the complexity of the shape, the bow is quite simple to make. Creating it will not require much time and effort, and the result will please not only the birthday boy, but also all the guests. In most cases, several types of bows are made on cakes:
- classic;
- volumetric;
- avant-garde.
Classic version
This option for making a bow from mastic is the most popular. The whole process of forming a bow is very exciting and perfect for beginners. You can also involve your children in this work. This activity will captivate them, and they will be proud of the result. To decorate a birthday cake you will need the following products and tools:

Having prepared everything you need, you can safely begin work, which will require attentiveness and accuracy from you.
Step-by-step master class on making a bow from mastic:

Volumetric product
The voluminous bow is very similar to the classic one. The only difference is the use of more mastic strips. With their help, the product is given volume and the desired shape. In addition to all the items and products used previously, this recipe uses a glass or small round mold.
To get a bow from mastic, you need to do the following step by step:

Avant-garde bow
This decorative element is made in the form of a lush and voluminous bow. It is distinguished from others by a combination of different working techniques, as well as an asymmetrical shape. Often, cakes with various flowers (snowdrops, peonies, daisies, roses and others) are decorated with an avant-garde bow. In order to make such a decoration you will need the following materials and products:
- multi-colored mastic;
- food foil or film;
- two rolling pins (regular and figured);
- figured roller;
- scissors.

For an avant-garde bow, it is better to use a mass with a high content of powdered sugar. This will make it more sticky and help it hold its shape well.
In order to understand how to make a bow from mastic, let's do the following step by step:

Anyone can design and make an original bow from mastic. To do this, just dream a little and show your creativity. Don't be afraid to experiment and try to create more complex designs. Even if something doesn’t work out for you and you ruin the bow, you can simply eat it and then start working again. The reward for your work will be the joyful smile of the birthday boy and all his guests.
Attention, TODAY only!
How to make a bow from mastic? What's good about it? We will consider these and other questions in the article. A lush and beautiful bow can turn into an independent cake decoration. An ideal option for the base is a round cake. You can also make a rectangular cake, add ribbons along the edges, and you will have a product that looks like a gift box. Very interesting results can be achieved by combining colors: a lush, bright multi-colored bow or a single-color, laconic bow - a matter of your taste and imagination.
Bow
We would like to present to you the master class “Mastic Bow”. First you need to make a pattern for the bow petal. Usually a large bow is made, the same size as the baked goods. If the cake is, for example, 22 cm in diameter, then the bow must be made with a diameter of 19 cm. In this case, the pattern must be made in dimensions 3.5 X 19.5 cm. The shape of your bow depends on the parameters of the pattern, so you can vary it as you like .
Details
We continue to create a bow from mastic. To create it you will need thick, quick-drying mastic. You can use milk mastic, the recipe for which we will provide you with below. Before use, add a little more powder to it than indicated in the recipe. Roll out a thin layer of mastic and cut out the petals according to the pattern.

The number of petals can be changed, thereby modifying the shape of the bow. Our pattern requires at least 12 petals. Before drying, powder them thoroughly from the underside.
Drying
A fondant bow is an amazing decoration for a cake. So, dry the cut out petals thoroughly. Use available means for this: rolls of foil and cling film. They are perfectly round and have identical sizes, which is very convenient. To avoid a strong bend, add more foil of smaller parameters. Glue the ends of the bow together.
Options
A mastic bow can be made in various ways. You can make six even pink petals and six yellow ones. In this case, roll the pink ones with a figured rolling pin. Additionally, you can make red thin petals. It is convenient to make them with a special roller. For those who have it, it’s great, since such thin petals give an excellent effect, the bow becomes brighter and more magnificent.

So, you already have 12 wide elements ready for the base, combining which you get a circle. It is very convenient to make the red thin petals shorter and simply put them in the spaces between the wide ones.
Elements
Few people know how to make a bow from mastic. For our bow we needed:
- ten red narrow ones.
six pink curly wide petals;
six yellow wide petals;
Assembly
So how to make a bow from mastic? Let's start assembling the decoration. To begin with, do not fasten the petals together with anything, try them on one another, take a closer look at them.
Our bow has three layers: six wide petals at the base, four wide elements in the second tier and two on top. For splendor, you need to insert thin red petals into the space between the petals, as we discussed above.

If you have already assembled the bow and you are completely satisfied with its appearance, carefully disassemble and assemble it again, but this time fastening the petals together. It is convenient to do this with melted chocolate or regular mastic cream that you used when leveling.
You only need to fasten it in the center, placing a slide of cream there. Then no one will notice the connection point. The cream will harden in the refrigerator and will hold your bow well.
In making bows you will need experience and numerous trials. We recommend not limiting yourself to 12 elements, but making them in large quantities so that there is a reserve. After all, if there are not enough of them, then there will also not be enough time to create new parts of the bow and dry them.
Milk mastic
How to make mastic? It is known that milk mastic is universal and easy to use. Make figures from it, cover the cake beautifully with it. Due to the oily and sticky structure of the mastic, even without special confectionery glue, you can glue together the details of the figures. Only this needs to be done immediately, without waiting for it to dry. After the figures dry, they will become strong and hard. But they can be eaten.
This mastic has only one drawback - it is not white, since baby formula and condensed milk have a yellowish tint. It is impossible to obtain soft blue or pure white from milk.
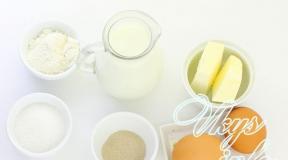
So, how to make mastic? To make this product, you need to buy one package of Malyutka milk formula (350 g), one can of condensed milk, 350 g of powdered sugar.

It should be noted that any formula milk may be suitable. You can also use dry cream or milk instead. The quality of condensed milk is especially important. It should contain only sugar and milk. Use very fine powder. You can buy it in stores, but you can grind sugar in a coffee grinder at home. The main thing is that there are no grains in the powder, otherwise the mastic will have an uneven structure, crack and the figures will turn out sloppy.
How to cook?
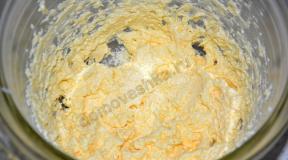
First, mix the milk mixture and powdered sugar in a saucepan, and then add condensed milk and knead the mastic. After a couple of minutes, during the kneading process, you will feel that the product has become loose, sticky and heterogeneous. After another five minutes, the mastic will become homogeneous and well mixed. Wash your hands, dry, sprinkle with powder and form a ball out of it.
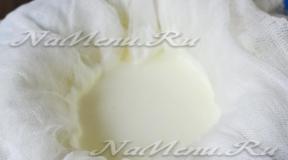
To make it easier to work with mastic, wrap it in cellophane and leave it on the table to strengthen the structure for half an hour. After this, separate the desired piece from it, add dye and roll it out to make it tight. You can also work with it immediately and after kneading, as it is soft and rolls out perfectly with powder and does not stick.
The thickness of the mastic for covering should be approximately 3-4 mm. A cake with a diameter of 24 cm and a height of 8-10 cm takes about 400 g of mastic.
Agree, your guests will remember the cake with a mastic bow for a long time! Leftover product should be stored in the refrigerator. If you take the semi-finished product out of the refrigerator, it will be hard, but it will quickly become usable if you warm it up in the microwave, stirring it. That is, put the mastic in the microwave oven for five seconds, take it out and knead it. If it is not soft enough, put it back in the oven for five seconds and knead again. Repeat these steps until the product becomes plastic.
Always work with mastic with powdered hands. Roll it out on a table previously sprinkled with powder. Otherwise it will stick.
By tradition, any celebration is accompanied by tea drinking. At the same time, every housewife strives to bake something delicious for guests. The most favorite treat is usually cake. It will be remembered by guests for a long time if it is effectively decorated with, for example, a mastic bow. The sweet mass is so plastic that working with it is a pleasure. Having mastered the preparation of just a few simple products from it, you can forever fall in love with this type of creativity.
You can cover the entire cake with mastic, sculpt various figures from it, create flower arrangements and three-dimensional inscriptions. We can say that it is very similar to plasticine. However, this is what it looks like at first glance. In order for the mass to be moderately plastic, harder or softer, you need to be able to prepare it correctly. Working with good mastic is very easy, but working with bad mastic is almost impossible.
Mastic can be:
- Chocolate. The recipe contains cocoa.
- Simple. Consists of powdered sugar, water, lemon juice and gelatin.
- Honey. It uses honey instead of powdered sugar.
- Marshmallow. It is prepared on the basis of chewing marshmallows.
- Dairy. Powdered milk and condensed milk are added to it.
- Creamy or protein.
Which mastic to choose for yourself is a matter of taste. There is a basic recipe for preparing a small piece of sweet mass. Have to take:
- powdered sugar - 125 g;
- water - 15 ml;
- gelatin - ¼ tsp;
- lemon juice - ¼ tsp;
- vanilla - to taste.

Gelatin is soaked in cool water for half an hour and then heated slightly. Lemon juice and vanillin are added to warm gelatin. All ingredients are mixed, sifted powdered sugar is gradually added to the solution. If the specified amount of powder is not enough, it is added until the mass becomes dense and elastic. The mastic is kneaded for some time on a table sprinkled with powdered sugar or starch. Then it is allowed to cool, wrapped in cling film and stored in the refrigerator.
If the mastic needs to be colored, then food coloring can be added to the mass at any stage of preparation. You can use natural juices: beets, carrots, herbs, citrus zest.
Materials for work
To work on the cake decoration you need to prepare. So, the following materials will be useful:
It is worth noting that the mastic itself does not hold its shape well. This is especially true for fine details. Therefore, a form for it needs to be created. To do this, use various mats and homemade volumetric figures. Mastic parts are laid out on these surfaces, and when dry, the latter take on the shape and bend of three-dimensional pieces. Such forms are made from polystyrene foam, foil, napkins and even plasticine.
Before applying the sweet mass to the surface of the cake, you should take into account the fact that it begins to melt when interacting with water, so it is recommended to use only butter creams under it or apply directly to the sponge cake.
How to make a bow for a cake
 Very complex compositions can be formed from mastic. However, a beginner should not take them on right away, because the desire to work will quickly disappear due to a lack of skills. It’s worth starting with simpler products. First you need to figure out how to make a small bow from mastic step by step. The whole process will take no more than an hour.
For a three-dimensional form, take, for example, a napkin. It is crumpled into a roll shape and wrapped with clean cling film on top. The table surface and work tools must also be clean.
To form the ribbons, dust the rolling pin and hands with starch or powdered sugar. A small piece is separated from the sweet mass, kneaded in your hands and rolled into a ball. Then roll the ball into a flat pancake no more than 2-3 mm thick. Two ribbons for a bow are cut from the resulting fabric using a knife or culinary scraper. The short edges of the ribbons are trimmed with scissors to make them even. The first ribbon of mastic is laid out on a sprinkled table. Place a roll of napkin on top, as shown in the photo.
Bring the first tape around the roll from bottom to top. The two short edges are coated inside with water, slightly bent and neatly connected to each other. There should be two neat folds at the edges. The first half of the bow is ready. Do the same with the second tape. The resulting bow blanks should look like those shown in the photo below.

The bow halves are coated with water in order to bring it together. After this, roll out a small piece of mastic and cut out a small strip no more than 2-2.5 cm long from the canvas. It is needed to hide the junction of the bow halves. Before wrapping the middle of the bow with this ribbon, it is gathered into an accordion, forming arbitrary folds. Then the middle is coated with water and wrapped with a prepared ribbon. If desired, you can form two more ribbons under the bow and make small folds on them. The resulting bow is shown in the photo..

After the mastic has dried, the bow can be attached to the cake. If the product is placed on a layer of mastic, it should also be coated with water to fix it.
Lush bow step by step
 You can make a voluminous, large bow from mastic in several stages. However, this will take some time, since you will need to make a large number of small parts and then dry them.
You also need to immediately decide what the product will be used for. If it is intended to decorate a cake, as in this case, you should know the approximate dimensions of the top layer. Based on this, you can choose the size of the bow so that the decoration looks harmonious on the cake.
In order to make such a bow from mastic for a cake, you will need all the same materials and tools as for making a small bow. One has only to add that if you plan to make a bow with a relief pattern, as will be shown below, should be used:
- relief silicone roller;
- a small shaped rolling pin.
A piece is cut off from the sweet mass and, having formed a ball from it, is first rolled out with an ordinary silicone rolling pin. Then the sweet pancake is cut into strips of the required size. Each strip is processed with a relief roller or rolling pin. You need to make 13 such parts.
The edges of each strip are coated with water and connected to each other. Next, the petals are cut with scissors along the glued edge, as shown in the photo below. Then they are placed on their side to dry slightly on a board. When all 13 pieces are ready, a long roll is formed from the napkins, wrapped in cling film and the blanks are strung on it for further drying.
Then on the cake you need to mark a circle for the base of the bow. To do this, take a glass, place it in the center of the cake and lightly circle it with a knife, without disturbing the layer of mastic.
A glaze of egg white and powdered sugar is applied to the intended base of the bow. It does not contain water, so it will not soak the parts made from the sweet mass. Next, each petal is pressed into the glaze with the sharp end of the base and the first row of eight petals is laid out.
The second row of four petals is collected in the same way. First add a little glaze to the middle.
The third row will be the last. It consists of only one petal. If at this point there is not enough glaze in the middle, you can add it there and secure the last petal. The bow is completely ready.
Now all that remains is to invite guests and brew strong tea! The petals can additionally be decorated with mastic balls that imitate beads. A cake with a bow made of mastic will become a real decoration of the festive table.
Cake is an integral part of any celebration. Homemade sweets will always be tastier and fresher, and will also bring a lot of delight to your guests. The cake should always be beautiful. There are many decoration options. A bow is a universal decoration for both an image, a gift, and a cake. It gives elegance and solemnity. For the cake you can make a bow from mastic. A master class on making a simple and fluffy bow will help decorate a cake for both the pastry chef and amateur. The purpose of the cake and its appearance can be different: you can decorate the cake as a gift, surround it and decorate it with a bow, or use small bows as decoration.
Simple option
Products, tools and materials for manufacturing:
- sugar mastic for modeling;
- powdered sugar;
- egg white;
- rolling pin;
- scissors;
- cotton wool;
- brush;
- napkins or paper towels;
- cling film or bag.

Step by step execution. Place the mastic on a bag or food foam, previously sprinkled with powdered sugar. Cover the top, covering the material. Roll out using a rolling pin. This way, the mastic rolls out evenly and will not stick to the rolling pin.

Let's prepare the rollers. To do this, wrap the pieces of cotton wool in a napkin.

We take the mastic out of the bags and cut it into four identical rectangular pieces. We make confectionery glue from egg whites and powdered sugar.

Take one part of the mastic. We place a roll of napkins in the center. Grease one edge of the mastic with the egg-sugar mixture.

We connect the ends of the mastic by gluing them.

We bend the edges of the workpiece, as shown in the photo.

Glue the curves of the workpiece together using a mixture of egg white and powdered sugar.

Now carefully cut off the excess part of the loop.

We form the second loop in a similar way. Lubricate the edges of the blanks with the protein mixture.

We connect the workpiece.

Now you need a third stripe. We lay it horizontally and bend it like a boat so that there is a depression inside and the horizontal edges do not change their position.

Lubricate the junction of the two loops with a sugar-protein mixture and apply the prepared center.

We turn the workpiece over and connect the edges of the center, cutting them off and greasing them with confectionery glue.

Cut the fourth strip in half. We bend the edges as shown in the photo.

Using a mixture of egg whites and powdered sugar, glue the ribbons to the bow. Let it dry completely and the bow on the cake is ready.

Adding volume
A voluminous bow will look more elegant.
You can use it to decorate a cake as a gift. It will look universal and will decorate any celebration.
Materials, products and tools needed to make such a bow step by step:
- mastic for modeling;
- protein;
- powdered sugar;
- brush:
- to create rings, napkins and cotton wool, or clean used ink and pencils will be useful;
- centimeter or ruler.
Let's make a voluminous bow step by step. Rub the work surface with powdered sugar and roll out the mastic into a thin layer. To prevent the mastic from sticking, you can cover it with cling film.

Cut 8 strips 7 cm long and 1 cm wide.

Now we make a blank 2-3 cm in diameter using napkins and cotton wool. You can use washed mascara or a marker. We bend all seven cut parts onto the workpiece, having previously greased the ends with a mixture of powdered sugar and egg white.

Having rolled out the mastic, cut at least 2 more strips about 15 cm long and 0.5 cm wide and one strip 1 cm wide and about 5 cm long. We form a circle from the last piece and leave it to dry.

We wind the strips around the pencil in a spiral.

Let the workpieces dry. We remove auxiliary items.

Trim the edges of the semicircles into a triangle.

We form the base of the bow. Moisten the edges with the egg white mixture, connecting the first 4-5 petals into a circle.

We form the remaining petals inside the bow, reducing each layer by 1-2 petals, as shown in the video below. Insert the previously prepared circle into the middle.

At the base of the bow we attach spiral ribbons, having previously lubricated them. The bow for the cake is ready.

Silicone mold
Modern stores of confectionery tools have a huge assortment, which is constantly updated. To work with mastic, there are special mats, rolling pins, pencils, and, of course, molds. A mold is a form, a blank for creating the desired shape or part. Silicone molds are used in confectionery art. Workpieces can be easily pulled out of them due to their flexibility. It must be taken into account that the hole in the workpiece is completely filled with mastic. That is, the figurine is not hollow, but made of mastic, both on the outside and inside. Molds can come in different shapes and sizes.
To make a figurine, lightly sprinkle the inside of the mold and fill the hole with mastic. Let the form dry, you can put it in the refrigerator for a while. Carefully take out the figurine and let it dry completely. The workpiece is ready.
If necessary, using special food coloring and a brush, you can give the bow a different color, texture, and draw elements.

Video on the topic of the article
I would like to present to your attention a master class on making a bow from mastic. The bow is lush, beautiful, and can become an independent cake decoration. The ideal base option is round cakes. You can also make a rectangular cake, add ribbons along the edges and you will have a cake in the form of a gift box. By combining different colors and textures you can achieve very interesting results: a laconic one-color bow or a bright, lush multi-colored one is a matter of taste and your imagination!
1. First, we need to make a pattern for the petal of the bow. I made a large bow, the size of a whole cake. Therefore, my pattern was 3.5x19.5 cm in size. That is, the bow itself will end up with a diameter of about 19 cm. For a 22 cm cake - excellent. I’m not making a printable pattern for you because I’m sure you can do it yourself. The appearance of your bow depends on the size of the pattern; you can vary it as you like.
2. For the bow we need thick, quick-drying mastic. I used it, adding more powder to it than in the recipe. Roll out the mastic into a thin layer and cut out the petals according to the pattern.
3. The number of petals can also be varied, thereby changing the appearance of the bow. My pattern requires a minimum of 12 petals. Thoroughly powder the petals on one (inner) side before drying.
4. Leave them to dry thoroughly. For drying, I use improvised means such as a roll of cling film and a roll of foil. They are the same size and perfectly round, which is very convenient. To avoid a strong bend, I added a little more smaller foil. We glue the ends of the bow petals at the ends.
 5. To show you the different options, I decided to make several types of petals. The yellow ones were just smooth. Rolled the pink ones with a figured rolling pin (6 pieces yellow + 6 pieces pink).
6. In addition, I made thin red petals. It’s convenient to make them with a video like this. Whoever has it is great, the effect of such thin petals is excellent, the bow becomes more magnificent and brighter. The only thing is... Since we already have 12 wide petals for the base, which when connected form a circle, it is more convenient to make these thin red ones shorter and simply place them in the space between the wide petals.
7. Let our petals dry. They must dry very well, otherwise the bow may lose its shape.
For my bow I needed:
- 6 wide yellow petals;
- 6 wide pink curly petals;
- 10 narrow red petals.
8. We begin to collect the bow. To begin with, do not fasten the petals together with anything, try them on one another, and take a closer look.
For this bow I had three layers: 6 wide petals at the base, 4 wide petals in the second tier and 2 on top. I slipped thin red petals into the gaps between the petals for fullness.
This is what happened in the end.

After you have assembled the bow and you are completely satisfied with its appearance, you need to carefully disassemble it and assemble it again, but this time fastening the petals together. This can be conveniently done using the usual mastic cream that you used when leveling. Or using melted chocolate. You only need to fasten it in the center, putting cream there in a mound. Then the place of fastening will not be noticeable. The cream will harden in the refrigerator and will hold your bow well.
Using the same pattern, but without the narrow petals, I made this cake:
 Here there was a slightly different scheme: 6, 5, 1.
Agree, with narrow petals the effect is much brighter. In general, in making bows we only need experience and numerous tests. I advise you not to limit yourself to 12 petals, but to make them in larger quantities so that there is a reserve. After all, if suddenly there is not enough, then there may not be enough time to make new petals and dry them.