Preparation of icing. How to cook icing? Decorating cakes sugar-protein glaze
I started to make baby cookies relatively recently. Up to two years my son did not eat sweet at all, we did not offer - he did not ask. Then I began to create a new resident, and I wanted the smell of baking to be in our house.
- Home icing recipe
Home Icing - Recipe
Home cooking is easy to make, the main thing is to understand the basic rules and then over time you will feel what consistency is easier for you to work with. I used to do two types of icing: one for a stroke, the other for a fill. Time passed, I made a certain amount of cookies and stopped kneading more dense icing, I learned to work with one of its consistency. But today I will tell you not only a step-by-step recipe for icing, but also I will give recommendations to novice hostesses about how to work with it.
Aysing recipe:
- 2 egg whites;
- 1.5-2 cups of powdered sugar;
- 1 teaspoon lemon juice;
- Dyes - choose the topic of cookies.
So, let's begin. I’ll say right away that I decorate pastries only after the child goes to bed, so you can see the reflection of the lamp in the photos, I apologize.
 All photos in this article increase when you click
 A little background. February begins and my boy, he is now 5 years and 4 months old, who is used to making beautiful cookies for each holiday, starts a conversation with me:
- Mom, it's February already, are you going to make cookies for Valentine's Day?
- I have not thought about it yet, because only the beginning of February.
- But what a holiday without tasty hearts ?!
- Well, I will try to find time and make cookies in the form of hearts.
- But only I do not want red, let it be Minion hearts!
–
As always, we prepared cookies together, I already wrote the recipe, so I will not repeat. These are baby cookies without milk and without eggs. If this is important to you, then welcome to cooking mass.
Now that our cookies are ready and cooled on the grid, we need to take a large enough bowl, a whisk and, accordingly, all the ingredients for icing. But we begin with two - two egg whites and one teaspoon of lemon juice. I don’t cook by sight, I use measuring cups, spoons, so if you like, it will be easy for you to repeat the recipe after me.

Combine lemon juice with proteins and begin to grind. Yes, we rub it manually. Even when I was going to make my first icing and watched a lot of videos about how to prepare it, how to mix with dyes, how to put on cookies, I saw the same rule among all professionals - you should feel the icing, it is prepared only by hand! By the way, I shared in the article about our very first baby cookies.
In this case, we do not need peaks in the foam, it should not be whipped at all. I take the whisk, as it is more convenient for them to use than a fork or a tablespoon. But it is important to understand one thing - if we whip with a whisk or food processor, then air bubbles form. If we rub, mix, then our icing turns out to be elastic and does not create problems when drawing pictures on children's cookies.
Now we proceed to our icing sugar. We measure out two glasses and sift well - sifting is important!
If you are doing the icing for the first time, then I advise you to measure half a glass and half a glass separately. Iceing from one and a half glasses of powdered sugar is well suited for pouring, and from two glasses for edging.
Take a tablespoon of powdered sugar and add to the protein mixture. Here you need to understand the essence of what is happening: add one spoon of powder and continue to mix until the icing sugar dissolves completely. This can be felt by trying on the tongue, carefully looking at the whisk or to the touch, rubbing a drop between the thumb and index finger. Powder dissolved, add another spoon and continue stirring until completely dissolved.
Thus, you choose one and a half cups of powder and at some point you feel that the royal icing (as it is also called) thickens. It becomes difficult for you to move the whisk in it. As soon as you feel that the last portion of powdered sugar has dissolved - your icing is ready for pouring baby cookies!

I have been using it for the last picture for the last times. But if you are a beginner, I advise you to continue working and putting aside a half cup of ready-made aysing, also gradually add 2-3 tablespoons of powdered sugar into it. This mixture will be thick, it is easy to draw the borders of the drawing, it freezes faster.
Now let's mix our royal icing with dyes. For this we need:
- Food wrap;
- Wooden toothpicks;
- Bowls by the number of colors;
- Teaspoons;
- Dye Wilton.
Iceing can be painted only with gels, but not liquid food dyes. Personally, I like Wilton products, they just have helium dyes in bottles and concentrated gels in jars. Both species can be seen in my photos. It so happens that you need a certain color and I start with a concentrated gel, I understand that it is not as saturated as I need and add a little gel from the bottle. But in most cases 12 colors and their concentration from jars are enough for me; it was them that time I painted my glaze.
Why not use liquid dyes? They change the texture of the icing you just achieved. Figure may leak.
If you made two icings of different concentrations, then in your case this white icing has already been set aside and covered with cling film. In my case, the first thing I did was put off the white color to draw white details. Then she mentally calculated how much of the glaze on the intended pattern I would need for each color. Here I think it is clear that if we are planning to paint with red only sponges on the face, then we’ll mix little red glaze. If we are going to make the background of the picture blue, then this color will need a lot.

Put a saucer or paper towel next to it, where you will put used toothpicks. Open the jar with concentrated gel and dip a toothpick into it. Scroll the toothpick with the dye on the icing and gently stir with a spoon. If the color is not as saturated as you need, and most likely it will be after a small amount of dye, take another toothpick and do the same thing again. And so on until the desired shade. You can not use one toothpick, otherwise you will put the ice in a jar of gel! Then you will only have to throw away your dye.
If you use a helium dye in a bottle, then you need to drip one drop at a time. Stir and then add another drop. You need to understand that these dyes are highly concentrated, so it is better to move gradually to the desired color.
Aysing dries quickly, so be sure to keep it covered with cling film. Put in the pastry bag the right amount - closed the remainder. It does not tolerate moisture, so its storage in the refrigerator is impossible. Dilute only the amount that will decorate on this day.
Well, my icing is ready and I will start decorating my children's cookies.

We decorate baby cookies icing in Minion style
Well, the fun begins, decorating cookies icing. It seems to me that every time I enjoy this process more and more, it is really interesting for me to think out how the ready-made cookies will look like, whether they will carry away my child. Minion's characters captured the mind of my boy about a year ago. Alexander built for his little men, we noted, he played the whole, where these strange creatures robbed the train with treasures. Therefore, it was important for me to make them recognizable, “alive”.
At first I went into meditation for a week, of course it was possible to open the almighty Internet and see the ideas of professionals, because so many birthdays are celebrated on this topic. But first, I was not sure that their drawings would fit the shape of the heart, and secondly, it was time for me to grow up. By the way, now Alexander and I are engaged in drawing and developing fantasy according to the video course, about which I will write in the coming months. It seems to me that it was he who pushed me to dream. I hope you enjoy my work.
Well, for the cause! We take pastry bags, you will need several of them, according to the number of icing colors. I draw a stroke with the N1 nozzle, and I fill with the N2 nozzle. In the photo above, you saw my set of Wilton tips, it also includes latches, which allow you to change the tip number on the bag with a specific color. I advise you to have several of them, as this is a very convenient thing and I personally lack two of the retainers.
I distributed my ready icing in pastry bags, I started with two colors - yellow and blue, they are the main colors of Minion. I usually make a white stroke, but this time I decided to try to make a more professional look for the finished products.
If your icing is prepared with the right consistency, then try to keep the stroke line in such a way that the nozzle does not touch the cookies. The glaze stretches, so after spending a few millimeters of icing, lift your hand 5 mm from the baking and continuing to gently press on the pastry bag, you will give the opportunity to glaze to lay down the desired line.

My faithful helpers are wooden toothpicks. If the line did not go there or not as expected, then while the icing is wet, it can be carefully cleaned with a toothpick. Also draw your attention to the "tails". When pressing on the pastry bag, at the beginning and at the end of the line, usually round drops of glaze appear. In professional products you will not meet them, as confectioners know how to properly press. With practice, they can really be avoided. I will give some tips:
- Before starting any line, you need to wipe a drop of icing from the nozzle on a paper towel.
- Finishing the desired line, stop altogether pressing the pastry bag.
- If you still have a drop, you can remove it with a toothpick while the glaze is wet.
Want to see what my lines were a year ago? I with great enthusiasm, just in the same breath, felt the Easter story for Alexander. And decided to play it in front of the child with the help of baby cookies.

Click on the photo and carefully consider my mistakes: the line was drawn without interruption from the cookies, so all the instability of my hand was transmitted. And there are so many “tails” that it is enough for all Easter bunnies, but we'll talk about bunnies later.
My camera apparently wanted to sleep no less than mine and let me down on a couple of photos. But the process does not return, I saw the photos only when writing this article, I apologize for the yellowness. So, while I draw a stroke on one cookie, the stroke on the other dries. You remember that icing almost instantly becomes crusted. Therefore, when I traced lines on 8 cookies, the first of the traced was already dry and ready to continue working. This time I change the nozzle to N2 and start filling in blue.

As you understand, the stroke does not allow the fill to go beyond the lines assigned to it and this facilitates the work. But it was with pouring that I got to the point for a long time how to make a perfectly smooth surface on cookies. Based on what I have today, I can advise:
- Do fill with icing starting closer to the stroke and moving along the curves of the drawing. Not by the chaotic movement of the hand, but by drawing lines and filling them gradually with all the necessary space.
- If your icing has not reached the brim, take a toothpick and send it to the desired place with neat circular movements.
- If irregularities remain on the surface of the pouring, it means that there is less icing in these places. Add it and gently taking the cookie by the edges, shake it in a clearly horizontal position like a rattle. Wet icing will occupy the voids and the surface will level out.
Analyzing my one-year-old errors:

Open a photo of a large size and if you carefully read, you will immediately notice that the icing did not reach the stroke; applied chaotically, so there were some divorces around the tail; there was no filling of voids, so there is no flat surface.
Since pouring has a large amount of glaze, it does not dry so quickly. Working in the night, I accidentally hit my finger in an incompletely dried biscuit. If you want to be 100% sure that everything will be perfect, then let each layer of the picture dry. It can take from 30 to 60 minutes, it all depends on the size of your cookies, air humidity and room temperature. I'm finishing one color, immediately proceeded to another, all the time keeping in my head which cookie was the first. Already made filling yellow on my children's cookies.

At this stage I went to sleep, since the next color was black and I was afraid to paint them on a semi-moist surface. Waking up in the morning and appreciating my strength, I decided to use the idea that I saw in one of the videos. It was a long time ago, and I confess honestly, initially she shocked me. The author draws the details of the drawing with a black felt-tip pen. I did not go by chemical means, but I used a simple pencil. It was morally necessary for me to see Minion’s faces before applying the icing. In addition, I was not sure that I could make clear circles in one another, so I used two caps of different sizes for a circle. You can not press with a pencil, this is a superficial barely noticeable drawing.
First I made a stroke, while I did it on all eight cookies, it dried and then filled it with black fill. At this stage, my toothpick magician will not help, if black icing stains yellow, then it will not be removed without a trace.

I waited for the black color to dry and applied white and red. Yes, it is possible to teach emotions on them!

I have everything on it, I hope you enjoyed my Minion cookies for children. It can be prepared for a children's holiday or just for their beloved households. I will be pleased to know if you have found in my master class useful information on how to prepare ice cream at home and how best to work with it. I will be glad to answer your questions in the comments.
Sweets are the most delicious and unbelievable temptation that units can resist. Gingerbreads, cakes, muffins and muffins, cakes, casseroles and pies, all this significantly improves your mood, allows you to indulge not only yourself, but also your close people. Most confectioners are able to create real confectionery masterpieces, true works of art, but beginner chefs do not lag behind them. This kind of desserts, such as icing, deserves special attention, it is very often used in decorating cakes and cakes. Thanks to detailed recipes, everyone has the opportunity to make this delicacy.
Glaze classification and features
Translated from English, the name of the dessert means “royal icing”. The recipe appeared in Russia, when at the court of the monarchs decorated confectionery with edible lace, flowers. As for the icing, this is a special decoration weight, made with the help of powder and egg white.
Varieties of icing:
- Classical. This is a special mass that has a sufficiently liquid substance. For the proposed type of glaze inherent incredible fragility. The finished delicacy can be applied to the surface of the confectionery or use appropriate stencils.
- Plastic. If you prepare an icing according to this recipe, the finished mass can be safely used to make edible lace and figurines. The composition resembles confectionary mastic, which is often used for decorating cakes. You need to work with plastic icing by all the rules, for this you should have a silicone mat and a mold. The formed mass is poured into molds, slightly dried, then it turns out a terrific result that can hit any connoisseur of desserts.
Numerous recipes allow to achieve a different consistency. It is important to know that the amount of powdered sugar depends directly on the purpose of the delicacy.
Icing classification by density:
- The consistency of thick cream. Such a mixture can be obtained by applying a small amount of powder. The final result resembles the classic type of glaze to cover the Easter cakes, pies. This icing is used in the manufacture of gingerbread, baking, when the surface of the product must be poured with a homogeneous mass.
- Soft peaks. To make a drawing, an inscription or a contour, this type of icing is useful. Willingness is checked very simply, it is enough to remove the whisk from the egg mass, it will have to hang down from it with soft and gentle peaks, which bend slightly if you turn the tool.
- Hard peaks. This type of confectionery coating has a special density. Pulling the rim from the resulting mass, it can be noted that the ice stretches and immediately solidifies with sufficiently dense, solid peaks. Often, the icing is placed in a pastry bag, and then decorated with muffins, cakes, pastries, cookies. To make volumetric or flat shapes with a stencil, you can safely use the finished mass.
Given the chic assortment of the proposed delicacy, you should be familiar with the step-by-step recipes for its preparation.
How to make traditional icing
Classical glaze of English origin is made on the basis of egg protein, lemon juice and powdered sugar. To make the mass more flexible, the composition will be more difficult, and it will also take much longer to whisk.
There are many detailed and accessible recipes that allow you to cook a treat at home. It is easy to choose a certain type of icing, it is enough to know for what purpose it will be used.
It is easy to prepare a drawing consistency for decorating cakes, as there are products for its production in any refrigerator. Thanks to this glaze, it is possible to decorate cupcakes, cookies and cakes, turning them into a solemn and even exquisite dessert.
That is why, no one can remain indifferent to such a culinary creation. The proposed recipe is simple and affordable, its quantity is enough to decorate a medium-sized cake and one kilogram of gingerbread.
With the help of such a glaze, you can make appetizing, festive, colorful and very original desserts. The duration of cooking classic icing is thirty minutes. One hundred grams of delicacy contains about 305 kilocalories.

List of the necessary components:
- lemon juice - 1 tsp;
- egg white - 1 pc .;
- powdered sugar - 155 grams.
The specifics of the step by step preparation of traditional delicacy:
- After reading the recipe, you should prepare the marked ingredients.
- The first step is to carefully separate the yolk from the protein. If even a small drop of yolk gets into the protein, the cream will not work, so you can immediately change this component to a new one.
- Next, you should beat the protein with a mixer or a blender, you can use a conventional whisk to get a homogeneous substance.
- Measure out the right amount of powdered sugar, then sift several times through a special sieve.
- Powder is added to the beaten egg white in small portions, the process of beating should not be stopped.
- To iysing acquired glossy shine, you can add a little.
The resulting glaze is used to decorate any bakery and pastry.
The secrets of making plastic icing
To form flowers from cream or other decorations will help a more complex composition, as the finished mass should have a fairly dense texture. You can prepare a flexible glaze thanks to the silicone mat.
Given that the composition may contain rare ingredients, they can be ordered in specialized stores on the Internet. As for caloric content, then in a hundred grams of glaze there are about 325 kilocalories. The cooking time is forty five minutes.

List of required products:
- water - 50 milliliters;
- fructose - 20 grams;
- food coloring - ¼ tsp;
- corn starch - 20 grams;
- invert syrup - 1 teaspoon;
- food glycerin - 1 tsp;
- citrus pectin - 1 tsp;
- polysorbate-80 (food supplement) - 3 drops.
Features of the phased preparation of plastic glaze:
- Carefully examine the recipe, purchase all the necessary components, they are easy to find in specialized pastry shops.
- In one container mix pectin, corn starch and fructose, as well as white food coloring.
- You will need water, but only at room temperature, it should be poured into a prepared container, then add the prepared dry mixture.
- Mix all the ingredients together, then leave for thirty minutes.
- After a specified period of time, mix again, then immediately inject the invert syrup.
- Mix polysorbate with glycerin, send to container. Prepare a mat made of silicone, it is covered with the finished mass.
- The oven must be heated to 100 degrees, send a mat with a prepared mass for ten minutes. Then it should be removed from the oven, cool. You can see that the mixture dries and takes the desired shape.
- The plastic pattern should be separated from the special mat, used for decoration of various baking and sweet products.
Despite the complex and rich composition of the presented dessert, the result is simply amazing. If you spend a little time and effort on his cooking, it is possible to create a real culinary masterpiece.
Secrets of sweet figures
The most simple and beautiful type of volumetric decoration from English glaze is a unique three-dimensional butterfly. To create it, you need a special stencil with a file, the sheet is placed on the prepared open book. The volume and size of the butterfly is adjusted by the angle of the pages.

To form a semicircular, place the stencil with the file on the cylinder. For such purposes a glass or plastic bottle is great. A very colorful and bright element of the decor is a ball, namely many balls, an openwork hemisphere, which will make it possible to turn the most ordinary pastry into a real culinary creation.
To prepare these figures, you need a regular balloon, which is inflated to a specific size. Then the surface is smeared with olive oil, using a fleece, then you can start the process. Carefully apply the pattern, the mixture should be completely dry, to do this, leave the ball in a dry and quiet place.
Recently, decorations in the appropriate format, namely 3D, have enjoyed immense popularity among confectioners. Manufacturing technology is quite simple, it involves the gluing together of flat parts. As for the complexity of the process, it is the selection of the desired stencil for all parts of the product.
Before you install a 3D body in a 3D format, it is important to wait, since all parts must dry thoroughly, otherwise it will not work. To separate the parts glued together, you should use icing, prepared for drawing. In addition, for such purposes, the usual whipped protein.
Interestingly, the icing will dry for at least twelve hours, so you should consider the given timeframe before you start cooking. That is why, when making a cake or a cake for a festive celebration, three-dimensional figures are made the day before, in order to be in time. Given the fact that such edible parts are very fragile and brittle, they are made with a margin.
Icing, on the recipe of which we will talk today, allows us to create the most diverse stylistics of decorating desserts.
Aysing is essentially a sugar-protein mass, the term of which means nothing more than “ice pattern”.
In fact, there is more than one recipe for making icing at home. In this MK we consider the most common, where we learn how to make for drawing patterns with icing.
Egg is a useful biological product for human health, and an excellent ingredient for the preparation of confectionery. However, raw eggs carry acute intestinal acute infection in the form of salmonellosis. Of course, modern poultry farms constantly monitor the safety of derivative products, but no one will be able to guarantee 100% safety of consumed raw eggs.
As you know, to disinfect the protein of chicken eggs, it must be processed at a temperature of at least 70 °. But we need protein raw, but not in custard (where it is amenable to a similar temperature treatment).
To disinfect the egg white, prepare a strong solution of soda and water (1 tbsp of soda / glass of water), where we place the egg for 15-20 minutes.

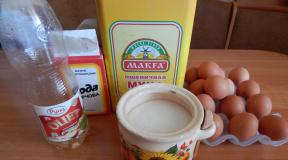
Ingredients for sugar-protein mass
1 piece chicken egg white
200 grams of powdered sugar (you may need more)
½ teaspoon lemon juice
Inventory
table fork and spoon
food wrap or wet kitchen towel
food paper
How to cook icing: master class
Separate the white from the yolk. We will have visible nodules in the protein composition, which we also need to carefully remove.

Sugar powder is sifted through a sieve, saturating with oxygen.

Protein whip in a light foam using forks.

Gradually add sugar powder to the protein.

Add powder to the composition to obtain a viscous state of the mass.


In principle, the icing is ready, but in order to obtain a homogeneous elastic mass that does not begin to flow, beat the composition. We do it at the minimum speed when using a kitchen mixer for no more than 5 minutes of time.

At this stage, beating it is permissible to color the mass in the desired color, adding.

We cover the composition of food plenochkoy or wet towel. The cream freezes quickly enough, so we need to try not to let it catch before starting to work with it.
To make sure that the correct composition and manufacture of the icing, we will make a striped one that should hold perfectly between stretched fingers. Move your fingers, if the icing did not break, then we withstood the correct consistency.

In the absence of a special culinary kornetik for working with icing, we will do it ourselves.
Take a sheet of food paper, fold it into a triangle.


We form a glass.

Angular excess paper we cut off.

We spread the sugar-protein mass in a homemade cornet.

We wrap a glass so that there is an opportunity to squeeze out of it.
Cut the “spout” of the cup - we maintain the minimum cut to get thin stripes when drawing.

And this beauty is capable of creating a cornet filled with icing.

"Ice" patterns icing on the finished cake
Aising allows you to make a truly icy.

And even create extraordinary beauty figurines.

Figures from icing are frozen very quickly on any surface of the desired shape. The main thing is not to allow the composition to stick to objects.
Aysing is a mixture for making decorations for confectionery, as well as for drawing patterns on gingerbread and cookies. In the classic version, icing is made from protein and powdered sugar with the addition of lemon juice. This mixture is used most often for drawing or creating fragile patterns. For the preparation of flexible icing or sweet “laces”, more complex combinations are used.
We will consider both options for making icing in our recipes.
Aysing for cookies - home cooking recipe
- single egg white;
- lemon juice - 5-10 ml;
- powdered sugar - 150-160 g;
- food dyes (if desired).
For the preparation of icing we will use raw egg white. Therefore, before breaking the egg, wash the shell well with soap and water. Separate the white from the yolk, put it in a bowl, add lemon juice and stir until smooth with a fork or a whisk, but do not whisk. We are not faced with the task of obtaining an airy protein mass, otherwise the icing will be saturated with air bubbles, which will negatively affect its quality.
In a mixture of protein and lemon juice, add icing sugar and stir well. If there is a need to get a multi-colored icing, then we divide the white mass into the required number of parts, add to each food dye and mix to obtain an even color.
Now lay out the mixture in pastry bags and proceed to drawing.
The prepared mixture in its pure form is used to draw dots, stripes and patterns. If you want to pour the surface of the cookies with icing, then we first outline the outline with them, and then dilute a small portion of it with a few drops of boiled water to make a mixture that spreads over the surface without difficulty. Fill it with certain contoured portions of cookies and let them dry completely.
You can also make various three-dimensional shapes or patterns from such an icing and then apply them to decorate cakes. To do this, use the printed stencils, putting them in the stationery file, on which we draw the patterns, repeating their contours on the stencil, and then after complete drying, carefully remove them.
You can also make incredibly spectacular balls of icing. To do this, apply the mixture on the oiled surface of an inflated balloon of the desired size, let it dry completely, and then gently gradually blow off the balloon and remove it from the resulting icing sphere.
How to do it yourself flexible icing at home?
To prepare a flexible icing at home you will need a special mat, some abilities to handle it, and some not so common components that can be ordered from specialized online stores.
- corn starch or potato starch - 20 g;
- fructose - 20 g;
- citrus pectin - 1 tsp;
- invert syrup - 1 tsp;
- food glycerin - 1 tsp;
- polysorbate 80 (E433) - 2-3 drops;
- white dye - titanium dioxide (E171) - 0.25 tsp;
- water - 50 ml.
Initially, we combine starch, fructose, pectin, white dye and mix well. Fifty milliliters of room temperature water is poured into a bowl, pour dry base into it, stir and let stand for thirty minutes. After the time has elapsed, mix the mass, add the invert syrup to it and stir again. In a tablespoon combine food glycerin and polysorbate-80, pour into the total container and mix again.
We smear the mixture on a mat for flexible icing and send it to an oven heated to one hundred degrees for ten minutes. Then we remove the mat, let it cool for ten minutes and carefully remove the resulting flexible pattern, carefully separating it gradually from the mat.
The resulting flexible icing can be used to decorate cakes, overlaying it over mastic or glaze, or forming the desired decoration out of it.
Flexible icing or, as it is also called, Sugarvale, can be prepared from a ready-made mixture, which is available in specialized stores, but the cost of such decoration is much higher than that prepared from a self-made mixture.
Now you know what icing is and how to cook it at home. A little patience, endurance and, of course, the desires and your products, decorated with cooked icing, will be simply irresistible.
← Click Like and read us on Facebook
Preparing fudge according to the detailed recipes suggested below, you will be able to decorate any homemade delicacy, especially a cake, without the hassle. We will tell you how to quickly make a similar design of cocoa dessert on a different basis: on water, milk or sour cream.
Of the many ways to decorate desserts, icing is the most sophisticated and is able to transform any confectionery product. For beginners, this method will seem difficult, but using the following master class, surely everything will be perfect.
Decorating desserts with icing is, of course, not for beginners, however, the following recipes suggest nothing complicated - a little practice - and you will have a delightful decoration for homemade delicacy. The following describes the master class on creating butterflies and flowers. Also tell you how to decorate cookies with snowflakes.
Any icing can effectively decorate homemade dessert. But if it is made on the basis of cocoa, it will also come out tasty and not at all expensive. We offer detailed recipes of excellent baking decor that everyone can reproduce.
Interesting articles

Decorations from mastic can turn a simple cake into a work of art. Sometimes the decorations are so beautiful that they even feel sorry for them! Mastic is used to decorate the cake and other products. She can cover the finished cake, the surface of the cake due to mastic will have soft and


Glaze for confectionery, except for a tasty crust, performs a protective function. The glaze does not allow the cream to flow between the layers of biscuit, evens the surface and maintains the necessary moisture content of the layers. The coating is a decoration of the cake, the basis for creating volumetric cream figures
Aysing is a mixture for making decorations for confectionery, as well as for drawing patterns on and cookies. In the classic version, icing is made from protein and powdered sugar with the addition of lemon juice. This mixture is used most often for drawing or creating fragile patterns. For the preparation of flexible icing or sweet “laces”, more complex combinations are used.
We will consider both options for making icing in our recipes.
Aysing for cookies - home cooking recipe
Ingredients:
- single egg white;
- lemon juice - 5-10 ml;
- powdered sugar - 150-160 g;
- food dyes (if desired).
Cooking
For the preparation of icing we will use raw egg white. Therefore, before breaking the egg, wash the shell well with soap and water. Separate the white from the yolk, put it in a bowl, add lemon juice and stir until smooth with a fork or a whisk, but do not whisk. We are not faced with the task of obtaining an airy protein mass, otherwise the icing will be saturated with air bubbles, which will negatively affect its quality.
In a mixture of protein and lemon juice, add icing sugar and stir well. If there is a need to get a multi-colored icing, then we divide the white mass into the required number of parts, add to each food dye and mix to obtain an even color.
Now lay out the mixture in pastry bags and proceed to drawing.
The prepared mixture in its pure form is used to draw dots, stripes and patterns. If you want to pour the surface of the cookies with icing, then we first outline the outline with them, and then dilute a small portion of it with a few drops of boiled water to make a mixture that spreads over the surface without difficulty. Fill it with certain contoured portions of cookies and let them dry completely.
You can also make various three-dimensional shapes or patterns from such an icing and then apply them to decorate cakes. To do this, use the printed stencils, putting them in the stationery file, on which we draw the patterns, repeating their contours on the stencil, and then after complete drying, carefully remove them.
You can also make incredibly spectacular balls of icing. To do this, apply the mixture on the oiled surface of an inflated balloon of the desired size, let it dry completely, and then gently gradually blow off the balloon and remove it from the resulting icing sphere.
How to do it yourself flexible icing at home?
To prepare a flexible icing at home you will need a special mat, some abilities to handle it, and some not so common components that can be ordered from specialized online stores.
Ingredients:
- corn starch or potato starch - 20 g;
- fructose - 20 g;
- citrus pectin - 1 tsp;
- invert syrup - 1 tsp;
- food glycerin - 1 tsp;
- polysorbate 80 (E433) - 2-3 drops;
- white dye - titanium dioxide (E171) - 0.25 tsp;
- water - 50 ml.
Cooking
Initially, we combine starch, fructose, pectin, white dye and mix well. Fifty milliliters of room temperature water is poured into a bowl, pour dry base into it, stir and let stand for thirty minutes. After the time has elapsed, mix the mass, add the invert syrup to it and stir again. In a tablespoon combine food glycerin and polysorbate-80, pour into the total container and mix again.
We smear the mixture on a mat for flexible icing and send it to an oven heated to one hundred degrees for ten minutes. Then we remove the mat, let it cool for ten minutes and carefully remove the resulting flexible pattern, carefully separating it gradually from the mat.

The resulting flexible icing can be used to decorate cakes, overlaying it on top of or over icing, or forming the desired decoration out of it.
Flexible icing or, as it is also called, Sugarvale, can be prepared from a ready-made mixture, which is available in specialized stores, but the cost of such decoration is much higher than that prepared from a self-made mixture.
Now you know what icing is and how to cook it at home. A little patience, endurance and, of course, the desires and your products, decorated with cooked icing, will be simply irresistible.