How to make mirror glaze for a cake - recipes at home. Mirror glaze for cake recipes with photos Recipe for white mirror glaze for cake
for 1 cake
40 minutes
342 kcal
5 /5 (1 )
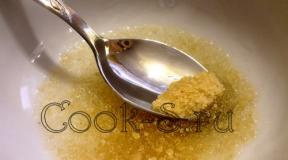
Mirror glaze recipe for cooking at home
All ingredients in this recipe Must be weighed on a kitchen scale, so the entire recipe is given in grams.
Kitchen scales, plate, immersion blender, container, bowl, mug, cling film, whisk, kitchen thermometer, 2 thick-bottomed saucepans (2 sauté pans).
Ingredients
How to choose the right ingredients
An essential ingredient in any mirror glaze, be it colored or chocolate, is high-quality cream, no less than 33% fat content. If your cream is not like that, then you shouldn’t start cooking - it will be very disappointing when nothing happens and the glaze just drains from the cake. Glucose syrup also cannot be replaced with anything, but this is not a problem, because it can be bought at any confectionery store, just like high-quality water-based gel food colors.

Step-by-step preparation
Preparing the glaze
- Pour 230 grams of cream with a fat content of 33% into a saucepan or saucepan with a thick bottom, bring it to a boil, but do not boil. If you have cream with a fat content of 35%, take 200 grams of it and add 50 grams of milk.

- In another saucepan, mix 70 grams of glucose syrup, 210 grams of sugar and 55 grams of water.

- Place the saucepan over medium heat and, without stirring, cook the syrup to a temperature of 110 degrees. We measure the temperature using a special kitchen thermometer (probe) or a pyrometer.

- Pour the finished syrup into the hot cream, mix everything until smooth.

- Add half a teaspoon of white dry dye – titanium dioxide. It will remove the yellowness of the glaze and make it opaque.

- Add gelatin (7 g) pre-soaked in 42 grams of water. For soaking gelatin, use six times the amount of water. Make sure it swells well before adding it to the glaze.

- Stir the mixture until the gelatin is completely dissolved. We punch it with an immersion blender.

- Pour the glaze into a container, cover it with cling film “in contact” (without air access) and put it in the refrigerator for 6-8 hours.

- After this, we take the glaze out of the refrigerator and heat it to a temperature of 27 degrees (the operating temperature of this glaze). This can be done in a water bath or in the microwave, in pulses of 15-20 seconds, taking it out and stirring each time.

- Using an immersion blender, beat the glaze until it is smooth. We introduce the blender at an angle of 45 degrees, and carefully break through the mass, without lifting the blender from the bottom of the bowl, so that air bubbles do not form. We do this at minimum speed.

- If air bubbles still form, pass the glaze several times through a fine sieve. In this case, all bubbles will remain in the sieve.

- Add water-based gel food coloring. Adjust the amount of dye depending on the desired gloss color.


Covering the cake

Recipe video
From this video you will learn a recipe for mirror glaze without chocolate and condensed milk. The video also reveals many secrets about preparing the perfect mirror glaze, as well as how to use it.
- The remaining glaze can be carefully collected and stored for up to a week. in the refrigerator (covered with film “in contact”), if necessary, heat the glaze to a temperature of 27 degrees and reuse.
- The icing on the cake can be slightly smoothed with a metal pastry spatula if the layer is too thick.
- If the glaze does not lie very smoothly on the cake, this means the cake is not frozen well. Try to remedy the situation by icing the cake again.
Chocolate mirror glaze recipe for cake
The glaze for this recipe is prepared very quickly and from available ingredients. However, she has disadvantages are its short shelf life and a small range of colors - from light brown to black. The color of the frosting will depend on the chocolate you use. You can take dark, milk and even white chocolate.
Cooking time: 30 min.
Number of servings: for 1 cake.
Calories: 351 kcal.
Kitchen appliances and supplies: kitchen scales, bowl, cling film, whisk, kitchen thermometer, thick-bottomed saucepan (saucepan).
Ingredients
Step-by-step preparation
- Pour 80 ml of cream into a saucepan. Add 215 grams of sugar and 60 grams of cocoa.

- Heat the mixture, stirring constantly with a whisk. Keep it on the stove until the sugar is completely dissolved; there is no need to boil the mixture.

- Add 70 grams of chocolate and wait until it is completely melted.

- Now wait until the mixture cools to 60 degrees. At this time, melt the gelatin in the microwave.

- Cover it with cling film “in contact” and leave to cool to 40 degrees. Exactly 40 degrees is the working temperature of this chocolate glaze. If you will be covering the cake in a few days, then put the glaze in the refrigerator and heat it to operating temperature immediately before coating. You can store the frosting in the refrigerator for up to 5 days.

- If you need a darker color for the icing, add black water-soluble food coloring to it.

- Before using, pass the glaze through a sieve again to remove any air bubbles.

- With this glaze you can either make drips on the cake using a pastry bag (the temperature of the glaze in this case should be 33-34 degrees), or cover the entire cake with it (for this it must be frozen).


Recipe video
I suggest you look at how to properly prepare chocolate glaze and how to apply it to the cake. This video will help you avoid mistakes during the cooking process.
A not very pleasant incident happened to me once. I bought mirror glaze, made a cake, poured it on it - and it is NOT MIRROR! In terms of properties it is mirror-like, in terms of taste it is, but there is almost no shine. I have no idea what was going on there. But after that, I suddenly thought about how to make mirror glaze for a cake at home? So that if you screw up, you won’t have to blame anyone but yourself. And if it works out, then do it this way, and don’t mess with the finished, non-shiny one anymore. Because, well, it’s a shame, I paid the money, but the result is not at all the same as what was ordered. And judging by how the glaze looks in the jar, it is not clear how it will behave on the product.
I must say that my first experience turned out to be very, very successful - I got the perfect glaze, it shines, it applies well, it stays on without any problems. Well, in general, judge the result for yourself, with your own eyes. And I move on to describing the ingredients and method of preparation.
The main catch in the ingredient list is glucose. Glucose does not mean the solution that is used in hospitals, but concentrated glucose. It is thick like honey. Possible replacements are clear and as light as possible honey and invert syrup. However, they can distort the color of the glaze into a warm yellow, so for all sorts of delicate colors, like blue and lemon yellow, use only glucose. In general, to make the color absolutely pure, the pros suggest adding a white coloring pigment.
First of all, chop the white chocolate.

Let the gelatin soften in cold water for 5 minutes (or whatever it says on the package).

Mix glucose, water and granulated sugar and heat over medium heat with constant stirring until the sand is completely dissolved.

Pour the hot mixture into the chopped white chocolate and stir.

Squeeze gelatin from water.

We add the squeezed gelatin to our hot slop and dissolve it in it.

To make the glaze homogeneous, beat it with a blender until the chocolate is completely melted. We keep the blender at the bottom, not on the surface, so that it does not beat in air.

Add condensed milk and coloring. Mix with a blender the same way.

You will have a lot of bubbles in the hot glaze. In order for them to come out, it definitely needs to cool down.

To cool, place the mirror glaze either in a container with a vacuum lid, or cover its surface with cling film like this.

When the icing has cooled almost completely, the bubbles will come out. It can either be used immediately or stored in the refrigerator for a week. Once cooled, the glaze has the consistency of something like silicone. It is easily separated from the walls of the vessel and can be cut into portions with a knife.

This is what the mirror glaze looks like on the finished product ().

The amount of ingredients indicated in this recipe is enough for 1-2 cakes.

Good afternoon friends! Today, professional confectioners have learned to make real masterpieces by decorating cakes and pastries. These are figures of people and animals, intricate patterns and paintings, not a cake, but a work of art. Did you know that you don’t have to be a super-master to amaze your family with excellent baked goods. It is enough to know how to make mirror glaze at home.
The composition of the shiny glaze is a kind of emulsion that has a water part in the form of syrup and an oil component - chocolate. An amazing palette of colors and unusual shine, and the surface is so smooth that when you get closer, you can see your reflection. Hence, apparently, the name.
To be honest, for a long time I was sure that all these desserts, amazing the imagination, were nothing more than some kind of clever trick. Well, such a perfectly smooth, shiny coating cannot be edible. But it turned out that it can! And even more - it’s not at all difficult to do it yourself.
How to make mirror glaze at home
Don't think that homemade mirror glaze recipes are beyond your capabilities. In fact, you only need knowledge of a few nuances and subtleties, and the rest will depend on your desire and good mood. If this is your first time making glaze, then you probably have questions, which I will try to answer as fully as possible:
What can be decorated
A glaze called mirror is prepared for coating mousse dessert products - cakes, pastries, soufflés, since they have a perfectly smooth surface. And this is an indispensable condition for achieving specularity and the desired shine effect.
To prepare such desserts, special pastry rings or silicone molds are usually used, which make it possible to obtain such an absolutely smooth surface.
Sometimes used in traditional cakes, but usually they are not completely covered, just the top. In this case, the glaze flows down in beautiful streaks.
What you need for cooking
Glasage, also called mirror glaze, can be made from products that are quite accessible to everyone. These are gelatin, sugar, chocolate, glucose syrup, molasses, food coloring, cocoa, vanillin, condensed milk. Agree, all this is sold in stores.
The cooking technology requires high precision, so in addition you will need:
- Cooking thermometer to select the correct operating temperature.
- Electronic balance.
- Blender with a tall glass.
How to choose the right temperature for making glaze
After heating all components, the glaze is whipped with a blender. At the same time, an indispensable condition for successful glazing is compliance with the temperature regime. Maintaining the operating temperature is very important, since glazing is the final stage in working with cakes. If you spoil it, you will nullify all previous efforts.
- Depending on the type, the working temperature for whipping is considered to be 29 - 39 o C. On average - 32 o C.
- A lower temperature will cause the mixture to “set” before it has time to coat the dessert. Although... there are some subtleties here: if you are going to make beautiful drips on the cake, choose the lowest temperature possible - 29 - 30. At a higher temperature, the drips will quickly roll down and harden into puddles.
- Glaze that is too hot will flow very quickly, leave gaps, and you will not achieve the desired effect.
- It is also important that the cake is properly frozen, take it out just before you start working with the frosting.
Mirror glaze for cake - basic recipe
This is a universal option for making mirror glaze, and once you master it, you can master it with others.
- Leaf gelatin – 12 gr.
- Water – 75 gr. (note that water is weighed in grams).
- Sugar, white chocolate, glucose syrup - take 150 g. each component.
- Condensed milk – 100 gr.
- Dye – 3 – 4 drops.
Step-by-step cooking recipe:
- Soak the gelatin in very cold water. almost icy water. If you don’t find sheet, take regular powder, it is also filled with water, but the ratio is 1:6. This means that at 12 gr. You need to take 72 grams of powder. water.
- Place condensed milk and chopped chocolate into a blender glass.
- Separately, pour water into a saucepan, add sugar and syrup, heat the mixture over low heat until the sugar dissolves. Do not stir the mixture, just shake or move around in the pan.
- When the mixture boils, measure it with a thermometer - you need to bring the mixture to a temperature of 103 o C. Bring it up, and immediately remove from the heat. It’s important to know here: overcook it and the glaze will become too thick; undercook it and it will run off.
- Pour the syrup into a glass of blender, squeezed gelatin into it and monitor the temperature - it should drop to 85 o C. Stir everything carefully.
- Add a couple or three drops of the desired dye and start working with the blender at minimum speed. Beat a little, then decide on the color and add coloring if needed.
Tip: hold the blender at an angle of 45°, and when working, turn only the glass. Then you will see how a funnel forms in the mass and bubbles go into it. There shouldn’t be many of them, and if you do everything right, there won’t be any at all.
If bubbles do form, remove them by straining the glaze through a sieve and then covering with cling film to prevent a film from forming on the surface of the glaze.
After this, place the container in the refrigerator to stabilize for 12 hours (overnight).
The next morning, check the mirror glaze for quality. If you press on it with your finger, it should become elastic and spring back.
Before decorating the cake:
- Warm the glaze in the microwave, blend again and measure the temperature. Working – 30 – 35 degrees – adjust if necessary.
- Quickly strain the mixture through a sieve and into a pitcher with a spout (this will make it easier for you to work with), and remove the frozen cake from the freezer.
Important! Start decorating the cake right away. If it sits for even a couple of minutes, condensation will form on it, causing the glaze to quickly drain. And the temperature of the glaze will drop.
Colored mirror glaze
As I said above, mirror glaze is a water-oil emulsion. Based on this, dyes for it are selected. They must be both fat- and water-soluble.
Confectionery gel dyes are popular among culinary experts, which are added in drops to achieve the desired color. In addition, you can take fat-soluble dry dyes.
- For a stunningly pure white, add titanium dioxide, a powder that produces a stable white pigment.
- You will get a pearlescent effect if you add silver or golden kandurin powder.
Attention! Frozen mirror glaze will become a more saturated and bright color than warm one. Keep this in mind when adding dyes.
By the way, if you dip a white plastic spoon into the mixture and freeze it, you can find out the color of the future cake without pouring it.
A few more tips:
- If the frosting is glass, scoop it up and use it for decoration, but only if there are no cake crumbs in it. If you get it, pass the mixture through a sieve, and then it can be used again.
- Make sure that no condensation forms, otherwise the glaze will wrinkle.
- If the glaze has thickened too much, you need to warm it up in the microwave again and continue working. Thus, it can be heated several times.
- Excess glaze can be collected and left in the refrigerator for a month - longer storage is not provided. Cake, and other confectionery products filled with
- mirror glaze, cut with a hot dry knife.
Chocolate mirror glaze - recipe
Mirror glaze, called chocolate, is the most popular in home preparation. Decorate the cake, the pastry, and the soufflé. If you don’t find molasses, make the syrup yourself, as described below.
- Gelatin - sachet.
- Sugar – 240 gr.
- Water – 95 gr. Molasses – 80 gr.
- Cream, the fattest, more than 30% - 160 gr.
- Cocoa powder – 80 gr.
- Soak gelatin: 30 ml for powder. water, leaf - 200 ml.
- Add molasses and sugar to the water, bring to a boil, and at the same time boil the cream in a separate bowl.
- Combine the cream with syrup, add cocoa in small portions.
- Stir, add the swollen gelatin and start beating the glaze. The temperature of the mixture for decorating cakes is 37 o C.
Honey mirror glaze for cake
Instead of glucose syrup, if you don’t find it, you can successfully use regular honey. Or make your own syrup (recipe below). The honey aroma will give your cake a special taste.
- Water – 75 gr.
- Leaf gelatin – 12 g.
- Sugar, natural liquid honey, white chocolate - 150 g each. Condensed milk - 100 g.
- Dye.
How to make the glaze:
- The preparation of the mirror mixture is completely similar to the basic recipe. Just note that the honey must be liquid; to do this, melt it in a water bath.
Mirror glaze with homemade syrup
This syrup is called invert, which is very easy to make yourself. Used instead of molasses and glucose syrup.
How to prepare it:
- Take: 350 gr. sugar, hot water – 155 ml, citric acid – 2 g. (this is 2/3 teaspoon) and baking soda - 1.5 g. (a quarter of a teaspoon).
- Place sugar in hot water and cook until boiling. When this happens, add citric acid and cook for 20 minutes, covering with a lid. The syrup will turn light golden brown.
- Remove from heat. Dilute the soda with a dessert spoon of water and pour into the syrup. Something like an explosion will happen. When the bubbles subside, the syrup is ready. It resembles liquid honey in color and consistency.
How to make mirror glaze:
- Gelatin – 7 gr.
- Sugar, white chocolate and invert syrup - 100 g of each component.
- Condensed milk – 70 gr.
- Dyes.
- Soak the gelatin. Heat water, add sugar, syrup and bring temperature to 103 degrees. Pour in condensed milk and add chocolate. Stir, add the desired dye and gelatin.
- Beat with a blender (glaze temperature should be 30 - 35 degrees). Send it to the cold. Warm to desired temperature before using for decoration.
It's nice when the cake not only tastes great, but also looks amazing. As French champion Guillaume Maubier says, “The eye buys.”
This glaze recipe has become universal for most confectioners on the planet. I think many of you are familiar with him. It has many advantages and several disadvantages. But the most important thing is that you can easily prepare and use it in your kitchen and you will succeed!
300 g glucose
300 g sugar
150 g water
200 g condensed milk
300 g chocolate (white, milk or dark)
20 g gelatin
Soak gelatin in cold water. Bring sugar, glucose, water to a boil. Pour over condensed milk, chocolate, squeezed soaked gelatin. Add dye. Beat with a hand mixer. Leave the frosting in the refrigerator overnight. Warm up and use at 35 C.
Benefits of the recipe:
Appearance, stunning glamor
- cake with frosting can be frozen
- the glaze is easily painted with water-soluble paints
- prepared from simple ingredients
- applicable to all types of frozen cakes
Disadvantages of the recipe
The icing is very sweet and can stick to a knife when cutting - the cake should be cut when it is still very cold, with a warm knife. Or don't freeze.
- It’s very difficult to take a photo of a cake without being reflected in it. The glaze is really mirror)
Difficulties in preparing glaze, how to solve them
The main difficulty is the appearance of bubbles on the surface. How to deal with them? When you have poured hot water, sugar, glucose onto the chocolate, condensed milk and gelatin, you put them through a blender and add coloring. Position your hand mixer at an angle to create a bubbly, streaky wave. Make sure your hand mixer does not create foam. Cover the icing with cling film. Leave it in the cold until tomorrow. When the glaze has set, remove the film. If there were a lot of bubbles, skim off the top foam. Warm the glaze to 35 C. The glaze can now be punched, you will feel that now its tendency to generate foam is much lower than when it was completely fresh. At the same time, watch the angle of your hand mixer - avoid bubbles.
If the glaze is very thick at 35 C, then add 1:1 syrup. The next time you make the glaze, remove it from the heat just as it boils.
Ideal surface
In order for the glaze to be distributed evenly, it must be applied to a completely flat surface. This surface is obtained by freezing.

If you are assembling the cake in a ring, place cake ring tape along the sides. After freezing, the ring will be easily removed from the mold thanks to this tape. When you remove it from a well-frozen cake, the sides will be mirror-like. Run a warm wrist over the sharp top edge of the cake - it will look softer, without sharp edges and the icing will flow easier.
Condensation is something to avoid. If there was condensation on the surface of the cake when you applied the frosting, the frosting will likely wrinkle by the next morning in the refrigerator. Everything will remain stable in the freezer.
Before you take the cake out of the frost, prepare your work area:
· Glaze in a container at the required temperature - 35 C - 38 C.
· Spatula with a neck for removing excess glaze
· A grid placed in a container where excess glaze will drain

Coloring the glaze
Our recipe contains water - water-soluble paint has something to dissolve in. That’s why we mainly use water-soluble paints for painting.

For a pearlescent effect, I add gold powder to the glaze. For the same recipe, more expensive fat-soluble dyes are sometimes used; it happens that they give particularly bright shades. White is a special dye that dissolves in both chocolate and water.

To get any color and shade, I use the color mixing table http://2mb.ru/poleznoe/tablica-smeshivaniya-cvetov/. I made the lavender colored icing by mixing white, pink and blue.
I applied purple icing to the white icing. Both glazes have a temperature of about 35 C when applied.

Before applying the design, leave the covered cake in the freezer for 5-10 minutes and then feel free to draw on the surface.

A small number of strokes of a different color on the main one looks elegant. When there are many strokes, the “Japanese” style and value of each line fades away with more of them. Therefore, use it in moderation.
Where else do we use this glaze recipe?

The glaze looks great on a veiled surface.

At one of the master classes, we decorated the table with daisies from mastic and made a burning yellow eye for them from glaze. The middle of the chamomile burned with yellow fire - it looked impressive.

When this buche was photographed, the glaze was sprinkled on the marble surface - it turned out artistic.
Photos for this post from a real friend -
Each of us is a little child. And we still choose from two unfamiliar candies the one with the most beautiful wrapper. It seems to us that if it’s beautiful, it means it’s tasty. And the task of any confectioner is to create the highest fair harmony between taste and appearance. Today we will do just that: we will create a very beautiful “wrapper” for different types of desserts. This is mirror glaze! How to prepare it correctly and what mistakes can you encounter? We'll find out today.
A mirror glaze recipe that has never let me down
I'll share my favorite recipe.
Once upon a time I heard that the kitchen is comparable to a laboratory. Every component, its quality, weight and other characteristics are important here. Since then, I have never doubted the veracity of this hypothesis. And there are recipes that confirm this. The recipes do not indicate “to taste”, not “a pinch” and not even “by eye”. Everything there is important down to the gram. It describes what, how, in what sequence and with what to connect.
There are huge advantages to such recipes! The likelihood that the dish will not turn out is minimized. And all because everything is described in detail down to the smallest detail.
This recipe is exactly where you need to follow the directions, and then you will understand how easy it is to become the creator of the perfect mirror glaze.
Ingredients:
- Sugar – 150 gr;
- Water – 75 g;
- Glucose syrup (molasses or invert, or corn syrup) – 150 g;
- Leaf gelatin – 12g;
- White chocolate (the best quality you can afford) – 150 g;
- Condensed milk – 100 gr;
- Dye. I'm not saying how much is needed. Focus on the color you want to get. But keep in mind that the frozen glaze will be brighter.
In addition to products, you also need tools. There are a lot of recipes where we can easily do without some products or replace one tool with one that is more convenient for us to work with (or which is available). But glaze is a very delicate thing. And for us to succeed, in addition to bowls and stewpans, we will need suitable tools:
- Scales;
- Thermometer;
- Immersion blender.
This is the basic recipe. There are many others, such as chocolate, fruit, cream, etc. If you have your favorite and personally tested recipes, share! Tell us how you cook in the comments and show off photos of your work! It will be great to see everything!
How to prepare mirror glaze (step-by-step recipe with photos):
- Soak gelatin in water.
- Combine water, sugar and glucose syrup.
- We send the mixture to the fire. Heat to 103. Sugar should completely dissolve. Remove from heat and cool slightly, stirring occasionally.
- Squeeze out the gelatin and add to the mixture. Mix.
- Melt the chocolate. This can be done in one of the following ways: in a water bath, you can put the chocolate in a pastry bag and hold it in boiling water, in the microwave in pulses (hold for 15 seconds, take it out and stir. And so on several times until the chocolate melts).
- Combine condensed milk with chocolate.
- Add the syrup mixture. Pour it into the chocolate in a thin stream. Mix.
- Add dye drop by drop. This makes it easier to choose the right color.
- Holding the blender almost vertically and not raising it above the mixture, mix the glaze.
- Now it's time to make sure you did everything right. You will see yourself in the glaze!
- Bubbles! If you see a small amount of bubbles in your glaze, you need to pass the mixture through a fine sieve. If after the second time there are still bubbles, you will have to redo the glaze.
- To work with glaze, you need to cool (or heat) it to 29-35. The ideal “working” temperature is selected individually, empirically, on average it is 32 C
Take note: if the glaze will be used for drips on the cake, its temperature should be lower, from my experience, no more than 30 C, approximately 28-29 C. Otherwise, the drips will go down to the very bottom of the cake and will stand on the base unsightly puddles.
How to work with glaze:
- To make it easier to drizzle the desserts, pour the glaze into a container with a spout.
- Desserts should have a smooth surface.
- Desserts are pre-frozen in the freezer.
- We place the products on a support above the tray, where the glaze will flow.
- Pour the glaze slowly, but with confident movements in a spiral.
- !!!We periodically check the temperature of the glaze. Before measuring the degrees, mix the glaze. If necessary, heat it up.
- Let it sit for a few minutes (about 3).
- Carefully remove the finished product from the support. We remove the threads from the flowing glaze and transfer the desserts to a dish, tray, or base.
- Place in the refrigerator for 3-6 hours. The larger the product, the longer it should remain in the refrigerator.
You can decorate the cake or pastry before leaving the dessert to cool.
Analysis of errors. Subtleties. Nuances. Secrets of mirror glaze
Color
Want a more saturated color? - Use glucose syrup.
What are the requirements for dry dye? — We have chocolate in the recipe. Taking this into account, the dye must be fat-soluble.
How to get snow-white glaze color? — To do this, you need to add titanium dioxide as a dye.
Can the glaze be repainted? - Yes.
If the glaze color is translucent, how can you add density to the color? - Using titanium dioxide. It’s also worth adding it drop by drop.
Can I make silver or gold glaze? Certainly! — With the help of kandurin, which you will need a lot to make the color clear and saturated.
Preparation
How not to spoil the glaze while mixing products? - Do not create bubbles. It depends on the position of the blender. It should be almost vertical and not rise above the surface of the glaze. Otherwise, you risk making the glaze bubbly, but not mirror-like (we will definitely use this method when the “broken glass” or “exploded volcano” styles are in fashion.)
In what bowl is it more convenient to prepare the correct glaze? — A tall and narrow glass.
What should I do if there are bubbles in the finished frosting? - If there are only a few of them, you can pass the mixture through a strainer 1-2 times. If there are a lot of bubbles, prepare another glaze; this one is no longer suitable.
Working with glaze
Why is the optimal temperature for glaze 29-35 degrees? — It’s easy to work with, it will harden quickly and be even and smooth. At lower temperatures, lumps may form. If the temperature is higher, this glaze will simply drain from the dessert. And if the dessert is mousse or covered with cream, we risk the warm glaze ruining its appearance. If the surface is a hemisphere, then the glaze will flow down on its own.
What is the best way to apply glaze to a surface? - You can use a baking sheet, but it is better to take a special wire rack or from the oven. Place the products on the grill at a short distance from each other to make it easier to work and cover all sides evenly. Pour the glaze into a container with a spout. Water in a circular motion from the center to the edges. All movements are slow and smooth. Instead of a wire rack, you can use any pan or three-liter jar as a platform.

If the glaze does not stick, but slides off the surface of the product. Why? And how to prevent it? “Perhaps when the cake was in the refrigerator, it froze so much that a thin layer of ice appeared on its surface. Now that you take it out, that ice melts and the glaze slides off. Before work, stroke the product with your hands. And only after that start covering with glaze.
How to smooth out the glaze if the surface of the dessert is flat on top? - With the help of a spatula.
How to achieve a perfectly smooth surface of a dessert using glaze? — 2 conditions are important:
- Initially, you need the surface of the cake or pastry to be smooth. A mousse top coat is ideal.
- The product must be very cold. Then the glaze will instantly harden evenly and flawlessly.
Can the product be coated with two layers of glaze? - Yes. After the first layer you need to take a short break. But first you should check the temperature of the glaze and reheat it if necessary.
How many times can the finished glaze be reheated? - Doesn't matter. The amount of heating does not affect the quality.
What if the icing is at the temperature we need, but it is still too thick and difficult to work with? - You can add a couple of teaspoons of sugar syrup (water and sugar in equal proportions).
Is it possible to use the same glaze from glass from finished products? - Yes. If there are no crumbs and pieces in it.
Should the operating temperature be the same for white or dark chocolate icing? - No. It is believed that for dark chocolate frosting the temperature should be several degrees higher. Here you should focus on how you personally feel comfortable working. Frosting at a higher temperature will be thinner.
Appearance and product design
When and how to remove the cake from the wire rack? - After 3 minutes, the glaze has more or less “set”, and now you can remove the dessert from the stand. This needs to be done with a very thin spatula. If necessary, if the product is large, you can use two spatulas.
How to get rid of glaze drops frozen at the bottom of a dessert? - Not with your hands! To prevent the glaze from sticking and reaching behind your fingers. You can carefully remove the drops while removing the dessert from the grill. To do this, the product is slightly raised with a spatula and turned several times on the grid in one direction or the other.
How to disguise flaws?
— The glaze is very delicate. It's easy to tear. What to do?
— You can easily decorate a flaw with nuts, chocolate, berries, cream, etc.
— How to decorate a dessert covered with glaze?
“Of course, we didn’t try so hard to hide such beauty.” However, to make a design interesting, sometimes you need a couple of touches. For example, mix different colors and shades of glaze. Come up with a berry composition. Or, make figures from chocolate, mastic or marzipan.
— The product is cold and condensation may appear. Can it ruin the appearance of the dessert?
- Unfortunately yes. Therefore, try to very carefully blot the droplets with a napkin without touching the surface.
— How to cut a cake without damaging its beauty?
— Dessert should be cold. But the knife is dry and warm.
Storage
Can I store the frosting? How to do this correctly?
- Can. In the refrigerator, cover with film so that it touches the surface of the glaze (in contact).
— How to use icing that was stored in the refrigerator?
- It is enough to heat it to the desired temperature.
— How long does the glaze last?
- About a month.
— Is it possible to mix the icing that was stored in the refrigerator with the one that was made right now?
— If the cooking recipes are identical, it’s possible.
If I missed something, feel free to ask questions! I will be happy to answer everything!
And have a successful experience!
Another option for decorating a cake can be, which is very easy to use.