Paint brown eggs for Easter with your own hands. How to paint eggs for Easter with your own hands: new ideas
One of the biggest church holidays is Easter. To him, people begin to prepare in advance. Immediately before the holiday housewives cook cakes, paint eggs. It is here that women can show all their creative imagination. Especially distinguished by the diversity
This article describes how to paint eggs beautifully at Easter with your own hands at home. These methods are so simple that even an aspiring hostess can handle it. In addition, they do not require any artistic skills from the hostess. Before you start painting eggs should prepare them.
HOW TO PREPARE EGGS FOR PAINTING?
- Initially, you need to get the eggs out of the fridge. They should be at room temperature. This is necessary so that the eggs do not burst during the cooking process.
- If you want the paint on the surface of the eggs to lie evenly, then you should wash them with soapy water under running water before processing.
- To give the eggs a smooth and shiny surface, after applying the paint on them, wipe them thoroughly and treat with vegetable oil.
Now let's stop in more detail on the technique of painting eggs for Easter.
AS A BEAUTIFUL PAINTING EGGS FOR EASTER WITH YOUR OWN HANDS
Onion peel is one of the old methods, which was used even by our grandmothers. The result of the use of husks are eggs of red, yellow and brown colors. This effect can be achieved by adding onion peel and increasing the time the eggs are in the water: if the egg is in the water for several minutes, the color will turn yellowish. Provided that the eggs spend several hours in onion water, the eggs will be painted in bright red and scarlet tones.
HOW TO COLOR THE EGGS FOR EASY IN HOME CONDITIONS WITH NATURAL DYES
A large number of products that we eat have a coloring effect. These products include: beets, carrots, cabbage, coffee, lemon, orange, various greens and wild berries. The result is an egg of such shades as: orange, blue, purple, green, yellow. It should be noted that the color in such cases is not very saturated. To enhance the effect, it is necessary to increase the time the eggs are in the broth.
DECOUPAGE EGGS FOR EASY NAPKINS
Currently, many tools have been created to help the hostess to significantly ease the egg coloring process. These include various stickers. In addition, you can apply the technique of decoupage. Initially, boil the eggs and prepare the gelatin glue. It is necessary to prepare it using the instructions on the package. Next, you should choose napkins with a beautiful pattern. It is necessary to remove the white paper layer. Cut the desired fragment and put on the egg. Next, the image is processed using the prepared glue, waiting for it to completely dry and slowly and gently get rid of the stencil.
HOW TO COLOR THE EGGS TO EASTER WITH YOUR OWN HANDS BY FOOD DYES
Now the culinary industry does not stand still and many confectionery additives have been developed. Various food colors can be used not only in the manufacture of sweet dishes, but also for coloring eggs. To use them properly, you must carefully read the instructions on the packaging. It should be remembered that tinted water should completely cover the egg.
COLOR THE EGGS WITH THREAD MULINES
In order to get beautiful patterns on the eggs, you can use ordinary floss threads. Eggs should be wrapped with colorful paints and dipped in boiling water. As a result of high temperatures interesting patterns of bizarre form will appear on the eggs. After heat treatment all threads should be cut.
HOW TO MAKE BEAUTIFUL MARBLE EGGS FOR EASTER
They look very solemn and spectacular. To properly paint the eggs you need to take vegetable oil and paints of different colors. This method is very complicated and requires the presence of artistic skills from the hostess. Coloring is carried out in the following way: first, the eggs should be painted with colors of light shades. Then they need to dry. Next, dark colors must be diluted in a cup with a low content of water and oil. It should be remembered that in no case should the cups with liquid be stirred up. It must be placed so that there are small drops of paint. Then each egg must be dipped in this solution. It should be lowered once, maximum two times. The duration of the egg in the paint determines the intensity of staining. It should carefully select the shades to each other and the right combination of colors.
COLORING EGGS WITH COLOR FABRICS
For this method, you need a fabric of bright colors with a beautiful pattern. For this, silk ties or Pavloposad shawls are most often used. A raw egg at room temperature should be wrapped in cloth so that its bright side is on the outside. In order to avoid slipping of the fabric, you can sew the fabric along the contour. Next, the egg with a cloth should be wrapped in a plain white cloth and carefully fasten it on both sides. Then add water and 3 tablespoons of vinegar to the pan. Eggs should be cooked until cooked right in the tissue. The same process is performed if silk fabric is used. After the eggs have completely cooled down, remove the cloth.
USE OF UNDERGROUND MEANS FOR PAINTING EGGS
- Before the implementation of dyeing wet eggs should be rolled on any grits.
- In addition, you can use fresh herbs for decoration. In order for it not to fall out during the cooking process, the egg with greens should be fixed with a gauze, stocking or bandage.
- For the decoration of eggs with straight lines used adhesive tape, glued in the form of strips. You can also apply the gum.
After completion of processing all devices must be removed.
DECORATION OF EGGS BY ALL FAMILIES - CHICKENS FROM EGGS
Easter is considered a family holiday and you can make it at home a tradition of sharing eggs with children. It will be interesting for children to make eggs from chickens. To do this, parents with children can paint them with yellow food paint, and use egg cells as supports. Cut the paws, eyes and beak out of paper to the chicken and attach it to the egg using gelatinous glue.


DECORATION BY MEASURING Stencils
Most parents do not have creative skills, but they all want to decorate eggs exquisitely. You can recall the times of youth and cut stencils from tracing paper. It can be one or more, and one stencil can be placed on both sides of the egg. For them to carry out the processing of paints. Stencils can use several kinds.
PERMANENT MAKEUP
If you do not want to bother with different stencils and tie up eggs with threads, then there is a way out in this situation. Permanent markers that can be bought in any office supply store will come to the rescue. In the absence of creative impulses and imagination, you can use patterns that are available on the Internet. When decorating you can help the child. For him, you can use the usual markers or watercolor, gouache, water-based. After completion of staining eggs should be dried.
DECORATIONS EGGS FOIL
This method will not only help to decorate eggs creatively, but also will raise your spirits during work. If you want to leave the surface of the egg untouched, then you can simply wrap the eggs in colored foil and fix the decorative elements on them. It is not necessary to use gold or silver shades, you can choose color foil.
DECORATION OF EGGS WITH SUGAR POWER
This method is very simple, but at the same time makes the surface of the egg more heterogeneous and gives it an interesting look. First boil the eggs using food dyes. Next, you need to mix powdered sugar with water to obtain a thick slurry. When the eggs are cold, you can use a pastry bag to put a pattern at your discretion. It all depends on the author's imagination. In addition, you can use special stencils, which on the Internet you can find a huge amount and for every taste.
RAINBOW ON EGGS
This method of coloring will give the eggs uniqueness, originality and make them more extravagant. Initially, boil the eggs and cool slightly. This will make the application process more efficient. Next, you should dilute several types of paints in different containers and add 2 tablespoons of vinegar there.
Initially, the egg should be dipped in the desired paint, repeat with all. Eggs should be postponed until completely dry. Next, you need to lower the painted egg to half in another paint. Also let dry. This procedure can be performed several times.
You can afford the most daring combinations of colors. After coloring on a colored egg, you can put any decorative element. However, without them they will look very beautiful.

QUILING ON EGGS
One of the most unique methods of decorating eggs is the use of new methods. One of these is quilling. This is the art of making paper of various patterns without the help of scissors. Currently, you can find whole pictures created in the style of quilling. Of course, the egg does not have a large surface, but on it you can make a real masterpiece of paper. But many craftsmen manage to create whole pictures: various volumetric animals, people, decorative elements can be folded out of paper.
Thus, using these egg coloring methods will help make your Easter table more sophisticated and unique. Just imagine how delighted your loved ones will come at the sight of painted eggs, made to them with their own hands.
The topic of our talk today is how to paint eggs for Easter.
One of the major Christian holidays is approaching and Krashenki are an integral part of this bright holiday.
Lent ends and the first meal always began with eggs.
They painted them on Pure Thursday or Red Saturday (this year on April 13 and 15) and were consecrated in church at a festive divine service.
Several options for painting eggs so that they are beautiful and original.
Coloring eggs without dyes
Traditional egg painting in onion peel

- The most famous coloring recipe, which is very popular.
2. We take fresh eggs, you can use both white and brown
3. Be sure to wash them well with soap.

4. We take onion peel, put it in a saucepan, fill it with water, and set it on fire, keep in mind that the saucepan may stain, therefore it is better to use a dark enameled color.
5. After boiling, reduce the heat and leave the husk to languish for 1 - 1.5 hours
6. To prevent eggs from bursting, add a tablespoon of salt.
7. Carefully, in a spoon, put them in a saucepan and cook for 15 minutes.
8. Remove from the pan, cool and rub with vegetable oil for shine
9. For white painted eggs, use white.

10. To get such beautiful specimens you can use parsley, dill

11. Top wet the surface of the shell with water and straightening, gently glue the parsley leaf

12. Put the nylon fabric on top of the egg, you can use old clean nylon stockings, cutting them into pieces

13. Tie the edges into a knot so that it turns into a tight-fitting bag.

14. Also repeat with a sprig of dill.

15. Prepare several eggs and send carefully to the broth with onion peel.

16. After 10 minutes, we take out the bags with eggs, let them cool and remove them from the nylon sacks, wipe with a napkin and remove the pasted parsley leaves and dill sprigs.
Coloring eggs food dyes
First you need to boil them
Beforehand, be sure to rinse well with soap and a sponge.
Boil water, add salt and boil them in it for 8 - 9 minutes.
Drain boiling water and blot the surface with a napkin.
For more information on how to boil eggs, you can read in the article.
Eggs in rainbow colors (3 species)

We breed food dyes according to the attached instructions

To dry eggs, we make sponge masters and stand pins.

1 way
Boil the egg completely for 2 - 3 minutes into the solution and get multi-colored stains
2 way

- Take a hot boiled egg and drop it in half in the first paint for 2 minutes

2. Wipe the remaining drops with a napkin and put it on the stand to dry, the hot will dry out very quickly

3. Lower partially in yellow paint, let dry

4. Then also in blue paint

5. The first rainbow egg is ready
3 way
- We add some more dyes to our solutions, so that the color is more concentrated, we collect the solutions in medical syringes

2. In order not to get dirty hands, put on a rubber glove and tightly wrap the egg in a napkin

3. Apply paint on the surface of the napkin
4. After applying the paint, press the cloth tightly

5. Leave the egg on the stand for 10 minutes, for better coloring.

6. Remove the napkin, the surface turned out to be rainbow-colored with a marble pattern
Decorative drawing on the shell with sugar

- To obtain a multi-colored paint on the surface of eggs, dissolve 2 tablespoons of turmeric in 1 liter of water and cook an egg for 10 minutes - you will get a bright yellow color
2. 5 tablespoons of Hibiscus dilute in 0.5 liters of water, boil an egg in solution for 10 minutes - there will be a blue egg
3. Squeeze the beet juice, or grate the beets and pour boiling water over it and put the boiled egg in it for 20 minutes, until it gets saturated color
4. Dilute icing sugar in a small amount of water in a ratio of 5: 1, if the solution turned out to be liquid, add a little starch, the consistency should be similar to sour cream

5. In a medical syringe without a needle, pour the icing sugar solution and gently apply the pattern on the cooled, dry egg, let it dry.

6. The drawing can also be made multi-colored, if the powder is diluted not in water, but, for example, in juices with different colors.
We decorate Easter eggs - unusual ways of coloring on video
How to paint eggs for Easter - 12 species in 15 minutes

The most important thing you can get pictures that no one will have, let's say - an exclusive
- For this method, we take raw eggs, wash them with soap and wipe them with a napkin

2. For the preparation you will need small pieces of silk fabric of different colors, you can use old ties for this. In this case, using 12 colors, if you do not have such a number, you can take the available colors.

3. Put the egg on the front side of the silk fabric and wrap tightly in the bag.

4. The second layer is wrapped in a piece of any white fabric.

5. The ends of the tissue are fastened with a stationery eraser. This procedure is carried out with all available pieces of fabric.

6. Put the eggs in the pot, pour water

7. Add vinegar and set on the stove to cook

8. Cook in boiling water for 15 minutes, take out, lay out on a plate.

9. After they cool down completely, unwrap them from the fabric.

10. This is the beauty
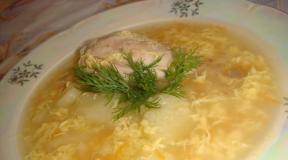
Unusual jelly easter eggs

These are beautiful and delicious desserts turned out to be a joy to children.

- We take drinks of different color, for example, orange juice, cherry juice, tarragon, Coca-Cola, tangerine juice.

2. Add and mix gelatin in each glass.

3. On one side of the washed eggs, we make small holes with the point of the knife and carefully shake out the contents of them into the plate (you can use it later to cook other dishes)
4. Wash the shell inside to clean water.
5. Put them in the oven, heated to 200 degrees for 10 minutes, so that they are heated and disinfected.

6. Using a small funnel or syringe, pour our drinks inside the shell
7. Put it in the fridge until it freezes.

8. When the contents harden, carefully remove the shells, put them on a plate, your child will be very pleased and will eat them with great pleasure, and especially if he himself took part in the manufacture of this miracle
Souvenir - Easter egg as a gift. Video workshop
You can get such beautiful and original egg colors with some effort and imagination, of course, it may take some time, but it's worth it.
They will decorate your holiday table and cheer up.
Along with the warm and sunny spring warmth, the good and bright day of Easter approaches us. Fragrant and bright Easter cakes, cottage cheese Easter eggs, a variety of baking dishes and naturally colored eggs, each hostess tries to prepare for the festive table.
They donate with color not only relatives and friends, but also not always familiar people, sharing the good news "Christ is Risen", and hearing in response, "Truly risen."
You knew that they are divided into certain types, and are completely dependent on the method of painting the paint. For example ,
- Krashenki - painted in one color;
- Easter eggs - have a certain pattern;
- Krapanki - covered with chaotic drops or circles;
- Drapanka - on monophonic scratched drawings.
In this article, we tried to collect the most popular ways of coloring the shell, reveal all the secrets and nuances to get the best result.
How to paint the testicles beet your hands for Easter
Before you start painting eggs, read the rules below, so that this idea would not turn into a complete disappointment.
Before you begin to cook the testicles, they need to bring to room temperature, taking a couple of hours before cooking from the refrigerator.
In water, add 1, 5 tablespoons of salt to 1 liter of water. Salt will not allow protein to leak out if it does crack.
For a more uniform color carefully, before cooking, wash them with a sponge.
Paint on Easter holiday in addition to chicken eggs can also quail, they look very nice.
And to fix the paint, vinegar is added to the paint, 1, 5 tbsp. 1, 5 liters of water.
For a more beautiful effect, you can rub a drop of sunflower oil. They will be like glossy and very rich colors.
One of the easiest and most economical ways to paint eggs, coloring with beets. And here we offer you take advantage of in two ways, for receiving various on a saturation of shades. 
Painting beetroot juice
What should be done :
Crush the beets and squeeze out its juice with the help of additional means (such as a juicer); 
If you do not have a juicer, just grate the beets on the largest grater and using gauze, manually squeeze the juice.
In beet juice pour 1, 5 teaspoons of 9% table vinegar. There should be plenty of juice so that it completely covers the blanks.
And leave them for a few hours to settle in this juice. Periodically turn over look at them for the color saturation, when it will suit you, remove the painted products and wipe on dry. 
Painting eggs with beet pulp
Here too take advantage of two ways :
You just need to chop the raw beets and rub it with boiled eggs beforehand, to obtain the desired shade. Then let them dry and grease with refined oil.
Do not forget to wear rubber gloves, otherwise at Easter you will be not only with painted eggs, but also with no less bright hands.
 Rub the also fresh beets and cook it for about 15 minutes. Then strain the broth and pour the testicles into it all night.
  Depending on the chosen method and time of exposure, you can get from a light pink shade to a deep burgundy color.
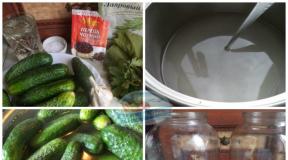
Painting onion peel
To paint eggs this way you need to prepare in advance. Now even in stores they began to sell onion peel for a purely symbolic price.
But it’s not at all necessary to buy it, just a few weeks before Easter, do not throw out the onion peelings in the process of cooking. And by the right day you will have enough for painting. 
Ingredients :
- Onion Husk - 1 bunch;
- Eggs - 10pcs;
- Water - 1 liter;
- Pan - 1 pc.
Let's start:
Dry pre-onion peel.  Pour onion peel with water and put on a large fire until boiling, then make a medium fire and let it boil for 30 minutes.
  When the decoction is ready, remove it from the heat and leave to cool to room temperature.
  Chicken beforehand get out of the fridge, give a couple of hours and thoroughly wash.
  Strain onion broth, very carefully put the billet into it, at room temperature, and put on the fire for 10 minutes.
  After the products have been painted, transfer them to another container and pour with icy water. The onion decoction can be used several times, the quality of egg coloring will not deteriorate.
  Grate them with sunflower oil for a glossy shine.
Marble method of coloring eggs
When the inspiration comes to the creation of the original, from improvised means, we recommend using this method of painting. Thanks to not tricky tricks as a result, souvenirs of ordinary beauty are obtained, and it is hard to believe that they are real.
Instruments:
- Onion Husk - 1 bunch;
- Water - 1.5 liters;
- Eggs - 10pcs;
- Kapron stockings - 1 pair.
Let's start:
To begin, chop the onion peel into different pieces, with a diameter of maximum 1 centimeter.  Plus grind the same white sheet of paper, and mix them.
This is done to ensure that the products are not completely painted, but it is exactly the result of the marble effect. You can also add red onion peel.
Preheat to room temperature, moisten with water and dab well in a husk with paper.  Kapron tights cut into approximately 15 * 15 centimeters squares, and wrap in them the testicles in the husk. Tying them in the same stocking is not a bow.
  Put everything in a saucepan, cover the remaining husk, pour water and put on the fire. Boil the field to reduce the heat and cook 40 minutes.
  Then get the product, release them from the caprone and husk, and only then cool it with ice water. Next, put them on a napkin and wipe dry. Be very careful.
Marble pattern in onion peel and Zelenka
This method is similar to the previous one, except for adding a few drops of ordinary green leaf. He also has the full right to exist, because it is thanks to the Brilliant Green solution that the marble color is more pronounced and saturated, try both ways yourself and choose the one that suits you best. Or maybe both will be to your liking. 
Ingredients :
- Onion Husk - 1 bunch;
- Water - 1, 5 liters;
- Eggs - 10pcs;
- Capron stockings - 1 pair;
- Brilliant Green Solution - 1 bottle.
Let's start:
Shred onion peel with paper and mix thoroughly.  Products, room temperature, rinse with a sponge and mix with onion peel. Nylon panty hoses cut into squares 15 * 15 centimeters, and cut into strips for filling blanks. Wrap them up.
  Carefully put the crafts into the pan, pour water, light the biggest fire, put it on the stove. Once the water boils, pour a bottle of green stuff there and let it boil for at least 8 minutes.
When they are brewed, spoon them into cold water, cool and unfold. 
In onion peel with a pattern
In addition to the monochromatic dyeing of eggs with onion peel, there are also various options for decorating with various patterns. A few of them we will look at in more detail
Easter eggs with vegetable patterns
For this decoration, you can use leaves of greenery, sold in the store, and house plants growing on the windowsill. 
Ingredients:
- Eggs - 10pcs;
- Onion Husk - 1 bunch;
- Nylon stocking - 1 pair;
- Green leaves - 10pcs.
Let's start:
Boil the onion peel for at least 30 minutes to obtain a rich broth.  Decorate each egg with one leaf and wrap it in a stocking carefully, without jamming it.
  Cook the chicken blanks in onion broth for 10 minutes. Cool them under ice water and gently unfold.
Easter eggs with a pattern of rice
With the help of ordinary edible rice, you can also decorate Easter souvenirs in an original way. They look unusual for sure. And they prepare literally from improvised means. 
Ingredients:
- Eggs - 10pcs;
- Onion Husk - 1 bunch;
- Nylon stocking - 1 pair;
- Rice - 150g.
Let's start:
Chopped onion peel boil in salted water for 30 minutes. Wash the products thoroughly, roll in rice.  From a capron make a bag, pour there 1st ..l. rice and put the egg. Spread the rice evenly. The bag should be tied as tightly as possible.
It is better to take long grain rice, since it does not boil out longer, and the drawing will be for sure.
Cook eggs with rice in onion broth for at least 10 minutes.
Finished products cool and deploy.

Decorating Easter eggs with lace and onion peel
Look very gently, painted with onion peel and decorated with a pattern of lace. At first glance it may seem that this is not a feasible task, but in reality there is nothing difficult here. Try it yourself, and you will be convinced of this. The variety of patterns directly depends on the lace itself, on the width, the number of patterns and monograms. 
Instruments:
- Eggs - 10pcs;
- Onion Husk - 1 bunch;
- Lace - 50 cm.
Let's start:
First, prepare a strong broth from onion peel. To do this, it must be boiled for at least 30 minutes. 
For a more saturated color of broth, use the husk from different types of onions.
Then the washed chicken eggs, which must be removed in advance from the refrigerator, since they can burst immediately from the refrigerator, carefully wrap in lace.  Lace is better to pre-wet, it will lay down so tightly on the egg, and sew with a needle and thread.
  Cool the broth, put everything in it and set it on fire. Over high heat bring to a boil and reduce it.
  Boil everything for at least 10 minutes, then transfer it to another dish with a spoon and cool it with cold water and pieces of frozen ice.
Remove the lace, and lubricate the finished product with sunflower oil. 
Decoration of eggs in onion decoction using drapanka technique
We offer you a no less interesting way to decorate eggs in the style of drapanka. Previously they need to boil and cool, and then very carefully scratch the picture. Create drawings with the whole family, it is very close. 
Instruments:
- Boiled eggs - 10pcs;
- Pencil - 1 pc;
- Diligent gum - 1 pc;
- Office knife - 1pc.
You can proceed:
To start, prepare a strong onion decoction in a standard way, cool it. Heat the testicles to room temperature to avoid cracking. Boil in onion broth. Dry with a paper towel and set aside to cool.  Using a pencil, draw an example of the future pattern on the egg. There are no special rules, as in the egg, you can draw, which is convenient to the soul.
  With the help of a clerical knife we scratch the drawing along the contour. Hold the knife with your whole hand, and not like a pencil, with two fingers, since it is not very easy. But it is not so difficult that not to give this occupation to children, they will also like to create drawings by themselves.
  When the drawing is done, with the help of a diligent gum, we remove the pencil and wipe it thoroughly with a clean cloth.
  And to give shine, lubricate it with butter.
Decorating eggs with wax in onion decoction in pysanka technique
A very common method in Ukraine, decorating eggs with wax. But to perform it requires certain skills. Since waxing is done with the help of a special device, the “Writer” is a wooden stick with a thin funnel at the end. It is she who gathers the wax and applies the drawing. 
Required tools:
- Food dyes - 2pcs;
- Scribe - 1 pc;
- Candle - 1pc;
- Eggs - 2pcs;
- Wadded disk - 2 pieces;
- Vinegar - 50g.
Getting Started:
We remove the products from the refrigerator beforehand and heat them to the desired temperature, because otherwise the wax simply will not fall. Then wipe them with a cotton pad dipped in table vinegar 9%. Dye diluted according to the instructions on the package, do not forget to add vinegar at the end to fix the color.  Ignite the candle and let it warm up To melt the wax. Dip a little pussy into the melted wax and heat it under the flame.
  We begin to gradually apply the wax on the surface of the shell.
The scribe must be kept straight, but the egg must be twisted with his left hand to obtain the necessary pattern.
 That surface on which wax is applied will not be painted over afterwards and will remain white, and the rest of the surface will acquire the required color.
Then we omit them in the dye and maintain the necessary time according to the instructions.  Next, clean the egg from wax, to do this, heat it over the fire of a candle and rub it with a wool rag.
  That's all ready!
How to paint eggs with natural dyes
The modern market of food dyes is literally replete with the proposed color palette. But painted souvenirs in this way do not always want to eat, and especially to give them to children. Despite the fact that it is written on all labels that food coloring is not getting any easier. Therefore, we suggest you use our advice to paint eggs with natural dyes.  Indeed, besides onion peel, there are still many excellent vegetables and spices, which are not so bright and saturated, but they are still painted in various shades. We will begin to gradually list them by the desired colors.
From dark red to pink:
Brew as much as possible tea “arcade” and boil in this broth at least 10 minutes, the longer you cook, the richer the shade becomes. Even in the maroon - pink shade will help repaint the broth of grated beets.  Orange shade:
With such a bright color carrot perfectly cope. It is necessary to rub it and boil for a few minutes, then cool and dip future souvenirs into it and boil it all together for at least ten minutes. From the spices you will help paprika and ground red pepper, 3 tablespoons to 1 liter of water and boil for at least thirty minutes.  Yellow shade:
This color can be obtained thanks to the saffron spice (turmeric). Three tablespoons of turmeric diluted in half a liter of water and boil for several minutes on very low heat. Just cool it and boil the testicles in it. Even for a yellow shade, use the peel of citrus or young leaves of birch, if they have already appeared in your area.  Various shades of green: For this you can use the juice of various greens, for example, parsley, dill, basil. For a richer shade, use spinach leaves. Greens pre-boil for at least thirty minutes, then cool and boil in this broth.
Even for greens are allowed to use green. But there is no need to cook in the brilliant green solution, just put them in it for a while, turning it from time to time, until the desired shade is obtained.  Brown and golden:
It requires traditional onion peel or a strong coffee solution. Blue shades:
Here you will find an assistant - red cabbage. Finely chop it, add water and a couple of tablespoons of table vinegar. When the solution is infused, place in it pre-boiled eggs and wait for the desired shade.  Lilac shade:
Red onion husks will give a beautiful lilac shade, and if you boil them longer, you can bring it to a purple color. 
Using food dyes know the longer to keep in solution, the more saturated the color will be.
Video lesson painting eggs in rainbow colors
And if you want to surprise your loved ones with the original painting of Easter eggs, then we present to your attention a very interesting video that reveals all the secrets of the rainbow color.
By painting eggs for Easter, which is celebrated on April 8 in Russia this year, you can get creative and get an incredibly beautiful shell - marble, watercolor or with complex geometric patterns. Medialeaks talks about popular ways to paint eggs on YouTube that will not require special skills from you, but will give an impressive result.
Natural dyes: how to make them brighter
The easiest way to paint eggs is to buy special harmless dyes in the supermarket and follow the instructions on the package. You can even find pearl and gold. If for some reason you want to use natural dyes, there are ways to do without onion peel, giving the usual red-brown color. Natural dyes for eggs can be divided into groups.
- Green - leaves of spinach or nettle, fresh green apples.
- Yellow - turmeric, orange or lemon rind, carrots, walnut shells.
- Red - onion peel (white or red onion).
- Blue - red cabbage.
- Blue - blueberries.
- Pink - beet.
- Violet - leaves of karkade.
- Beige - coffee beans.
Selected ingredients must be added to the water when boiling eggs. You need to be prepared for the fact that the color after dyeing eggs with natural dyes will not turn out as bright as in the case of artificial ones, but it can be enhanced if, after cooking, you hold the eggs in water with dye a little longer (or even leave overnight in the refrigerator). In addition, dyes can be mixed or omitted the egg first in one of them, and then in the other.
To keep the dye on the eggs better, you can add one or two tablespoons of table vinegar to the water.
Speck or quail effect with rice
One of the easiest ways to paint an Easter egg is beautiful and unusual - to achieve the effect of quail shell with a container of rice. For this channel Sunrise Fun Tv He suggests that you put some uncooked long-grain rice on the bottom of a plastic container with a lid (preferably cylindrical). And then add a few drops of liquid dye and shake, closing the lid to mix the contents.
Put the boiled egg in this container and shake it again. As a result, it will not be painted completely, but speckled as quail. As in many other ways, the egg from such a container is better to reach with gloves, so as not to get dirty.
This method has already been adopted by manufacturers of seasonal goods for Easter, and now in European stores you can stumble upon professional kits for painting eggs with rice. But even at home, the way will work - you just need to remember that the container must be soft so as not to damage the egg.
Patterns with pieces of fabric
This unusual way of painting Easter eggs has become very popular lately - a movie with him in blog post HolidashVideo was watched by about six million people. For dyeing eggs with a cloth, two types of cloth will be needed - unnecessary colored items made from 100% silk and white synthetics. The whole fabric is cut into squares of 15 centimeters. Raw eggs need to be wrapped in silk, put the rolls on a sheet of synthetics and tie, making something like a bag.
Sacks should be poured with water in an enamel or glass pan. Add two tablespoons of vinegar to the water, boil for 15 minutes. Because of boiling in vinegar, silk sheds, dyeing eggs with fabric patterns.

Each of these cloth wrappers can be used for painting several times.
Watercolor shaving foam
Blogger Jenna Ezarik who published a video about this original way to paint eggs for Easter, calls it "the strongest possible". It will need a lot of shaving foam. She needs to fill the bottom of the tank, and top with a liquid food dye. You can pour dye with stripes, drops and other abstract patterns, use one color or several.
The goal is not to paint all the foam completely, but to prepare a mass with paint in which the egg will collapse, so the patterns will be much more effective than the dye of one tone.
Boiled eggs are rolled in the resulting mixture and left for twenty minutes outside the containers.
After that, the mixture is removed with a napkin. The result should be eggs painted with a watercolor effect.

Stationery eraser geometry
Office gum is suitable not only for cutting a watermelon in half (). The essence of the method is simple: before dipping a boiled egg into the paint (the method works with soluble food coloring), it must be carefully pulled off with several rubber bands. It is not necessary to strive for symmetry in the lines.

After 15-20 minutes, you need to remove excess liquid with a cloth and just remove the gum.

You can not use the gum, and apply strips and patterns on the egg with a thin layer of the usual dough or in another way. For example blogger Sarah johnson , who published a clip about an elastic band, simply draws patterns on eggs with a simple wax pencil, and then removes wax.
Textured paper towel patterns
A simple way to dye eggs, which will require a liquid dye, spray with water, thick napkins or paper towels, stationery gum and gloves. A boiled egg is wrapped in a towel, tying this improvised package with an elastic band. It is dripped with liquid dye in different places, then sprayed with water from a spray bottle.
Twenty minutes later, the egg is removed from the towel. Perforation from paper is transferred to the egg.

Colored spots with nail polish
One of the strangest ways that bloggers use is painting eggs with nail polish. And no, you don't have to brush over it. You will need a plastic container with room-temperature water, bottles with varnish of different colors, a wooden stick or a toothpick (to stir the varnish), and gloves so as not to get your hands dirty.
Blogger A thrifty mom , so painted eggs for Easter, notes that the water must be at room temperature, otherwise the varnish in it will spread out incorrectly. You can check the readiness of water by dripping varnish into the vessel several times - drops should spread on the surface of the water without sinking.
If everything worked out, the varnish can be mixed a little with a wooden stick: such divorces will create more unusual patterns on the egg.
After all these preparatory operations, you just need to dip the boiled egg into the water - but not completely. Lacquer film from the surface of the water goes over the egg, creating an abstract pattern, and the egg itself will resemble marble.
Since the egg will not be completely covered with varnish film, you can repeat the procedure with the same colors of varnish and dip the egg in them with the other side. Or use a different set of colors.

The ideas of network users are sometimes more interesting and creative than the offers of marketers and pro companies. On the eve of the New Year, we learned that even gift wrapping can be approached with incredible sophistication: the guy packed a gift for his brother so that the contents of the package.
Others at this time share tips on how to keep the marriage in the best Japanese traditions, and although they come to cheers.
Easter 2018 is coming soon! On this spring day, you want everything on the table to be bright and festive. There are many ways, like with your own hands, to paint eggs beautifully for a holiday. Along with, be sure to attend the celebration and be pleased with their appearance, originally painted eggs.
We will try and learn. The main thing is not to start and be sure to succeed.
Important! An hour before cooking eggs, remove them from the refrigerator so that they take room temperature. This is necessary so that the eggs do not crack during cooking.
In the article you will find:
The original decoration of eggs for Easter gold

Cut a foil about 15x15 cm in size. Wrap an egg in it so as to achieve the smoothest possible surface. Cut off excess foil. Apply the pattern. Such an egg can be eaten, as the paints are not in contact with the shell.
Painting eggs with food coloring - "Bright Beauty"

Dilute food coloring. Dip an egg in it for 5 minutes. Pull out and let dry. The same egg dip in the dye for 1/2 volume and hold for 5 minutes. Take out and leave to dry. Again, drop the same egg for 5 minutes into the dye in 1/4 volume. Remove and allow to dry. Eggs can be eaten only by people who are not allergic to food dyes.
We decorate eggs with homemade dressing

Coat the egg with paste. Roll in the food dressing or manually stick the elements of the dressing to the shell. In the same way, you can decorate the egg with small pieces of foil (4x4 mm).
Manual coloring of eggs - "Russian avant-garde"

Using children's wax crayons and felt-tip pens, you can paint eggs with any abstract drawings. Attract children to this activity.
We draw on Easter eggs ourselves - "Palm Sunday"

On hard-boiled eggs, paint with acrylic paints for glass or ceramics willow twigs. Easter symbols will look very elegant and festive. Choose eggs of different natural colors for the design: from white to dark beige.
Beautiful egg decoration for Easter - "Children's cartoon"

Buy plastic doll eyes at the sewing accessories shop and glue them to hard-boiled white eggs, add smiles drawn with a marker. There will be funny little faces that children will surely like.
How to paint eggs using watercolor paints on honey - "Landscape"

Buy watercolor paints on honey that can be considered edible, and draw a landscape picture using a few white eggs. On one let there be blue sky and bright sun, on the other grass and flowers, some can be painted in the colors of ladybirds. Together they will create the impression of a bright spring meadow.
Decorative eggs for Easter - "Water Manicure"
Do you want your Easter table to be decorated with decorative eggs painted with bright multi-colored divorces? You will need: plastic blanks of eggs, several bright nail polishes and a plastic cup.

Pour two-thirds into a glass of water, drip a few drops of varnish and a toothpick and gently mix the varnish. Dip an egg into a glass, drown it with a toothpick so that it is completely under water, then take it out with two fingers and, holding the egg, make a couple of strokes with your hand so that the varnish will dry faster. Repeat the same manipulation with the rest of the eggs.
Yes, these will be decorative eggs that cannot be eaten, but they will help to create a festive atmosphere in the house, and if you pack them in an original way, you will not be ashamed to give them to relatives or friends.
Natural dyes for eggs. What is the color when using them

Listed here are only natural dyes that you can safely use to paint Easter eggs and not worry that it will damage your health.
Brown dye
Onion Husk
Tea
Coffee
How to do:
Boil the onion peel for half an hour, put the eggs in a decoction, boil until the color is bright. In coffee and tea, boil eggs with a brown shell for half an hour.
Yellow dye
Turmeric
Method:
White eggs put in a small amount of hot water, add 4 tbsp. l turmeric Put on fire for 1/4 hour.
Red dye
How to paint
Squeeze out a few glasses of beet juice. Put boiled white eggs into it for 9 hours.
Orange dye
Carrot
How to do:
Squeeze a few glasses of carrot juice. Keep white eggs in it for 9 hours.
Pink dye
Way;
Squeeze out a few glasses of cranberry juice, boil white eggs in it for 20 minutes, leave for 12 hours.
Green dye
Spinach
Parsley
How to do:
In a small amount of water put boiled white eggs, a few leaves of spinach, a bunch of parsley. Boil for 10 minutes and cool.
Blue dye
Karkade
How to do:
Brew karkade boiling water and let cool. Boiled white eggs dip in the resulting broth for 15 minutes and every 3 minutes to check the color.
Egg basket
Surely in your house there is a decorative wicker basket. Cut the paper mesh packaging for eggs into the basket and color it in the color of the basket. Insert the package in the basket, place the painted eggs in the cells and decorate additionally with flowers and ribbons at your discretion.

Stand for eggs on the Easter table
From cardboard sleeves from toilet paper, multi-colored jammed paper, ribbons, lace braids, artificial flowers and beads, you can make such beautiful egg coasters that the eggs themselves need not even be painted.
A simple way to dye eggs for Easter with a rag (video)
What decor methods make eggs inedible
- Coloring permanent markers.
- Use for decoration aniline, acrylic and other synthetic paints.
- "Decoupage" - decorating eggs with fragments of napkins using glue (eggs can be eaten if a paste from flour or starch is used).
Easter for the Orthodox, bright holiday. It is so good that preparations for this holiday take place in an atmosphere of joy and happiness. Paint eggs for Easter with your family, collect old and young. Take up my advice, invent your own coloring. Enjoy the holiday with all your heart and he will bring you happiness.
Good luck and all the best!