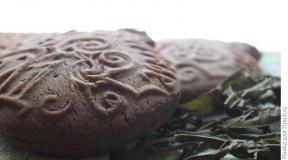
How to make sugar crystals on a stick. How to grow sugar crystal at home? Video: how to make crystals from sugar
Chemistry is one of the scariest schoolchildren's nightmares. It is enough to mention the periodic table or valence to awaken in young hearts the desire to pretend to be asleep until the very receipt of the certificate. Newly minted graduates gladly hand over chemistry textbooks to the library and forever forget about complex formulas and calculations. And in vain, because thanks to this science, you can conduct fascinating experiments and create interesting things. For example, sugar crystals.
Lollipop growing equipment
Transforming an ordinary kitchen into a modern candy laboratory is not difficult. It only takes a few simple items:
- a large saucepan, preferably one with a thick bottom and a non-stick coating;
- 500 ml of water;
- 700-800 g sugar;
- thick paper or cardboard;
- glasses, cups or small jars;
- skewers.
Glasses or jars should be transparent, without stickers, so that you can observe how the crystal grows. An alternative to skewers is wooden ear sticks. One side, on which cotton wool is strung, must be cut off, and the other left. To grow a large crystal, it is recommended to buy sticks for sushi, but then you should also choose a jar with a volume of 2-3 liters.
Important: Dishes intended for boiling syrup and making sugar candy must be perfectly clean. No dust or detergent residue to ruin the entire experiment.
Step 1: Prepare the skewers
A crystal is made up of just one ingredient: sugar dissolved in water. Solid particles attract smaller ones, which stick to each other and freeze. Sugar floating in water needs a base - a skewer. More specifically, solid crystals of sweetener that should stick to the stick.
At the first stage, you need to cook a not too thick syrup. Mix 50 ml of water with 2 tablespoons of sugar in a small saucepan. Heat the mixture, preferably over low heat, so that the liquid does not acquire an ugly brown tint. Stir the syrup constantly until the sweetener is completely dissolved. Bring to a boil, keep on the stove for 5-10 minutes. Leave the saucepan and cool slightly, pour the syrup into a saucer.
Put a piece of paper next to the plate, sprinkle a thin layer of sugar on it. Prepare a tray or saucer for skewers, which should be covered with foil, parchment paper or cling film.
Dip about half of the stick in syrup, wait for the sweet water to drain, and then pour out the wooden base in sugar. Make sure to get a layer of the same thickness. The more evenly the sugar sticks, the more beautiful the crystals will be.
Put the skewers on a plate. They should not come into contact with adjacent sticks. Set the workpiece aside, closer to a radiator or other heat source, so that the sugar freezes faster. It will take at least 12 hours for the skewers to dry completely and for the sweetener crystals to adhere securely to the wood base.
The remaining sugar can be used in the second step. The syrup will have to be prepared new, and the old one will have to be added to tea or poured out.
Step 2: base for the crystal
You need to try the skewers with your finger: if they seem damp, wait a little longer. Are the wood sticks and sugar dry? It's time to start making your homemade lollipop syrup.
- Place a large saucepan on the stove and turn on low heat.
- Pour 2 cups of water into a container, wait until it warms up.
- When the liquid is hot, add a glass of sugar. Stir until the sweetener is completely dissolved.
- Add another 1.5 cups of sugar. Stir until a foam forms on the surface of the syrup, which must be carefully removed with a spoon.
- Immediately rearrange the pan on a stand or dip it into a container with cool water.
The syrup at this stage remains liquid and crystallizes easily. If you cook it a little longer, you get a sticky mass that is more suitable for making jam than for growing candy.
Wait until the syrup is warm. Pour the workpiece into glasses or jars. Fill containers 3/4 or half full. A piece of 500 ml of water is enough for about 7-8 glasses.
Tip: The pan for making the syrup should be high, because when heated, the mass rises and can "escape", staining the stove and the outer walls of the dishes.
Step 3: fragile structure
Cut circles out of thick sheets of paper or cardboard. They should be slightly larger than the neck of a jar or glass. You don't have to make them perfectly round; ovals or even squares will do. The main thing is that they completely cover the container with syrup, protecting it from dust, and be sufficiently tough.

Punch a hole in the center of the circle into which a skewer is inserted. It is necessary that the wand does not fall through and does not move. You can attach a cap or cap to the tip located on the surface of the glass, which will prevent the skewer from dropping down under the weight of the growing crystal. A long clothespin will help to fix the stick, which should be carefully placed over the paper circle.
Step 4: Observation
Dip the skewers into glasses of syrup so that they do not touch the walls or the bottom. The cold slows down and stops the crystallization process, so the sweet water should not cool down. Place the glasses of syrup next to the radiator or in another warm place, preferably away from the sun.
The containers with crystals must not be moved, lifted, or twisted around the axis. It is forbidden to remove the skewers until the lollipop has grown to the desired size. One can only observe how small particles stick to the hardened base.
How long will the lollipop grow? Depends on the consistency and temperature of the syrup, as well as on the ratio of sugar and liquid. Some crystals grow in just a week, others need 10-12 days.
Fast food option
- Pour water into a saucepan, do not add anything.
- Bring the liquid to a boil, add 2-3 lodges of sugar.
- Introduce the sweet component in small portions. Stop when sugar stops dissolving in liquid.
- Remember to stir the syrup so that it does not stick to the bottom of the pan and burn.
- Set the pot with the sweet solution aside. It is recommended to prepare two servings of syrup, because sometimes one is not enough.
- Sprinkle dry sugar with water and roll into a small ball. Wait until it hardens and wrap the workpiece with thread. Some people advise using a hair, but it is very thin and can break at any time.
- Tie the other end of the thread to a branch or pencil so that the crystal is exactly in the center of the pan. Like a skewer, the sugar piece should not come into contact with the walls or bottom of the container.
- The syrup needs warmth. If the sweet solution cools too quickly, the crystal is irregular in shape.
- You should regularly monitor the level of syrup in the pan, and if it drops, add a new portion.
Lollipop prepared in this way can be taken out for 2-3 days.
Important: You cannot add ordinary sugar to the syrup, which does not dissolve, but simply settles to the bottom. Only a warm, sweet solution that has undergone heat treatment.
Colored crystals
Lollipops, for which sugar and water were used, turn out to be white or slightly yellowish. If you want to prepare a crystal of a bright shade, you should add a synthetic or natural dye to the sweet solution.

Beetroot, cherry, or raspberry juice will make the candy red or pink. Blueberries will make them blue, and saffron or carrots will make them orange. A few drops of spinach juice and green crystals will grow in the jar.
The candies will turn yellow thanks to lemon zest, cranberries or red currants will make them scarlet, and blackberries or red cabbage will make them purple.
Natural colors can be added to the syrup during cooking, and synthetic food colors can be added to glasses. The sweet solution is mixed with flavors to enhance the taste of the crystals. It is forbidden to put dried fruits, chocolate chips and other solid components in glasses, otherwise the experiment will end in failure.
Homemade sugar candies decorate cakes and serve desserts on sticks for tea. With unusual crystals, you can congratulate a friend on the holiday or even start a business selling creative sweets.
Video: how to make crystals from sugar
I'll show you a simple and funny chemistry experiment. We used to do it at school, we just took salt and grew salt crystals. In this example, we will take sugar and grow crystals from it. It will be a lollipop, which can be eaten in the end, which is good news.
Ingredients for making sugar crystals
- - 380 ml. water,
- - 1 kg of sugar,
- - wooden sticks - skewers,
- - clothespins,
- - glass transparent cups - glasses (other dishes are possible).
Making sugar crystals
We put water in a saucepan on the stove, heat it up a little. Add sugar and stir until completely dissolved. If it does not dissolve, we heat it a little more and so on until it is completely dissolved without residue.Important: do not boil water with sugar and, if possible, do with a lower temperature.
Our main task is to completely dissolve sugar with minimal heating.

Prepare the sticks on which you will grow crystals
Dip the sticks in water and roll them a little in powdered sugar. Let dry on a plate in a temp place. This is the base on which sugar crystals from water will crystallize.
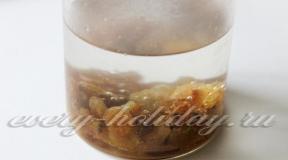
Only after the water has cooled, pour it into cups, add food coloring if desired. I poured it into several glasses and added a different color dye.
Place the sticks in the cups and secure with a clothespin in the center. The sticks should not touch the edges of the glass.

We are waiting for the crystals to grow
It takes several days to grow crystals. I advise you to remove all the cups in an inaccessible place. Preferably dark. Cover to keep out dust. Wait a few days, observing the process periodically.
Crystals begin to form. Sugar also crystallizes on the surface of the glass.


The final stage is crystal drying
After all the crystals have grown, you need to get them out by breaking the surface that has formed. And put in an empty glass to dry out excess liquid. In time it will take about a day, everything dried up overnight.
You can try!
Beautiful and appetizing lollipops beckon to put them in your mouth. So feel free to enjoy.
You can make small crystals by taking toothpicks and glasses.
That is, and now, on the eve of the winter holidays, I propose to spend an exciting and educational experience with the children - growing sugar crystals on sticks!
They turn out to be so beautiful, sparkling with many faces, as if ice - and, unlike alluring icicles, these "lollipops" can still be eaten! Sugar crystals are sweet and edible!

And making them at home is not difficult at all, just a long time. The preparation itself will take about 20 minutes in the evening and another half an hour in the morning, but the observation will take a week or two. Well, that will be what! Because growing crystals is sooo interesting, especially for younger schoolchildren: give older ones more difficult experiments, for example, with bright blue crystals of copper sulphate ... but it's better to start with edible chemicals like salt and sugar! It's safer this way :) I think that it will be interesting for preschoolers to watch how more beautiful crystals become on a stick day by day - a real Magic! Even I was interested !!!

And by the way, especially for my parents, I will note: at first I was worried that I would transfer sugar. But then it dawned on me that even if the crystals didn’t turn out right the first time, it turned out to be a sugar syrup, which can be used: boil jam or add to tea ... so the products will not be lost. So let's get started!
Materials for making sugar crystals:

For 3-4 things, depending on the size (if for a glass 200 ml, then 4 crystals, if you make in large glasses 0.3-0.5 liters - then 3 pieces).
- 5 glasses of sugar + 4 tablespoons;
- 2 glasses of water + ¼ glasses;
- 4 wooden bamboo skewers;
- Cardboard;
- Glasses or glasses, transparent;
- A saucepan for syrup.
First, we need to prepare a "seed" for the crystals so that they have something to cling to. They will not be able to cling to a smooth stick. Therefore, we do this. Pour 2 tablespoons of sugar into ¼ glass of water and heat over low heat, stirring, until the saccharins are dissolved.

Thoroughly dip wooden sticks in the resulting syrup from all sides, to such a height, which crystals you are going to grow.

Sprinkle a couple more spoons of sugar on a sheet of paper and immediately roll the sticks dipped in syrup in it - carefully so that the saccharins stick around the sticks on all sides.

These saccharins will be the "base" for future crystals, so it is important that there are no empty areas left - then the crystals will be even.

Dip the sticks in sugar and leave them to dry overnight. This is an important point, because if they do not have time to dry and you dip the sticks into the syrup, the sugar will simply melt on them. And we need the syrup, like a mortar, to firmly glue the saccharins to the skewers. Therefore, it is better to wait until the next day.
In the morning we will continue our exciting lesson. Pour 2 cups of water into a saucepan, pour 2.5 cups of sugar and heat, stirring occasionally, over medium heat until dissolved.


Then pour in the remaining 2.5 cups of sugar and continue heating until the sugar is completely melted.


The saturated sugar solution is ready, let it stand, cool for about 15 minutes. Meanwhile, we will cut out pieces from thick cardboard, a little larger than the diameter of the glasses in which we will grow crystals, and insert our wooden sticks with saccharins into these cardboard boxes.

The cardboard boxes will perform two tasks: firstly, to keep the stick from touching the bottom and walls of the glass (and this is important, otherwise the crystal will "grow" to the glass), and secondly, to cover the solution from dust, because it will stand for more than one day ... We insert the sticks so that they do not go back and forth, but stick tightly in the cardboard.

It's time to pour the syrup into the glasses while it is still hot - in the cooled down the crystals will not grow.

And we lower the sticks with the blanks into the solution. Stir so that the stick does not touch the walls and bottom, at a height of about 2-3 cm from the bottom of the glass.

If you want to make not transparent crystals, but colored ones, then you need to add food colors carefully dissolved in water to the syrup: for 1 teaspoon of warm water - at the tip of a dye knife. But, firstly, dyes are not very useful, and secondly, when they are added, the solution becomes less saturated. Therefore, our pink and orange crystals grew slightly less than the white ones. And, as the kids and I unanimously decided, transparent crystals are the most beautiful!

And now you just need to watch :) Be patient, crystals grow slowly - but the next day you will notice that little by little it turns out!

You will see with what interest the children will run every day to see how our crystals are there! And how surprised they will be that they are growing! Do not rush to take it out - for the crystal to turn out spectacular, it takes from a week to 2. We kept it for 10 days, first we took pictures and looked through the glass, and then, when a week passed, we became bolder and began to take out the crystal to look at it and put it back into the solution.
In one day…

In 3 days…

In a week…

After 10 days:

After a week and a half, we finally got the sugar crystals, admired them, arranged a photo session and then ate them like candy :)


(Read 1 time, 1 visits today)
January 27, 1944 - the day of the complete liberation of Leningrad from the Nazi blockade.
76th anniversary of the Leningrad Victory.
It was a platoon of women sappers. He was affectionately called "the girl's team."
Together with their dogs, they went through the entire war, worked as messengers on the front line, participated in breaking the blockade of Leningrad, delivered goods to the front line and took out the wounded from the battlefield. They cleared roads and settlements from mines. They cleared mines from Leningrad and Pskov, the Karelian Isthmus and Estonia.
This topic is about the Leningrad maiden platoon of sappers and their combat partners and friends - dogs.
Themes dedicated to the Leningrad Victory
Anonymous
Recently I complained to a friend that I dream of living first to the daytime sleep of the child, and then to the nighttime. I count the hours. It seems that only after the child falls asleep just begins my own life. We are a year and three. I thought it would get easier after a year, but it only got harder. The forces are already at the dawn.
And then she said one thing that really offended me. That since I get up from the child, then I do not love him. That you can't wait until you fall asleep, you need to enjoy every minute of communication, as she does with her two children. It's like waiting for someone to come and relieve me of the child for good. But this is not at all true !! I just need a break. The time when they miss me for the title, they do not suck, they do not yell in my ear, they do not require me to play, sing a song, etc. I didn’t know that my every minute would be occupied by him. The children of my friends could at least sometimes play themselves, without their mothers, but not mine. He yells even when I go out and apologize to the toilet without him.
And on the one hand, I am offended that my friend said so. That since I am getting tired there is no need to pose as a loving mother. On the other hand, I really love him and do not regret anything! But I'm so tired ... Please tell me that I am a normal mother, that everything is in perfect order with me.
Anonymous
On the one hand, the topic is chatty, on the other, it is important to me. I will try to write so that it is clear what I mean. It may take a long time, but still ...
We have two parents, me and an older sister. Outwardly, my sister looks like my mother, I think she is prettier than myself, outwardly I am more of a dad. Earlier, in adolescence and youth, it was not clearly clear to whom it was more like, but I always had complexes about my appearance. Now, when it comes to my fifties, I look at the changes in my appearance and understand that over the years I am becoming my father's copy, which I do not really like. As a man, my dad is not beautiful, but maybe in his youth he was, with a difficult character. Mom needs to erect a monument for living with him for more than forty years. But this is not particularly relevant to the case, it is to understand the scale of "gravity". I always thought that my character was not so bad. Now, again with age, I understand that I take a lot of traits from my dad, naturally unconsciously. Even my mother says that over the years it is harder and harder with you, the character is similar to my father. I really don't like it, I try to control myself, correct my behavior, but it doesn't always work out. I'm very afraid that genes will really work in old age, and I will become as unbearable as my father (stubborn, rude, selfish), but also my appearance ... I always dreamed of being outwardly like my mother ((((. And here ...
Do you think you really can't plug genes with your finger, as they say, or is it still possible to do something else?
The lights of a sun
A friend called me yesterday. Ask for advice. Her son is 16 years old. Recently he confessed to her that he was in love with a classmate. In the 10th grade I moved to another school. He says, he saw her and that's it, he realized that "this is the most beautiful girl, with the most beautiful eyes in the world ..." A year ago, this friend said that her son and her husband said: "There is no love! You have a habit! You live for the sake of children ... "And now she suffers from love, suffers, writes poetry ... Asks my mother for advice ... To confess or not?
I say to my friend: "Let him decide. In such matters there is no right or wrong decision. Let him act as his heart tells him ..."
The topic is chatty ... Did the children share their love experiences with you? And what did you advise them ...
29,863
These precious stones have firmly taken their place in the decoration of cakes. Just look at the beauty you can create using geodes!
![]()


It turns out that making such a miracle is not so difficult. The lesson I prepared proves it.
What we need:
- isomalt;
- food coloring;
- silicone mat (one long or two);
- cutting metal circle for cookies (I have a diameter of 10 cm);
- Cutting down a small metal oval or circle (I have an oval, about 3-4 cm in length);
- Thick-bottomed ladle and teaspoon;
- kandurin (vodka or alcohol for dilution);
- tassel. ⠀⠀⠀⠀⠀⠀⠀⠀⠀
How to create a geode:
Step 1. Place the isomalt in a saucepan and melt it over low heat.Don't let it boil!After the isomalt crystals are completely melted, add the dye we need and mix.


Step 2. We remove from heat and pour our mass onto a silicone mat. So we do three times - we need three caramel plates at the exit - transparent (that is, not colored), light purple and dark purple.


Step 3. After the plates have frozen, place each one individually on a silicone mat and cover with another mat. We knock with a hammer, breaking our plate into small parts. We do this with all the plates.

Step 4. We put a large round cut on the rug and place a small one inside.

Step 5. We spread a layer of dark "glass" around the small felling, then a layer lighter in tone.

Step 6. Fill the entire surface with a small amount of melted isomalt, lightly sprinkling onto the surface with a spoon.When everything hardens, we remove the felling.


Step 7. We spread transparent "glass" in a circle next to the light layer in a circle and spray isomalt on top in the same way for setting. We are waiting for solidification.


Step 8. We dilute the kandurin in vodka or alcohol and paint the edge of our ring with a brush.

The amethyst rings are ready!