Poppies from ribbons and coffee. DIY coffee topiary
Topiary has become a popular interior element. It is made from different materials. One of them is coffee.
DIY coffee topiary. Step by step
A master class with a detailed description of the stages will help to make a topiary from coffee.

Glued onto the blank for the crown coffee beans, placing them with the central strip down.


The ball is completely pasted over. Then the next layer is glued, placing the grains with a strip up.


For the trunk is used a tube... You should step back three centimeters from its edge and glue double-sided tape in a spiral. On the other side, three centimeters of the tube is also left unsticked.

We wrap it on scotch tape satin ribbon the desired color.

do-it-yourself coffee topiary master class. Photo

We take a container and pour water into it. Add to water alabaster until you get a mass that looks like a rather thick sour cream.


We transfer this mass to the pots and insert the trunk into it.

Alabaster must harden to dry its surface.

We also glue the surface of the alabaster in the pot with grains in two layers, like a ball.


Squeeze out the glue on top of the tube and glue the crown.


We decorate the resulting coffee topiary with a ribbon.


DIY coffee topiary in a bag
To make an original coffee topiary with your own hands, no special materials are required.

do it yourself coffee bean topiary. Photo
The basis for the crown can be Christmas ball, and the barrel is a wooden kebab skewer.
Coffee beans are glued on a ball, decorated skewer.

As a container for installation can be used jar from under the cream. We wrap it in burlap, which we tie with a string around the neck.


Gypsum is poured inside, fixing the tree. The surface of the gypsum is hidden by a cardboard circle filled with instant coffee.


Topiary coffee. Step-by-step guide with photo
The production of such a topiary from coffee in a master class is described. Let's consider in detail the process of making such an interesting decorative composition.

Take wire twenty centimeters long, recede from the end by seven centimeters and fold this part into a ring. Four centimeters are measured from the other end of the wire and bent at this point.

The saucer is degreased with alcohol... The wire with the ring side is glued to the degreased surface with instant glue.
Inner surface cups also rub with alcohol and glue it to the other side of the wire. First, a support is found that will support the cup while the glue sets. The glue hardening process can take several days.

When the foam hardens, cut off the excess amount. Removing the foam. take into account the thickness that the coffee beans will give. It is necessary to make the jet look harmonious.

To form a volumetric assembly jet, you can use mass for modeling or masking tape. It is convenient for the latter to wrap the wire frame.
After the excess foam has been removed, the surface color... If this is not done, then a white base will begin to shine through between the coffee beans.
A step-by-step master class on creating a coffee topiary ends gluing grains to the foam surface. It is better to glue them with transparent glue, which sets in a couple of minutes. This will allow you to adjust the placement of the seeds.

Heart of coffee
You can make a coffee topiary with your own hands in a variety of shapes. One of the possible options is the heart.

To make it, draw a heart on paper, cut out and circle on cardboard... We need to make two cardboard hearts.

do-it-yourself coffee tree topiary. Photo

Two wire the required length is wrapped in paper and glued to the heart.


Glue on the cardboard surface cotton pads, and close the top with a second cardboard heart. This will create volume.

Outside, the resulting heart also needs to be pasted over with cotton pads. To give the necessary shape, it is wrapped threads.


The resulting base paint brown paint. Then we glue coffee beans onto its surface.


Glue to the iron can in a circle sticks from ice cream.


Wire... Wrap the glued to the heart with jute thread.


We fix a sponge in the resulting pot, and put the trunk of coffee topiary in the shape of a heart into it.

We decorate the surface of the pot and the topiary itself.


Options for coffee hearts
Quite discreet topiary, which is decorated with only small elements. As a decoration, a cinnamon star is used, which combines perfectly with coffee in smell, a harsh rope, and two thin ribbons that match perfectly in color.

A very interesting coffee tree with a heart-shaped crown. The grains are arranged in even rows, which gives the composition a special effect. There is no need for bright decorations. One modest bow is enough.

A coffee tree with a regular crown. A special decor makes it unusual. This is a bright bow with hearts and an absolutely straight trunk wrapped in rope.

how to make topiary from coffee beans. Photo
The decor and the shape of the trunk give this coffee tree tenderness. The slightly curved barrel looks graceful. White and pale green details perfectly set off other colors of this composition.

Bright and elegant coffee heart, decorated with red roses with shiny petals. The decor is accentuated by a double bow with the same color combination.

Coffee topiary with multiple crowns

To create such an unusual coffee topiary with your own hands, you need six foam balls. They need to be wrapped with threads, the ends of which are fixed with glue. Coffee beans are glued on top, flat side down. When gluing, leave a small space for fixing the support.


Double aluminum wire we divide into several parts to form a branched crown. The end of one wire is divided into two parts so that the structure gains stability.

We bend the trunk, and fix the additional branches with masking tape... Then we split all the upper ends into two parts, bend the branches.


To give the trunk aesthetics, we first wrap it with masking tape. This will create a bulge at the bottom, like a real tree. Coarse tape is wound over the masking tape. twine.


On the ends of the branches, smeared with glue, we put balls of coffee. A tree is installed in the selected pot and the base is filled with plaster. The gypsum surface is also decorated with coffee beans after drying. Another layer of coffee can be glued onto the crown.


Coffee topiary: video
The process is most clearly explained by the video of the master class on creating a coffee topiary. For the crown, a foam ball is taken, which is wrapped in paper and thread. On one side, a hole is made in it for the barrel. Coffee beans are glued to the surface with transparent glue. In the pot, the details of the trunk are fixed using a plaster composition. A ball is put on this trunk, which is pasted over with grains. Next, the surface of the gypsum in the pot is decorated. To do this, it is also covered with coffee beans. At the end, the finished topiary is decorated. To do this, you can take various ribbons and other decorative elements.
Video: heart-shaped coffee topiary
This step-by-step coffee topiary workshop shows how interesting it is to decorate a fairly ordinary topiary container. A transparent glass cup is taken as such a container. Pigtails, woven from a simple, rough rope, are glued onto it. The result is a textured detail that matches smooth glass. Liquid gypsum is placed inside the cup, into which the topiary is placed. After the gypsum has set, the edges of the cup are decorated with coffee beans, and white pebbles are placed on the surface. As a result, the heart-shaped topiary looks more harmonious thanks to the interestingly decorated base.
Topiary magnet from coffee
Let's make a topiary magnet from coffee. A step-by-step master class will help with this.

For the manufacture of such a topiary we do cardboard blanks... To do this, draw a round crown and a pot, and then cut them off.


We collect a tree using a wooden stick from ice cream. We insert it between two pieces of cardboard and glue it.


We paste over burlap cardboard parts on both sides.


Glue on the back side magnets.

On the front side we glue coffee beans. Glue the first row along the edge with the flat side down, and the second row with the flat side up. Fill the center with grains, and then glue the second row.


We decorate the finished topiary.

Base for topiary from a branch
To make the basis in a step-by-step master class on creating a coffee topiary, it is not at all necessary to take special components. Branch and old newspapers can be used.

From newspapers a ball is made. Branch greased with glue and put into it. The newspapers must be pressed tightly against it.


The surface of the ball is smeared glue and wrapped around threads... The next layer of newspapers is wound on it, which is also wrapped with threads and coated with glue. The procedure is repeated until the desired size is obtained.


The finished crown on the trunk is installed in a container with plaster filling. Gypsum it must be diluted to the consistency of sour cream and poured into the desired container. The trunk is installed there and kept as even as possible until the gypsum hardens.


Educator MADOU # 203 "Combined Kindergarten", Kemerovo.
Only the sun will rise -
The poppy will bloom in the garden.
Cabbage butterfly
Will fall on the flower.
You look - and the flower
Two more petals.
DIY poppies. Master Class
Target: These flowers are made for interior decoration and can also be gifted.
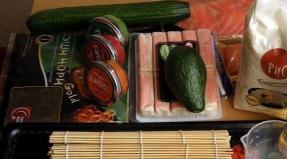
Required materials for making poppies:
Aluminum wire;
Satin ribbon;
Glue "Titan";
Glue gun;
Coffee beans;
Balls for "dry pool";
Green corrugated paper;
Alibaster;
Dark fabric for the ball;
A coffee cup or flower jar;
Wooden clothespins;
Working process:
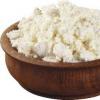
We make the middle of the poppies. Cut the balls in half.
Fill the halves of the balls with cotton wool or padding polyester.
.jpg)
Trim the balls with a dark cloth so that the green color does not show through.
.jpg)
Glue the coffee beans with titanium glue.
.jpg)
Making a stem for a flower. Measure the length you need. It depends on the height of the pot and the size of the flower. Make a wire puncture in the half of the green ball and secure.
.jpg)
Apply glue to the wire and wrap it with corrugated paper.
.jpg)
Making poppy petals. Cut the required number of strips of satin ribbon (petal length 13 cm). We glue with glue, giving the shape of a petal.
.jpg)
Glue the petals to the center of the poppy. To make the flower lush, glue the petals in two rows.
.jpg)
.jpg)
Glue a green circle to the bottom of the flower.
.jpg)
Glue the flower and stem with a glue gun.
.jpg)
Cut out leaves from thick corrugated paper and glue them.
.jpg)
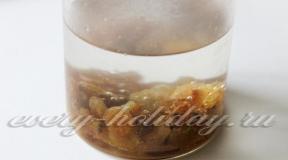
Pour alibaster powder into a coffee cup. Pour in some water. Stir well. Place the flower in the center of the pot and hold it in position until the alibaster grabs. It will take a few minutes.
.jpg)
Cut thin strips of green corrugated paper and hide the alibaster with our grass.
.jpg)
You can make a pot out of a tin can and wooden clothespins (mine is made of corn).
.jpg)
Take apart the clothespins and glue them to the jar. Strengthen the flower with an alibaster. Pour coffee beans into the pot for decor and aroma. Here is another flower ready.
.jpg)
Such bright and fragrant flowers will decorate your home and can become a gift for your family and friends.
.jpg)
1. Good day, dear craftswomen !!! For a long time I searched on the Internet for a suitable way for me to make poppy from ribbons. And I found it !!! And I decided to share with you this method, and how I make topiary.
2. So that's it! That's what I needed to work + in the manufacturing process, beads, white threads (similar to iris), toothpicks, and plaster of paris with PVA for pouring were added. 
3. Glue the skewers (7 pieces) together and wrap them with a tape (I have a tape of 2.5 cm) 
4. Then I wrap the trunk with "Grass" yarn (well, I really like it) 
5. Here's a barrel I got 
6. Take the ball. (I dangled from my child)))) And we make a hole in it. 
7. Insert the barrel, pre-greased with glue 
8. Lubricate the ball with glue and wrap with yarn 
9. Let's start making the poppies themselves. For one poppy you will need: 2 red ribbons 16 cm long, 2 red ribbons 20 cm long (I have a width of 4.5 cm) and a square of a green ribbon (I have a ribbon width of 5 cm), respectively 5 * 5 cm. I burn the ribbons from the ends. 
10. The end of the tape is wrapped diagonally to the wrong side at an angle of 45 degrees. 
11. Pinch a little and make a fold 
12. We make folds along the entire length, fixing with a thread, slightly not reaching the end 
13. We also wrap the other end on the seamy side. 
14. And make a fold 
15. Tapes, shorter for the middle, gather a little more 
16. We connect the outer and inner petals with each other 
17. And then we connect the double petals and fasten 
18. Here's what happened 
19. Now the middle. Cut out the circle and burn the edges 
20. Making stitches in a circle 
21. We put cotton wool in the middle (I put half a cotton pad) 
22. And tighten 
23. Mark the middle with black thread 
24. Done 
25. Making the stamens. At first I did them as described on the site I indicated, but something I didn't really like. 
26. Began to do like this ... It seems to me so magnificent 
27. Putting it together 
28. And sew to the middle. 
Fans of unusual things have long appreciated the coffee topiary that came from the East. It is easy to use the materials at hand. The main thing is to find a source of inspiration. You can do this by walking down the street, looking through thematic catalogs, or simply by listening carefully to yourself. The key to success will be pedantry and confident hand movements.
It all began many centuries ago in garden design, when people learned to figuratively change the shape of bushes and trees. With the spread of classicism in Europe, gardening traditions have become the norm in many countries. In the middle of the 19th century, China first began to use a well-known technology to create a tree that was not similar to any existing species.

The history of this unusual decorative art is almost 2 hundred years old. National schools have been formed in each country. Exhibitions are held annually, where masters demonstrate their skills.
DIY coffee topiary: numerous types
It is enough to look at the numerous photos to literally lose the power of speech from the flight of the imagination of the masters. Each of the presented topiary has a unique shape, color, geometry and style. Depending on the occasion, social status and age of the recipient, you can choose one of the creative projects for implementation:

Designers distinguish the following types of compositions:
- For children;
- For decoration of premises;
- Gift;
- Anniversary;
- Cash;
- With modified geometry (for example, "").
Do-it-yourself topiary "coffee tree": photos and tips from the masters
It is difficult for a beginner to overcome fear before starting work. That is why step-by-step instructions in the form of photographs must be in front of your eyes. The first few songs will seem daunting, but it will get easier over time.

To help beginners, designers have developed several guidelines:
- If more than 1 layer of grains is applied, then the first is always fastened with a strip down, and the second - with a strip up;
- PVA glue or "hot glue" is used;
- It's better to start with a sketch - this will help determine the amount and type of materials required;
- It is necessary to maintain a balance - excessively bulky compositions are not stable.
Topiary from coffee "gentleman": a gift for a real man
Finding a memorable and unconventional gift is not easy, so sooner or later people come to the idea of doing everything on their own. It's easy to make the upcoming birthday of your boss, brother, husband or groom unforgettable. This will require 3-4 hours of free time.
Even if the master is not familiar with the tastes and preferences of the hero of the occasion, such a gift will have to go to the court.
More ideas for creating a topiary for a man can be found in the article: n

You can create coffee splendor as follows:
- Buy a blank ball in a needlework store;
- Buy 250-300 grams of aromatic coffee beans;
- Fix the grains in 2 layers on the surface of the ball with a glue gun;
- Glue the hat to the ball;
- Paste over the curved wire with a dark twine;
- Put the ball on the wire;
- The pot where the composition is placed is decorated depending on the preferences of the culprit of the holiday.
Making coffee topiary with flowers
Floral motifs are always popular due to their versatility. Poppies, roses, wildflowers and bouquets all create a cozy atmosphere in the room. You can create a composition with flowers at home.
How to make a topiary with your own hands - tips for beginners:

Most often, flowers are made using satin ribbons or corrugated paper. Polymer clay is also used, from which flowers are extremely beautiful.
The flower arrangement is usually fastened from one side, from the top in the center, or the flowers are distributed evenly throughout the topiary.
Minimalist coffee and twine topiary
Designers have learned to use objects around them in various creative projects. For example, a mug is part of the topiary or its basis. Depending on preferences, everyone chooses an option for themselves. It is not difficult to create an unusual piece of jewelry or a gift. The main thing is to decide in advance on the preferred execution option. Fans of vintage style will appreciate the simple but very effective composition.

It is created from a mug, twine and small decorative elements:
- The handle of the cup is wrapped with twine in several layers, fixed with a glue gun;
- The same is repeated with the body of the water tank;
- The coffee beans are applied at the bottom of the mug, where the thickness of the twine or twine is greatest;
- Grains are applied strictly in 1 layer;
- The composition is completed with a vintage bow attached to the handle of the mug.
Unusual coffee topiary: photo with a cup
Many have seen unusual handmade gifts, but everyone decided to make something similar with a cup. In addition to the method described above, it is not difficult to create a flying composition at home. For work, you will need a cup, saucer, strong wire or cutlery, coffee beans and decorative elements, depending on aesthetic preferences.

The further procedure is as follows:
- A piece of wire is bent on both sides by 3-4 cm using pliers;
- The lower part of the saucer, where the base of the composition is attached, is covered with protective plastic;
- The same is repeated with the outer edge of the cup;
- The air structure is fixed using Moment glue or hot melt glue;
- The base is wrapped in several layers with twine and fixed with glue;
- The coffee beans are applied to the base in several layers;
- Optionally, the saucers are decorated with pebbles, tinsel, beads or just coffee beans.
A wedding is one of the most memorable events in the life of every person. That is why they are looking for gifts and decorative items for her the longest.
You can make a good wedding gift yourself. This will require natural coffee beans, 2 pieces of strong wire, glue, decorative materials and a little imagination.

A wedding is a harmonious union of two people, therefore, it is this idea that the designers propose to implement:
- With the help of pliers, both wires are bent in an arbitrary way;
- Take 2 balls, each of which personifies the image of the bride and groom;
- In the first case, 2 layers of glued grains are decorated with a mini-bow, and in the second, with a cylinder;
- The curved wire leading to the lady's ball is decorated with pink fabrics or threads, and the gentleman gets a dark version;
- Colored fabrics, beads, coins or colored stones are used to decorate the pot.
3 more ideas for wedding topiary can be found in the material:
Making poppies topiary with coffee: master class
Master classes come to the aid of novice masters, telling in detail how to create a floral masterpiece. Poppies will help to decorate a living room decorated in a classic style. At first glance, a laborious composition is created in a few hours. The main thing is to be calm and focused.
- Black threads;
- Coffee beans;
- Gypsum;
- Small balls of green or small balls for topiary;
- Several decorative elements to choose from;
- Scissors;
- Decorative grass;
- Crepe paper;
- Hot glue.

Rubber balls are cut into two equal parts, which are stuffed with padding polyester. After that, both halves are trimmed with a fabric that matches the color of the coffee beans. Then the grains are applied in two layers using a glue gun.
To create the petals, you need a strong wire that runs through the bases in the form of balls. Once it has gone through, it is aligned with pliers in the shape of petals.
To make petals, you need maroon paper, cut into small pieces. After that, one of the previously cut balls is pierced with a strong wire and fixed with glue. As soon as the workpiece has dried, the upper half of the cut ball is pasted over with red petals.
You will learn how to make an unusual organza topiary in this material:
Topiary "dollar" from coffee: making a gift for the chef
Finding a good gift is not so easy, so for many it becomes obvious the need to make it with your own hands. When it comes to the birthday of an executive or business partner, it is better to choose a composition in the form of a dollar sign. Even if there are no significant reasons on the nose, the money tree will complement the interior of the room.

In order to make a coffee dollar you will need the following:
- A piece of thick cardboard on which a dollar sign is drawn;
- A piece of steel wire bent in the shape of a sign;
- Fasten the curved wire onto a piece of cardboard;
- Cut out a currency sign similar in its parameters from cardboard and cover the first part;
- Wrap the workpiece with a jute rope;
- Pierce the workpiece in the middle with two parallel pieces of wire and wrap them with a jute bundle;
- Fasten with a glue gun on the grain blank (the first layer is installed with a strip down, and the second with a strip up)
- Fix the product to the base.
Air topiary made of coffee and satin ribbons - a delicate DIY gift
Floral motifs are the most common element in living room decoration. They found their reflection in unusual compositions made of satin ribbons. Depending on the selected flower, the appropriate color of the material is selected. For example, to create a sunflower, you will need pieces of ribbons of a golden or slightly beige color.
Butterflies or ladybugs act as additional decorative elements.

For work, you will need the following materials:
- Glue gun;
- Stick as a base;
- PVA glue;
- Fragrant coffee beans;
- Gypsum;
- DVD or CD disc;
- Beads of a suitable color;
- 1 candle;
- Scissors;
- 3 types of satin ribbons;
- Clay pot.
The only difference from the above described mechanism of operation is associated with the design of the decorative part. To begin with, pieces of satin 5 cm wide are cut.For a full-fledged composition, you will need about 40 pieces. They are folded in half and one of the edges is trimmed neatly. Then the 2 ends of the folded ribbon are glued together in the middle. Next, pieces of colored tape are attached to the CD with a glue gun.
Topiary from coffee beans (video)
Topiary made from coffee beans is a stylish decoration for a bedroom, living room or office space. This unusual craft will become a memorable gift for loved ones. It's easy to do it yourself. This will take a few hours and a little imagination. The initial sketch is made on paper, and then the necessary materials are selected on its basis.
Topiary from coffee (photo)