How to melt the chocolate at home. How to melt chocolate? Variants of the best chocolate coating
Melting chocolate has its subtleties. This is usually done in order to pour liquid chocolate over the surface of a dessert or to dip small products like fruit, cookies or sweets in it.
There are 3 different ways of melting chocolate.
1. In a water bath. We need to take 2 pans of different sizes: one large, the other smaller. Chocolate should be put in a smaller saucepan, and in a large pour hot water and put it on a low heat. It is desirable that a small saucepan does not touch the bottom of a large one. Stir the chocolate in a small saucepan with a metal spoon until it is completely melted.
2. In a pan with a non-stick coating. Break the chocolate into pieces and put in a pan with a non-stick coating. Put the pot on a low fire. At the same time constantly stir the chocolate so that it does not burn. Once the chocolate is completely melted, remove the pan from the heat.
3. In the microwave. Break or chop the chocolate into small pieces, put it in a microwave bowl and melt it at low power for 2 minutes. Then remove the bowl, mix it well and put it in the microwave again. Do this until the chocolate is completely liquid.
Of all these three methods, the best is heating the chocolate in a water bath. In this case, it does not burn and does not boil.
When melting chocolate, fat is sometimes added to it. But at the same time you can put no more than half a teaspoon of fat. Fat is needed to make chocolate more uniform. However, do not use butter or margarine. They contain water that, when cured, will make chocolate uneven.
With the help of chocolate, you can transform any dessert beyond recognition. It can not only be applied to other products from above. The products themselves can be immersed in melted chocolate, and then put on a plate. This can be done with dark, milk and white chocolate.
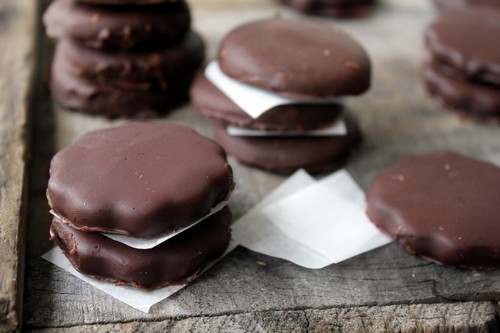
Melting chocolate for icing cookies

If you decide to bake a cookie and then cover it with chocolate, follow these rules. Cooked cookies must first be cooled. Then you need to melt the chocolate and, holding the cookie for the tip of your index finger and thumb, immerse it in chocolate. Try not to occupy a large area with your fingers. Before putting cookies on a plate, slightly tilt it so that the chocolate flows to where it is not. After you have covered all the cookies with chocolate, put a plate with it in the fridge for at least 20 minutes. This is necessary in order for the melted chocolate to harden.
Melting Chocolate for Frosting Fruit

Very tasty strawberry, covered with chocolate. For this dessert, you will need strawberries with a small part of the stalk and leaves, for which it is convenient to hold the berry. Wash the berries and place on a paper towel. Melt chocolate and, holding the berry by the stem, immerse it in it. To make the dessert more tasty, you can add liqueur or brandy to the melted chocolate before icing the berries. In this case, the chocolate coating will be more even and thick. Put the chocolate covered strawberries on a plate and set for 15 minutes. in the fridge.
Real sweet teeth know thousands of ways to use chocolate in cooking. If you melt it, you can make icing for baking, berries and fruits, prepare a tasty and healthy drink or warm fondue sauce. Let's talk about how to melt chocolate properly, and a microwave will help us in this activity.
The nuances of cooking in the microwave
Previously, chocolate was traditionally melted in a water bath. But the microwave oven has a similar effect on the product, and besides, it makes it faster. Just need to know a few secrets and follow the procedure.
First, you need to find the right dishes. It should be a deep bowl made of ceramic or glass, and one that will remain cold or slightly warm after working the microwave.
If the container is overheated, it means that the temperature was too high, which is harmful for chocolate - it will begin to clump up and will be covered with a white coating when it hardens. If this happens, quickly pour the chocolate into a cold bowl, add a few pieces of tile to it and stir until evenly dissolving.
To melt chocolate in the microwave, use glass or ceramic dishes.
Secondly, for cooking in the microwave, you need to break the chocolate into small slices, - so it will melt faster.
It is very important to choose chocolate correctly. Using a microwave, it is better to melt black and milk chocolate, which contains at least 50% cocoa butter. White chocolate in its pure form is not very suitable for such work: it is difficult to melt it, and then it is troublesome to use it to decorate baking. Porous chocolate to melt in the microwave is also not worth it. Well and, of course, there should not be any filling in the tile, including nuts.
Note! To avoid overheating and damage to the product, strictly adhere to the temperature and time regime. So you get the "right" chocolate and do not spoil the microwave.
The time it takes to melt chocolate directly depends on its initial quantity.
Table: approximate melting time depending on product weight
Also make sure that no water, including condensate, gets into the melted chocolate. This can lead to a violation of the consistency of the product.
Different ways
The microwave will greatly facilitate the process of melting chocolate and making it in different ways: for fondue, icing, a drink, or as an ingredient for baking.
Dark or Milky
Place a broken slab of bitter or milk chocolate in the prepared bowl. The smaller the pieces, the easier it will melt. You can use a grinder or blender.

Break the chocolate bar into smaller pieces
Set the microwave at 50% power (usually 350 or 400), send the dishes with chocolate to it.
Check that the dishes with chocolate are located clearly in the center of the working area of the microwave oven. This is important for uniform heating of the product.

Set the correct mode on the device, the power should not be maximum
Make sure that the chocolate mass is heated evenly, otherwise it will be heterogeneous. If your microwave is not equipped with a turntable, you will have to rotate the bowl with the contents at regular intervals. It is necessary to stir the mass several times, suspending the operation of the furnace.

Remember to stir the chocolate several times.
If you did everything correctly, the tank will remain cool, and inside it will be a homogeneous mass with a glossy shine. You can use it as a frosting for cake and cupcake, cake filling.

Properly melted chocolate has a uniform texture; it is thick and shiny.
Keep in mind that overheated chocolate very quickly changes its texture and taste, loses its plasticity and turns into a harsh, grainy mass that freezes almost instantly.
White for glaze
White chocolate is drowned in the same way as dark or dairy, but the power is set even lower, about 30% (250–300). Otherwise you will overheat it. Since white chocolate is often used to make confectionary glaze, it may be necessary to combine it with other ingredients, such as cream or butter, during its melting process.
Break or slice a bar of white chocolate into pieces, or better yet, grate or chop in a blender bowl. Put in a deep glass or ceramic dish and put in a microwave, set the power below average. Otherwise, follow the recommendations from the previous paragraph.

If the melted white chocolate is mixed with softened butter, you can get a smooth, even icing
After the white chocolate has melted, give it 5 minutes to cool slightly, then mix it with warm cream or soft butter. This will prevent clumping, and the chocolate will not be collected in grains when you make it a cake icing.
With milk for sauce
It will take 50 ml of milk or cream per 100 g of chocolate. The consistency of melted chocolate will be softer and more fluid, it will not harden immediately. For example, this method is perfect if you are preparing a sauce for chocolate fondue. We set the microwave power to 300 and melt the chocolate pieces poured with milk in several steps for 30–40 seconds, be sure to remove and mix the chocolate mass thoroughly.
In a large company, you can arrange a fondue party: put strawberries, cherries, banana, apple or pineapple slices on the skewers, dip them in melted warm chocolate and enjoy a juicy sweet taste. For the original flavor, you can drop a little brandy or cognac into the mass.
Two simple recipes for hot chocolate treats.
Everyone likes hot chocolate. To prepare it according to the classic recipe is simple. Melt the bitter or milk chocolate in the microwave using the first method described by us, then add the same amount of hot milk to it. Mix well to make the mass uniform, and put it in the microwave again. The contents in the bowl will gradually heat up and begin to boil. As soon as it increases in volume and begins to rise, quickly turn off the stove and remove the bowl.
Choose deep dishes for cooking so that the boiling milk has room to rise.
Serve directly to the table, garnished with whipped cream or a scoop of vanilla ice cream.

Serve melted chocolate with milk, adding nuts and whipped cream
And if you like spicy aroma and original taste, try to cook an unusual hot chocolate according to an oriental recipe.
You will need:

In a deep ceramic or glass bowl, mix sugar, spices, grated chocolate and 1 glass of milk. Send in the microwave, setting the defrosting mode (150-200), for 6–9 minutes, without covering from above. During this time, remove the bowl from the device twice to thoroughly mix the contents. Then add another 4 cups of milk to the mix (do this gently, stirring with a whisk until smooth) and place again in the microwave, but for 9–13 minutes. Control cooking: as soon as you see that chocolate with milk is going to run away, immediately turn off the device and reach for the bowl.
Ready to drink before serving, you can decorate the peel of lemon or orange, cinnamon stick.
In the microwave, try, only break into small pieces first. I recently made truffles, so I melted it in a microw. Everything seemed to work out.
One of the main components of confectionery art is chocolate. If we talk about the professional environment of kitchen craftsmanship, then there are often used special glaze recipes, which are different from the usual chocolate to us. At home, cooks are often used as a glaze or dessert decoration.
Therefore, in this article you will learn how to properly melt chocolate. You will also learn how to make melted chocolate to be liquid.
How to choose chocolate to melt
Chocolate with a high content of cocoa butter will allow you to make high-quality and tasty frosting. So do not skimp on the purchase of this product. As part of a good product should be such components as cocoa butter, cocoa beans, sugar and milk powder.

Expert opinion
Anastasia Titova
Confectioner
A warning! For melting is not suitable product with raisins, nuts or other additives. In addition, you can not use a porous product.
If the wrapper indicates that it is a table or culinary / confectionery product, then this is what you need. To make inscriptions on desserts, the dessert type of the product is used. It has sufficient thickness that allows you to make the inscriptions.
The best option for glaze is a couverture. However, it has great value. It burns well during heat treatment, and after hardening it becomes “fragile”. Its sale is carried out in special bakeries or pastry shops.
Before you melt white chocolate it would be good to get acquainted with its features. Not everyone can do it right the first time. The product is quite delicate, so it is only melted on the steam bath.
How to melt
Before melting, the product is crushed and rubbed on a grater. Lumps and excess viscosity will appear in the overheated product. The optimum temperature for obtaining a fluid state of liquid dark chocolate is 50, and white - 45. In order to avoid sticking of the product and the formation of lumps, it is necessary to stir it constantly during the heating process.
Water or other moisture in another state (steam, condensate, etc.) should not be allowed to melt or melt chocolate. It will spoil the taste of the product. Dishes, used for melting, pre-wipe dry. It is worth noting that wood, plastic and silicone absorb moisture, but metal does not. Therefore, for mixing the product is better to use metal kitchen equipment.
Usually, the product is not fully melted, as the solid slices will melt on their own, but a lot depends on the recipe of the dessert. You can decorate with chocolate icing various delicacies. To prepare a liquid glaze in the composition is added a little heavy cream or butter.
How to melt chocolate in a water bath
On how well to heat the chocolate will depend on how high-quality and attractive you get the icing. First prepare the pan. with thick bottom. It is useful to you for the preparation of a water bath. So, fill the pot with water a little more than half and heat it to 75–85 on the stove, maintain this temperature.
Quickly smash a tile and place it in a pan of smaller diameter. So that when melting the product is not burnt, it is better to give preference to the container with a non-stick bottom. It is important that the pan is completely dry, otherwise the chocolate will burn. Therefore, for greater persuasiveness, it is better to wipe the container just in case.
It is important that the smaller diameter pan does not come into contact with water, in a larger diameter pan. The fact is that overheating of the product will lead to the fact that not only its consistency, but also the quality of taste will change, so you need to melt chocolate strictly according to technology. So, for example, if you pour the product like mastic, it will crack after 3-5 hours if the main ingredient has been overheated. Especially capricious in melting athomemade white chocolate, as well as milk. Such a remark would be rather indirect if you melt a black tile in which cocoa butter is less than 60%.
If you need to melt bitter chocolate to decorate the cake, then do it on low heat. And if you have to melt white or milk chocolate, then after heating the water bath, turn off the stove at all. These 2 types of product heat up quickly, so it will take less time to melt them. Use a wooden spatula or spoon to stir the product.
When the product has melted, wrap the pan with foil, after having made several holes in it, to avoid condensation. Leave the chocolate under the foil for 2–3 minutes, this time will be enough for the product to finally melt and become homogeneous.
Use a slow cooker to melt chocolate
There are many methods of melting chocolate using different electronic appliances for the kitchen. Then you will learn how to melt chocolate in a water bath using a slow cooker. Low heating temperatures of the multicooker will help you, since you can not worry about overheating of the main ingredient.
So, the whole process consists of the following stages:
- Break the tile into small pieces.
- Pour water into the multicooker bowl to the lowest mark.
- Install the steamer tray and place the product in it, it will be used as bowls with chocolate But this is possible only if there are no holes in the tray.
- Install the program: "Steaming".
- Stir the mixture until it is melted.
The advantage of the method is that the multicooker works according to the established program, and you only need to monitor what is happening.
How to melt chocolate in the microwave
If you know how to melt butter in the microwave, then you will not be too hard to make in it. This can be done in two ways:
- Place the chocolate pieces in a glass or ceramic dish. Send it in the microwave for 1 minute. Remove the container, mix the mass and send to the microwave for another 30 seconds. So repeat 3 more times.
- If you have to make icing or ganache, then you can quickly melt chocolate in another way. Set the microwave to defrost mode and place it in a container in it for 2 minutes. If the consistency does not suit you, then straighten it to warm up for another 1 minute.
Often, this method is used by confectioners to make decor, such as leaves, lace, or flowers. Modern microwaves have enough power to process the product, while its quality will not be affected, and your baking will be decorated in accordance with the original idea. In this way, you can melt the chocolate in the oven, how to do it and write is not worth it, since the whole process looks about the same. The only thing you need to warm the oven to the minimum temperature.
In the bowl of the combine
If your time is running out, then a water bath for chocolate is not an option, just like other methods of melting this product provided in the article. How to be? The faithful assistant can be a food processor. How to melt chocolate on a cake in a food processor?
- Place 2/3 of the tile in the combine bowl, it needs to be pre-crushed or use a monetized product.
- Heat up the remaining composition, that is, 1/3 of the mass to 50 and add to the cold.
- Mix it quickly in a combine. So you will achieve uniformity, it will not lose its beneficial real and get a nice shine.
A few more reminders of how to melt chocolate for a cake will help you avoid common mistakes in this business and get a good result:
- You can not use for melting milk, black or white porous chocolate.
- It is unacceptable to cover the container, since the resulting moisture will spoil the product, from which then do not get rid of.
- To make a liquid consistency, add a little water, cream or butter.
- If you have to draw a picture, the ingredient must be thick, for this reason it is slightly allowed to overheat. Be careful, because with excessive heating the product can take lumps.
- The melting point of the white tile is slightly lower than the black one, so after heating the water for the water bath, it is better to turn off the stove, so white chocolate will melt anyway.
Now you know exactly how to properly melt chocolate in a water bath and in all other ways, which will allow you to prepare an original dessert for the joy of those you want to indulge.
Perhaps there is no one among us indifferent to chocolate. This wonderful, tasty and fragrant dessert brought by Columbus from the island of Guyana in the distant 16th century has been the leader in the world of sweets for many years.
Sweet good
Chocolate is not only tasty - scientists argue that regular use of it in moderation (no more than 1 tile per week) has a beneficial effect on the circulatory system, prevents the development of malignant tumors, and contributes to the elimination of cholesterol deposits. And this delicacy is considered an excellent antidepressant, since it consists of theobromine and phenylethylamine - substances that elevate mood and improve brain activity.
It is eaten not only in solid, but also in melted form, and it is also used to make icing for decoration with it - many confectionery recipes involve the use of fragrant delicacy.
But despite its apparent simplicity, this dessert is a rather whimsical product - an incorrectly melted tile can simply turn into a too viscous or dry heterogeneous mass.
In order for a small culinary miracle to turn out not only tasty, but also beautiful, you need to know which chocolate to choose and how to melt it properly for a cake, cake, eclairs or pancakes.
How to choose?
As you know, there are many types of this dessert: bitter (black), milky, white, porous, with raisins, nuts, sesame, roasted, etc. All of them are good in their own way, but not every type is suitable for cooking glaze.
Porous chocolate is better not to use - to achieve the necessary consistency and the desired quality of the resulting mass is very difficult, because its structure is poorly heat-treated.
Dark is burning longer because of the high content of cocoa powder in it. Nevertheless, it is this type that is most often used by pastry chefs - sweet dishes with it turn out to be especially spectacular and refined.
Dairy perfectly amenable to melting, hot it turns out to be viscous and not too liquid.
White is considered to be an ideal artistic material at all - with its help it is possible to colorfully paint, for example, a homemade cake, after having added the necessary food colors to the glaze.
In order for the confectionary mass to turn out homogeneous, shiny, look good and be convenient to use, you need to take a clean product, without adding nuts, raisins, wafer crumbs and other impurities. When buying, carefully study the composition of the tile - the main components should be sugar, cocoa butter, cocoa powder and milk. No high-quality product should contain any artificial flavors, colors or preservatives.
How to prepare?
Before melting the chocolate bar on the stove or in the microwave, it should be prepared for heat treatment:
- remove the tile from the refrigerator an hour before cooking. Cold product cooks slower; in addition, sudden changes in temperature are detrimental to cocoa butter, therefore it is desirable that it be at room temperature before cooking;
- chop the tile with a knife into small slices or grate it - so it will cook faster, and the glaze will be homogeneous;
- place the resulting crumb into a saucepan or stew-pan with a thick bottom and walls, and lubricate its inner surface with a thin layer of deodorized (odorless) vegetable oil - it will be easier for you to pour over the glaze and subsequently wash the dishes.
How to melt chocolate?

Immediately it is necessary to make a reservation that in order for the mass to turn out to be homogeneous, water should not be allowed into the tank during the process. It is also unacceptable to cover the pan or stew pan - the condensate produced during the heat treatment can get from the lid inside the dish.
Bring sweetness to a boil should not, because for a cake or other confectionery boiling liquid is not needed.
Remember! The melting point of dark chocolate is 55 ° C, dairy - 45-50 ° C, white - about 45 ° C.
There are several ways to prepare liquid chocolate mass. Tell you more about each.
Natural way
If you are going to please loved ones with a delicious dessert, and outside the window is a hot summer, you can make a delicacy without using home-made equipment. The temperature in the sun in hot weather often reaches 40-45 ° C, so the container with crumbs can be simply put on a window or balcony. However, this way you can melt only white or milk chocolate, as they differ in their low melting point.
In the oven
To start, warm the oven to a temperature of 60-65 ° C (no longer needed). Then pour the crumb into a thick-walled pot and place it in the oven to the highest position, away from the fire. During the process, periodically stir the mass with a wooden spatula until it becomes liquid and homogeneous.
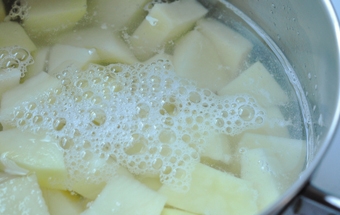
Similarly, in the oven you can also melt chocolate in a water bath. To do this, boil water in a saucepan, heat it to 60 ° C, place a bowl of slices or chips in it so that the water covers the bottom of the pan 2-3 cm. Then send everything to the oven for 10-15 minutes.
In the microwave
Many hostesses trust the preparation of the glaze of the microwave oven - it is simple, fast and convenient. But to get the perfect result before cooking, you should carefully study the question of how to melt chocolate in the microwave.
This process has its own tricks and nuances:
- use only special thick-walled glassware designed for a microwave - plastic containers can spoil the taste of the dessert;
- set the minimum power or the mode of "defrosting", then the melting will be uniform;
- every 30-35 seconds, open the oven and mix the contents of the dish;
- watch the time - it will take no more than 2-3 minutes to make a liquid stogramm tile.
Note! Using a microwave oven to melt white chocolate with high quality will not work, as it has a low melting point and can quickly overheat.
On the steam bath

In order to cook the glaze in this way, prepare two pans (they should be selected in such a way that the smaller one fits completely into the larger one). Pour the crumb or slices into a small saucepan.
Hello! Here, recently decided to bake a cake with chocolate icing. I wanted to do everything quickly, so I began to look for information on how to melt chocolate in the microwave. Yes, yes it is with the help of microwave. There was no time to mess with the water bath. And stand over the stove so that nothing burns out. It turned out that it is much easier to heat chocolate, and most importantly, faster. There are, however, their own nuances.
Since the microwave with different power, you have to adapt to your device. I will give general advice, but you will have to correct them yourself. Chocolate can burn, so you need to start with low power.
At short intervals, you will need to stir it. When you adapt yourself, you will understand in which mode it is better to cook it. Someone will like to cook at maximum power in literally 30 seconds. And someone will set the defrost mode and wait 5-10 minutes. While not worrying that the mixture will burn.
Also important is the choice of product. Can tiles be used with fillers? I would not advise. Raisins, nuts, popped rice will lead to uneven heating of the product. And our task is to quickly turn a solid tile into a liquid homogeneous mass.

Similarly, porous chocolate is not suitable for our purposes. There are a lot of different additives in it, but cocoa is definitely not enough. Because of this, it does not melt, but coagulates. This applies not only to porous tiles. On the Internet I saw reviews of housewives, as "Alenka" rolled into balls in a water bath.
Choose any tile with a cocoa content of at least 60%. The exception is white chocolate. Cocoa in it is not more than 35%, but it does not roll into balls.
Another important point is the temperature of the tile. It should not be thrust into the microwave immediately after the refrigerator. A sharp temperature drop can adversely affect its consistency. And most importantly, chocolate is afraid of water. It is enough to prevent the mass with a wet spoon and you can forget about the desired consistency. The mixture becomes heavy. It stretches like rubber. This icing is not suitable for decorating the cake, and even more so for the fountain.

Now, let's go directly to the recipe:
- Cocoa tiles are best broken into small pieces. You can cut with a knife into portioned squares. So the tile will melt more evenly and quickly.
- Place the chocolate pieces in a shallow bowl. Put in the microwave.
- Start with low power. I advise you to put on 30% of maximum power. If you have 800 watts, choose about 250-300 watts of power.
- Set the time to 15-20 seconds. After - mix the mass and set the timer again for the same time.
- Stir the mass every 15-20 seconds. So you need to do until you achieve complete homogeneity of the product.
- If there are a couple of unmelted pieces, do not rush to put the mixture back into the oven. Try mixing everything thoroughly. From the already melted mass, they can melt.
The most important thing is not to overheat the mixture. Otherwise, the mass will be too dense, with a bitter taste.
To the note: If you grate chocolate on a grater, it will melt much faster. In this case, the warm-up intervals should be 10 seconds each.
Melted chocolate freezes pretty quickly. To have time to put it on pastries, add a spoonful of sour cream. Also suitable for the glaze warm milk or cream. On YouTube found an interesting video. It shows how to melt chocolate in different ways.
Cocoa icing for cake
It is suitable not only to cover the cake. She can decorate cookies, cupcakes or pie. In order for it to be well applied and frozen, it is necessary to respect the proportions. According to this recipe you will get a liquid icing.
We will need:
- a bar of dark chocolate with a cocoa content of at least 72%;
- butter 40-50 g;
- milk, about 30 g (fat. 3.2%);
- two tablespoons of sugar;
- tablespoon of cocoa powder.
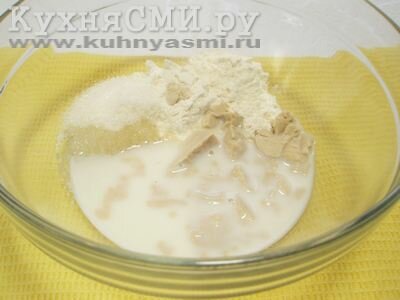
Tile should be broken into pieces and placed in a wide bowl. Add butter to it. It must be put out of the refrigerator so that it is at room temperature and knead with a fork. Next, the mixture must be combined with milk. It also should not be cold, since everything will warm up unevenly in the microwave. Unless you have a microwave with convection.
Milk needs to be poured in a thin stream to our ingredients in a bowl. Then mix cocoa with sugar and mix all ingredients. Put the mixture in the microwave oven at 800 W for three minutes. Every 30 sec. Stir the mass so that it does not burn. This icing is easily applied to the cake, the mixture is moderately thin.
Mastic for decoration
This confectionery coating is prepared with butter and nuts. We still choose chocolate without additives. Nuts will be added separately. They need to grind in a blender or grinder. It can be peanuts, almonds or walnuts. I like chocolate with almonds the most. So, we will need:
- 65-70 g of butter;
- white chocolate - 100 g;
- icing sugar - ½ cup;
- warm milk - 1 tsp;
- vanillin and nuts - to taste;
With this glaze, you can make such decorations as in this photo.

Important: beforehand get the butter and milk out of the fridge. They should be at room temperature. Grind the nuts are not very fine, so it will feel better nutty flavor.
Put the butter in a bowl, then chop the white chocolate and add to the butter. Send this mixture to the microwave for a couple of minutes. Do not forget to stop the process and stir the ingredients. White chocolate melts worse than milk or black. Therefore, the power can be set immediately to 50%.
When the chocolate is melted, add warm milk, powdered sugar, vanillin and nuts to it. Mix everything thoroughly and return to the oven for literally 20-30 seconds.
How to stoke for a sweet fountain
Mini chocolate fountains are very popular today. The heating element inside this appliance maintains a constant temperature of the heated product. The mixture using a special screw that rotates, is fed to the very top. Then from the top tier overflows into the bowl. And so in a circle.
For this device you need to buy special chocolate. It is portioned and melted directly in the fountain. But what if there is no special chocolate, and you want to pamper yourself with delicious food? You can make a mixture of ordinary tiles. Such mini-fountains have a capacity of 300 grams. Therefore, the number of tiles will depend on the volume of the fountain.
The product must be chosen without additives with a cocoa content of at least 70%. Any slab chocolate will be too thick for this appliance. Therefore, it is diluted with cream, vegetable oil, strong alcohol.

Microwave melted cocoa tiles need the same pattern that I described above. Then warm cream or brandy is added to the mixture. Dilute so that the mixture is sufficiently fluid. You can also add refined vegetable oil. Two bars of chocolate a little less than 200 ml. After that, turn on the device and let it work for a few minutes. Then pour liquid chocolate into the bowl and turn on the motor.
Original Fruit Dessert
This icing is prepared very simply. This turns out quite an interesting dessert. Chocolate use which one you like best. It can be white or black tile. For registration of fruit, you can use sesame seeds, crushed nuts. As well as coconut flakes or multi-colored topping.
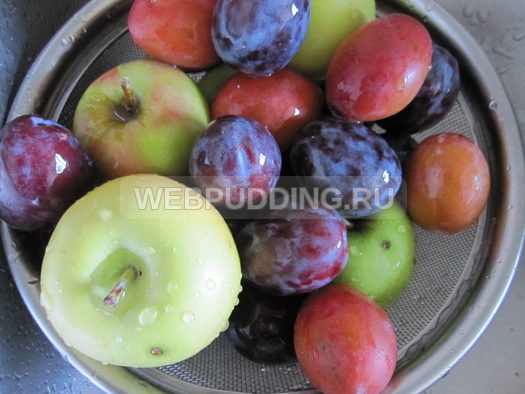
Fruits and berries should be washed and dried. If the fruits are large, then cut into slices, each of them strung on a toothpick for fruit. Add powder to the bowl.
Tiles break into pieces and melt in the microwave. For fruit it is better to heat the tile at the smallest capacity. It may take up to 10 minutes, but then you will get the desired consistency. When the mixture is ready, dip the fruit first into it. Then go nuts, sesame or coconut.
Effectively look fruit with different icing. On the one hand, you can dip in white glaze, on the other, in the dark. Lay out the dessert on a plate and put in the fridge for pouring. Enjoy your meal.
And what recipes do you use for making cocoa glaze? I hope my tips will help you save time. Subscribe to updates, and share recipes in social networks. Waiting for you on the pages of my blog. Bye Bye.