Original ideas for crafts and figurines from salt dough with a photo. Pug for a magnet - a dog made of salt dough in a step-by-step master class
New Year's gifts and handmade toys are a popular direction of home creativity, because before the holidays you really want to prepare at least small memorable presents for all your friends, colleagues and relatives. It is unlikely that you will be able to buy so many ready-made gifts - not every budget can withstand such expenses. But home creativity allows you to make a lot of pleasant surprises with minimal cash investment.
Today, craft stores offer the widest selection of materials - you can buy polymer clay kits, scrapbooking blanks, Christmas decorations and postcards, patterns for embroidery or drawing. However, you can also make unusual toys for the New Year from improvised materials - for this it is enough to master the technique of testoplasty or bioceramics. This direction of creativity is truly exciting and, which is nice, practically does not require additional financial costs.
Salt dough is just a godsend for creative people! This material is suitable for a wide range of applications, from appliqué to 3D modeling.
These master classes are devoted to how to mold a dog from salt dough. The article will consider different options for crafts, so that anyone can choose what he likes best - and do it with his own hands.

salt dough recipe
The basis of a strong and durable craft is a properly prepared dough.
Ingredients:
2 cups salt "Extra";
2 glasses of wheat flour;
10 st. spoons of sunflower oil;
0.5 cups of water.
This is a classic recipe, but it can be varied. Maclo will replace the cream for pyk or pharmacy glycerin. In the mixture for viscosity, you can add 2-4 tbsp. spoons of wallpaper glue.

After kneading, the dough must be wrapped in polyethylene (bag, cling film) and put in the refrigerator for an hour or two.
Please note: the dough prepared in this way is not intended for consumption! It is completely inedible and can harm the human body. If you are making with a child, he should explain this rule before starting work.
The resulting dough should:
- Do not stick to hands and work surface.
- Have a uniform consistency.
- Be tight.
- Strictly keep the form devoted to him.
In order for the dough to acquire the desired color, instead of ordinary water, you can use vegetable juice (carrots - orange, beets - pink). Instant coffee gives the material a soft brown tint.
Please note: with this coloring, the colors will not be bright, and after drying they will turn completely pale.
Any violation of the recipe or storage conditions of the finished material can lead to such unpleasant consequences:
- In the course of work, the dough will stick to hands, table, tools. It is simply not possible to fashion a neat figure out of it.
- After drying, the craft made from dough will begin to crumble and crumble.
- The product will not bake or be able to set properly. It often happens that the top layer of salt dough forms a hard crust, not letting air into the middle. Because of this, the craft will become vulnerable and break at the first fall.
Possible problems in making dough
If you didn’t get the perfect dough or figure the first time, you will need to solve one of the possible problems:
- bubbles or cracks that appear after drying the figurine indicate that you dried it too quickly by setting the wrong oven temperature. Dry the figurines naturally or in a preheated oven with the doors ajar. It is possible that your cabinet is heating too intensely or unevenly;
- the paint on the figurine cracked - most likely, you began to apply colors to the figurine, which did not have time to dry completely. Do not throw away the craft - let it dry in the air, and then remove the paint with fine sandpaper and paint again;
- it’s impossible to make a massive figure (for example, a panel) without cracks - its thickness prevents the dough from drying out. Do not forget to turn the product while it dries in the oven or in the air;
- a piece has broken off from the figurine - do not rush to send the craft to the bin. Glue the element with PVA, let it dry, go over the joint with sandpaper and varnish it.
Tools and items for creativity
In the process of creating figures from salt dough, you will need:
- a rolling pin or a bottle of water (needed for rolling out the dough mass);
- board for sculpting figurines;
- toothpicks (needed to make patterns and holes);
- brushes;
- black marker for guiding lines;
- gouache or acrylic paints;
- universal varnish;
- paper and pencil (to make figurine templates);
- scissors;
- foam sponge (for painting a large surface);
- glue;
- ropes (for hanging figurines);
- buttons and beads (for making textured prints);
- cereals and pasta for making panels in a rustic style.
Drying figurines
Giving the product strength provides competent drying. You can apply one of the following methods:
- drying in a warm oven- the figures are placed on a baking sheet covered with parchment, and then in an oven with a temperature of 60-80 degrees. You need to keep the craft for 1-2 hours (it all depends on its size and thickness);
- natural drying- the figures are placed on a wooden or plastic board and kept in a warm place (without direct sunlight and not on a battery!). The process is long (4-5 days), but ensures uniform drying, making the figurine strong;
- drying with heating and cooling in the oven- the figures must be placed in the oven on a baking sheet lined with parchment, put the cabinet on heating (up to 150 degrees). When the set temperature is reached, the cabinet must be turned off and the figures should be left in it until it cools completely.
flat dog
The flat salt dough dog can serve as a keychain, decoration, baby room pendant, wall decor, etc.

This master class will explain how to make a flat dog step by step:
- You can act in the same way as when creating a panel - use a sketch and a film. But it’s more interesting to sculpt “on your own”.
- We break the image into its component parts.
- We tear off such pieces from the dough that are enough to create one part.
- We sculpt the base - the body. Based on its size, we build a general view of the product. The shape of the body must immediately be corrected with a knife or hands: tear off the excess, add the necessary, smooth the edges, add thickness, etc.
- We supplement the body with other details.
- If in the future you plan to hang this craft, then holes for the thread must be made in advance.
- We dry by the combined method (in the air, then in the oven).
- We paint if necessary.
Dachshund dog

- Step 1. Take a sheet of cardboard and draw a stencil for the dog. Cut out the template, marking the location of the eye, nose and mouth, so that you can later refer to the drawing while working with the dough.
- Step 2. Place the test mass on parchment and roll it out with a rolling pin into a plate with a thickness of 2 to 3 millimeters.
- Step 3. Place the dachshund template on the plate and cut out the blank with a sharp knife. Cut carefully, trying not to tear the paper - then a piece of parchment with the blank will need to be transferred to a baking sheet. If you cut the mass on the board, it will be difficult for you to shift the dachshund onto a baking sheet without crushing the product. As a last resort, use a wide spatula with thin edges and pry the dog when moving. Roll the rest of the dough into a ball - then it will come in handy to give the dog volume.
- Step 4. Pinch off a couple of pieces from the rest of the dough. Form oval eyes, roll them well in your fingers and, after checking the pattern, glue them onto the workpiece so that the dachshund has eyes. Before attaching the eyes to the muzzle, wet this place a little with water.
- Step 5 Wet your fingers in cool water and go over the cuts well, smoothing their edges.
- Step 6. Pinch off small pieces from a lump of dough and form a dachshund for eyelids.
- Step 7. Using a toothpick, draw the dog's ear, paws, and mouth.
- Step 8. Tear off a small lump from the dough and form a voluminous ear. Do not forget to moisten the place of gluing with water. Stick a lump of dough on the middle of the future ear and smooth with wet fingers, stretching to the edges.
- Step 9. Glue a piece of dough at the tail of the dog and stretch the mass to the sides, giving volume to the back of the figure. Add volume to the dog's tail.
- Step 10 Using a toothpick, make strokes imitating wool, drawing lines from the edges to the center of the product. If the test mass has dried up by this time, lightly moisten the figurine with water.
- Step 11. Dry the dog for several days in the air or in the oven, using the methods above.
- Step 12 Using black gouache, draw strokes imitating the dog's fur and draw the main lines. Black paint should emphasize all the relief places on the figure. Let the paint dry.
- Step 13 Take a dark yellow or ocher paint. Apply it to a foam sponge. Blot all the protruding parts of the figurine with a painted sponge. Let the paint dry.
- Step 15 Color the eyes white and add black dots to the pupils. Write a wish on the figurine.
- Step 16 Cut off a small piece of string or twine. Glue on the adhesive sealant to the back of the dachshund.
- Step 17. Cover the product with a layer of thick or liquid glossy varnish. Leave to dry. The craft is ready!
voluminous dog
- We tear off one piece from the dough and sculpt the torso, head, paws, tail in turn. We move from large parts to smaller ones.
- We lightly grease the seams between the parts of the craft with water so that the dog does not fall apart later.
- Now you need to let the salt dough dry properly so that the figure is not afraid of falls and temperature changes.
- We paint.

In this master class, I will show you how to make a dog from salt dough, and not just a dog, but a graceful and elegant Dalmatian, he charms everyone at first sight. This is a very cheerful, agile, inquisitive and energetic breed of dog. You can leave such a proud Dalmatian with gifts for yourself to cheer up and give as a New Year's souvenir.
For work you will need:
- universal salt dough;
- rolling pin;
- stacks;
- gouache;
- brushes for drawing;
- universal varnish;
- decorative elements.
First, we make a stencil. We draw on paper, and then we cut out the dog and the bag that she drags in her teeth. We cut off overhead parts from the cut out figure - something that will not be molded according to a stencil.

We roll out the dough with a thickness of 2.5 - 3 cm and cut out the figure according to the stencil. It turns out something of a strange shape, but with each next step it will be transformed into a dog.

We start sculpting by sealing the muzzle. Put a small ball of dough on the protruding part of the muzzle, moisten it with water on top and knead the dough with your fingers so that there are no joints. We do not fill the space under the nose.

From a small ball of dough we make a nose. Remember to dampen the dough with water to easily level it into the desired shape.

With a stack, draw the contour of the mouth and apply the eye. From a triangular piece we make a hanging wide ear.

To make a hind leg, roll up a large sausage, which will be thinner on one side than on the other.
At the bottom of the paw, form a sharp heel, without space for the phalanges. Moisten the upper part of the paw with water and smooth the dough with your fingers so that there are no sharp contours.

Form the front paw in the same way, only without the heel and paw.

Place a small piece of dough on the stomach between the paws and also smooth it with wet fingers.

On the hind leg we form a place for the phalanges. A small piece of dough needs to stick to the heel and bend it as in the photo.

Now we make 4 thin short sausages, it is possible that they differ slightly in length.

We lay the made sausages on the workpiece of the foot, starting from the far phalanx. We put the back sausage evenly, and we begin to bend all the subsequent ones little by little. The result is a neat paw.

Glue 4 phalanxes to the bottom of the front paw, as well as to the back.

To make 2 more paws, it is enough to stick 2 oval pieces of dough and make small cuts with a stack. It is not necessary to highlight these paws strongly. Also, with a stack, you can draw a little wool under the head and over the body.

We make a cake no more than 0.3 mm thick. And we bend it into the shape of a bag with one elongated edge.

We “put” the edge of the bag into the mouth of the Dalmatian, we bend all the wide sides up. From the same thin piece of dough, cut out the shape of a Christmas tree, which we stick into the bag so that it looks out of it.

We make another thin cake and close the bag on top. Wet the edges of the two parts of the bag with water and level the joints.

On top of the bag we make a lapel from a thin sausage, which needs to be flattened. Additionally, for realism, draw folds on the bag with a stack.

The finished work can be dried in the oven at a minimum temperature.
Dalmatian painted from salt dough
There should be no problems with coloring a Dalmatian. We cover the entire surface of the dog with white gouache, bypassing the nose, which will be black. When the white is completely dry, paint in the coat and some details with a pale gray. Black highlight the eyes, nose and mouth.

Decorate the bag with a light brown color, and when it dries, make the folds of a darker color. When the bag is dry, decorate the tree and make black spots on the white wool.


Open the finished figure with varnish, and when it dries, you can glue the decor on the Christmas tree in a bag.

So that good luck accompanies you all year, dog should be kind and well-fed. And if you already sculpt a dog, then it’s funny and with a big bone, so that it’s enough for a long time.
For work you will need:
- knife, stacks;
- rolling pin;
- gouache and brushes;
- paper;
- pencil and scissors;
- universal varnish.
Modeling a puppy
First you need to draw a stencil or, more simply, a drawing of the desired size. If you do not have outstanding artistic talent, then the picture can be printed. It is more convenient if the stencil is on cardboard, not paper.

We roll out the dough into a cake with a thickness of 1-1.5 cm. We apply a stencil on top and cut out the figure along the contour. We remove all excess dough and smooth the cuts with your fingers body of the dog.

From the rest of the dough we make a sausage, which will be thinner in the middle than at the edges. We put the sausage down, connect the edges of the figure with the sausage. With a sharp stack, make indentations around the edges to form the edges bones. In the same way, we make the tail more voluminous.

From a small piece of dough we form a ball, then slightly stretch it into the shape of an egg. We stick head puppy, so that the bottom of the head goes a little on the bone.

Now we take 2 identical pieces of dough, roll up the balls, then pull them into the shape of a pointed droplet. Lightly flatten and stick ears up on the head, bending them down on muzzle.

Take a piece of dough about 1/3 the size of the entire head and also form a ball. Stick the ball down on the muzzle and make a vertical indentation from the bottom with a sharp stack.

From a small ball we make a speaker spout dog. On the bottom of the nose we make 2 holes in the form of commas.

It is necessary that the dog holds his bone tightly, which means we are doing paws. From 6 identical pieces we form small neat sausages. We spread 3 sausages on top of the bone on both sides. Then add a small piece of dough on the sides from the paws to the head and smooth the dough well with a wet brush.

Drying salt dough better in a natural way, but if you need to do it quickly, then use the oven. We put the figurine in a cold oven and set the minimum temperature. Bake for 30 minutes on each side. If you do not follow these recommendations, be prepared that the work may crack during drying.

Coloring the puppy
We decorate everything with brown gouache, except for 1 ear, a protruding muzzle with a nose, bones and paws. In order for the paint to lay down well and not crack during varnishing, the brush must be very wet.

We make an interesting coloring on the muzzle. Dip the brush with brown paint a little in black and draw an oval where the eye will be. Near the second eye, the coat, on the contrary, will be lighter, for this, lightly dip the brush in white paint. We also paint part of the paws.

The remaining parts of the dog are painted white, except for the nose. We make paws in different shades. When the white muzzle is dry, make the nose black, and then put a little highlight on it with white paint. To make the bone different from the coat color, add a drop of orange or pink paint.

Ready puppy you need to varnish and, if desired, glue the lace on the back. Now you have a well-fed and kind defender and symbol of the coming year.


Like the product and want to order the same from the author? Write to us.
More interesting:
See also:
DIY clay extruder
An extruder for artistic modeling, or, as it is more simply called, a squeeze syringe, is often needed when working ...
Salt dough Christmas decorations
Christmas decorations from salt dough The author of the article "Salt dough: recipes and secrets" Olga Olefirenko...
How to sculpt from plasticine
We continue the series of educational articles about different needlework techniques and crafts. This time Elena Nikolaeva...
Decor of a glass jar with salt dough roses
Decoration for a jar of salt dough Salt dough is one of the most suitable material for decorating...
Doggy poodle, crochet
Crocheting toys using the amigurumi method allows you to create very cute and funny animals! In this ma...
Knitted dog crochet, amigurumi
The symbols and heroes of 2018 will be dogs! They have long been an integral part of our lives and are...
Elmira Dolgov
teach kids how to sculpt dogs, conveying their characteristic features (oval body, round head, elongated muzzle)
Develop eye and fine motor skills,
develop a love for animals
continue the ability to share impressions, express their opinions, listen to other children
enrich children's vocabulary with words (kind, smart, devoted dog, friendly)
to form the ability to evaluate the actions of animals and the actions of people
preliminary workdogs dogs. Conversation about dogs based on the experience of children in whose families these animals live. Reading a Mordovian fairy tale "How dog was looking for a friend» memorizing poems and riddles about dogs, pre-cut and painted chains of paper dolls.
Material: sculpture dogs,dough rolling pin, stacks, boards for modeling, wet and paper napkins.
preliminary work: Examination of rubber and plastic toys - dogs, familiarity with the appearance of different breeds dogs(postcards, albums, illustrations, etc.).
1. Organizational moment.
Children sit on the carpet in a circle. Passing the ball to each other, the children tell their mood (fun, no tears, good, etc.)
caregiver: It's great that you are all in a good mood, then let's wish each other a good day.
Children doing physical exercise
Let's stand side by side in a circle (holding hands, swinging them)
Say hello to each other (nodding head)
We are not too lazy to say hello (threaten finger)
Hello everyone and good afternoon (hands up and wave them)
If everyone smiles (smile)
good morning will start (sit down on carpet)
2 Main body
caregiver: Oh, guys, look, we received a package, what could be there? Yeah, there's some hint here, let's read it!
“He is friends with the owner, guards the house
Lives under the porch, and the tail is a ringlet ”(we use the mnemonic table « dog» )
Children: it dog!
caregiver: Opens the package, and there sits dog Druzhok. Hello, Friend, we haven't seen you for a long time, and here you are again with us. Guys, let's remember thanks to what fairy tale we met Druzhok?
Children: "How dog was looking for a friend»
caregiver: That's right guys! Let's remember who dog met on the way. Questions educator:
Why the dog decided to look for a friend?
Who did you meet first dog in the forest?
Did they become friends? Why?
Whom did you meet after the hare dog? Where did she meet the wolf?
Did the wolf and dog friends? Why?
Did you make friends dog and bear?
To whom did she become a friend?
Children's answers.
caregiver: Well done boys! Children, Druzhok wants to tell us something. My friend says that he did not come alone, but with friends, but they scattered around our group, let's find them. Children are looking for paper dolls. It turns out that Druzhok told them how great and fun it is to live with a person, and the little paper guys also wanted to have such a friend as dog! Let's help paper boys and girls to find a pet and blind them dogs.
Children: Help!
Examining the sculpture dogs, refinement of the shape and features of the parts, the head is round.
Finger gymnastics. "Friendship".
Friends in our group
Clench and unclench your fists with force.
Girls and boys.
Alternately touch the fingertips of the right and left hands, starting with the thumb.
We will make friends with you
Little fingers.
Separate your fingers one by one.
One two three four five.
Reconnect your fingers.
Five, four, three, two, one.
Shake hands vigorously
Show and explain.
First you need to soften dough, roll a bun out of it, then take a rolling pin and roll a circle out of it. (show)
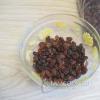
Then take the seeds and make the muzzle round, laying out the seeds in a circle, make the ears from the seeds, then make the eyes and nose from the coffee beans!

(During operation, the song "Sounds of the Forest")
In the end classes the teacher reads a poem and invites the children to give the molded animals names.
You and I have
The cat and the horse have
The pig and the piglet
The cow and calf.
Only our puppy
No name yet!
(M. Plyatskovsky)
Reflection.
Who were we talking about?
Who did you buy yourself?
Well done! You tried very hard! At home, tell your parents that paper boys and girls have made new friends. And teach your friends to sculpt the same dogs as we have learned today.
Exhibition of children's crafts.
Appendix:
"How the dog was looking»
Long ago I lived in the forest dog. One alone. She was bored. I wanted find a friend for your dog. A friend who would not be afraid of anyone.
met dog hare in the forest and says him:
Come on, bunny, be friends with you, live together!
Come on, agreed the bunny.
In the evening they found a place to sleep and went to bed. A mouse ran past them at night, dog I heard a rustle and how it jumps up, how it barks loudly. The hare woke up in fright, his ears trembling with fear.
Why are you barking? - is talking dog. - When the wolf hears, he will come here and eat us.
"This is not a good friend," she thought. dog. - Afraid of the wolf. But the wolf, probably, is not afraid of anyone.
Goodbye in the morning dog with a hare and went to look for a wolf. I met him in a deaf ravine and is talking:
Come on, wolf, be friends with you, live together!
Well! - answers the wolf. - The two of you will have more fun.
They went to bed at night. The frog jumped past dog I heard how he jumped up, how he barked loudly. The wolf woke up in fright and let's scold dog:
Oh, you are so-so-so! If the bear hears your barking, it will come here and tear us apart.
“And the wolf is afraid,” thought dog. “It’s better for me to make friends with a bear.”
She went to the bear:
Bear-hero, let's be friends, live together!
Okay, says the bear. - Come to my lair.
And at night the dog heard, as she crawled past the lair, she jumped up and barked. The bear got scared and scolded dog:
Stop doing that! A man will come and skin us.
“Gee! - thinks dog. “And this one was cowardly.”
She ran away from the bear and went to man:
Man, let's be friends, live together!
The man agreed, fed dog, built a warm kennel for her near his hut. At night dog barking, guards the house. And the person does not scold her for this - he says thanks.
Since then dog and man live together.
If you decide to make an original little thing on the occasion of the holiday, for example, the New Year 2018, the symbol of which is a white dog, or you just want to have an informative and interesting time by making a bright product with your own hands, you have come to the right place!
A master class on creating a unique craft, namely a dog from salt dough, will certainly be necessary, by the way, because with it you can make a beautiful souvenir, or rather a fridge magnet in the form of a dog's muzzle.
We make a dog, a symbol of 2030 with our own hands
Our step-by-step guide in tandem with detailed photos will tell you how to mold a dog from salt dough, and then make a magnet from the blank.
At the end of the article you will find a video for the craft.
To make a dog fridge magnet:

- flour - 1 stack;
- salt - 1/3 stack;
- vegetable oil - 2 tbsp. spoons;
- water - about 1/3 cup;
- magnet - 3 pcs. (different size);
- twine - 30 cm;
- gouache paints, brush;
- scissors, knife;
- colorless nail polish;
- for paper cutting.
Preparing mass for sculpting a dog
We combine flour and salt, while mixing them well with each other. Add sunflower oil and then water. Knead the dough thoroughly.
The finished dough should not crumble and stick to your hands.
- If the dough crumbles, add water.
- If the mass sticks to the table and hands - add flour.
And now we sculpt the dog step by step:

When the dough is ready, take a rolling pin and roll it into a layer 6-8 mm thick.

Print out the dog template and cut it out.
 Wet the paper lightly with water and stick it to the dough.
 We take a knife and cut out the dog along the contour.
 We remove excess dough.
 And we move on to transferring the picture.
To beautifully transfer the drawing from the template, you need to cut off each detail in stages and apply the contours to the workpiece.

This is how it happened for us.

The foot is made according to the same principle.

Leave for a few days in an apartment (recommended in the absence of humidity);
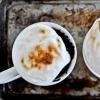
Dry the craft in the oven. To do this, sprinkle a baking sheet with flour, and put the dough in a preheated oven to 150 ° -170 ° for 10-15 minutes.
Important! Flip the craft to the other side when 5-7 minutes have passed. This will help to avoid possible swelling of some elements.
You can find out about the readiness of the test by the presence of a golden crust.

After the workpiece has cooled down, you can start painting.
In this master class, we used 4 colors of gouache.

You can color the magnet dog to your taste or do the same as we did.

In order for the craft to look more voluminous and natural, you need to give shades by mixing colors and adding highlights.
After opening the crafts with paints, it is necessary to let it dry for 2-3 hours.

After that, you can safely proceed to the opening with varnish. In MK, we used the most ordinary colorless nail polish. With it, the craft will be eternal, which means that the dough will not absorb moisture and the souvenir will last for a long time.
The main thing is to apply varnish on the entire craft, and not just on the outer part.
Is the polish dry? Let's start assembling! Using a glue gun or universal glue, glue the twine, make a bow from two pieces of twine, in the center of which you can attach a half-bead. Attach the bow and foot.

We turn the product over and attach the magnets in three places: to the center of the dog, to the bow and to the foot. And this means that our magnet dog is completely ready!
Video: "Doggy Making Secrets"