Charlotte cream liquid what to do. Custard "Charlotte": recipe
To cook "Napoleon" according to the classic recipe of the Soviet era, you need to tinker. Make the dough, bake a lot of cakes, cook the cream, assemble the cake, let it soak. It's a whole story. But the result is a delicious, tender, melt-in-your-mouth cake, worthy of the most exquisite holiday table. You won't make this every day. And if you want? Then there are quick recipes. Today there will be everything - both traditional and its two simple relatives.
Cake "Napoleon": a recipe with custard, the most delicious
In my opinion, this is a very successful homemade cake recipe. The dough for cakes will be chopped, custard. I tried to make the most detailed step-by-step photos so that it would be clear to everyone who will bake for the first time.
Cake Ingredients:
- flour - 2.5 cups * (400g);
- sugar - 2 tbsp. (50gr);
- salt - a pinch;
- butter - 300g;
- water - 6-7 tbsp. (110-120ml).
- Cream Ingredients:
- egg yolks - from 4 eggs;
- powdered sugar - 8 tbsp. (200gr);
- milk - 400 ml;
- butter - 150g.
* a glass with a capacity of 250 ml.
How to cook "Napoleon" at home:
First of all, we take out the butter, cut off 150 grams for the cream and leave it on the table. We need it softened. By the time we cook the cakes, it will melt. And for the test you need frozen.
I will show you how to cook chopped dough, but I’ll be honest right away - I myself rarely cook it like that. I usually use a blender or grater. However, let's go in order.
- On a cutting board, sift the flour with a slide, put the salt.
- Frozen butter (300g) cut into medium-sized pieces arbitrarily. I put them in flour.

- We arm ourselves with two knives, one in each hand, or with such a special tool that you see in the photo, and begin to chop the butter, while mixing it with flour.

- As a result, a mixture similar to wholemeal flour should form in front of you with small inclusions of pea-sized pieces of butter. This is the correct consistency. If you chop all this in a blender bowl, then it will turn out like this without any problems. If you grate the butter, then try to do it as quickly as possible so that the butter does not melt in your hands. The presence of frozen butter in the dough determines its friability after baking. If the butter melts before the oven, you will get a dry sole instead of cakes.
- For the same reason, we will add very cold water (6-7 tablespoons) to our mixture.


- Kneading the dough with your hands for a long time and until smooth is not something that is not necessary, but categorically impossible! Quickly mix, crush, so that a little bit of a lump sticks together and that's it.

- Then we give it the shape of a log, put it in a plastic bag and send it to the refrigerator for 30 minutes.

- While you can do the cream. Separate 4 egg yolks into a bowl, pour powdered sugar.

- Mix with a whisk.

- Pour milk into a saucepan and bring to a boil. In a thin stream, without ceasing to interfere, pour the hot milk into the egg-butter mixture.

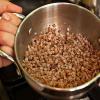
- Then pour everything into a saucepan in which the milk was heated, and return to the fire. With low heat, stirring constantly, cook the mixture until we feel that it has begun to thicken, and the whisk leaves traces on the surface.

- Remove from stove and continue stirring for another 2-3 minutes. Then pour the mixture into a deep bowl.

- Cover with cling film so that it lies directly on the mixture. So the surface does not dry out. We leave to cool.
- We return to the test. Remove from refrigerator and cut into 10 or 12 pieces. In a real Napoleon, there should be no less number of cakes.


- Bake cakes ideally on a silicone mat. If not, on baking paper. We will roll out immediately on them. To do this, put one piece of dough in the center, cover with a plastic bag and roll out thinly with a rolling pin, no more than 2mm.

- In order for the future cake to be the correct round shape, we put a plate on top and circle around the edge. Don't throw away the dough scraps. Saving them and then rolling out another full-fledged cake will not work, but then baking them for sprinkling is just right.

- To prevent the dough from puffing up in the oven, prick it often with a fork. I have such a tool.

- We bake one at a time in an oven heated to 200 ° C for just a few minutes. Therefore, do not go far, as they are browned - take them out. Ready put on a towel.

- If the cream mixture has already cooled down and become warm, you can continue with it. Put softened butter.

- Beat with a mixer until smooth and uniform.

- When everything is baked, you can proceed to the assembly of the cake. Lubricate all layers with cream, do not forget to leave for the top and sides.


- You can decorate the cake with the crumbs that we get when we bake the dough scraps. Sprinkle them on the top and sides. Additionally, you can sprinkle with finely chopped hazelnuts and powdered sugar.

- The cake must be kept in the refrigerator for at least 3-4 hours for impregnation.
From such a classic "Napoleon" of the Soviet era!
Napoleon from ready-made cakes with condensed milk cream

As you understood from the previous recipe, the longest and most effort-consuming process is baking. The cream is prepared relatively simply and quickly. Therefore, for a quick option, we buy ready-made cakes. I can say from my own experience that they are quite good. The cake is ready in 20 minutes.
Ingredients:
- cakes - 1 pack (380g, 6pcs);
- condensed milk - 1 can;
- butter - 150g.
How to make a cake from ready-made cakes:

I am satisfied with the result. Of course, the taste is far from the first, real one, but the cooking speed is definitely a huge fat plus.
Puff pastry cake with sour cream

This one is also faster than the classic version, although it requires baking. But ... if you make a rating of recipes, then puff is in last place. Also tasty, but still not the same. The option is suitable for the case when you need it quickly and there are no store-bought ready-made cakes.
Ingredients:
- puff pastry without yeast - 1 kg;
- sour cream at least 20-25% - 200g;
- boiled condensed milk - 1 can.
How to cook:

Here are three Napoleon cake recipes, from complex to simple, for all occasions and situations. Print yourself step-by-step photos, experiment and please your family and friends.
Hi all. Today I will share with you the recipe for the legendary Napoleon cake. I think for many this dessert is associated with childhood, and also with the New Year. Because, most often, it was on this holiday that our mothers and grandmothers spoiled us with this masterpiece.
There are two camps of people who are divided according to the type of finished product into a “wet” version and a “dry” version, or, more precisely, into soaked and crispy. I prefer the “wet” version of Napoleon. With lots of . Recently, I began to prepare a light version of the cream -. In addition to these classic options, you can cook with and with, it's insanely delicious. With these creams, the cake just melts in your mouth.
Well, if you are a crunchy lover, then just replace the custard with butter, and you will be happy. For example, or
What is a Napoleon cake anyway? This is a puff pastry. I will tell you in detail how to cook this most puff pastry at home. Of course, you can also buy ready-made puff pastry. But, as you know, the taste will be completely different.
I won’t write about the preparation of custard here, I just give links to two creams, the choice is yours - and. Well, for those who like to crunch -.
So, how to cook Napoleon cake at home. By the way, I want to note that the weight of the cake according to my recipe is 2-2.5 kg. If you want a smaller size, feel free to halve the ingredients.
Napoleon cake recipe step by step with photos.
Ingredients:
- 450 gr. flour
- 250 gr. butter 82.5%
- 1 egg
- 150 ml. ice water
- 1 st. l. vinegar 6% (I have white wine)
- 1 tsp salt (no slide)
Cooking:
We send the butter and a glass of water to the freezer for 30 minutes. I usually put the butter in the chamber in the evening, and in the morning I start cooking.
Sift flour into a bowl.

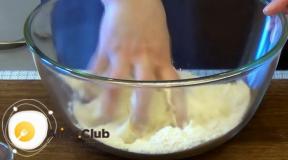
We rub our well-chilled butter on a coarse grater there, mixing the butter with flour all the time.

Quickly rub the grated butter with flour with your hands, spend no more than 2-3 minutes on it.

Add the egg, salt and vinegar to the chilled water.

Mix with a fork. Vinegar can be any, but not more than 6%. In my case it is white wine.

Pour this liquid into the butter-flour mixture and collect the dough into a ball. There is no need to knead the dough for a long time until smooth. It is ideally obtained with large pieces of unmelted butter.

We divide our dough into 13-15 parts. This time I had a diameter of 19 cm. 15 cakes came out, before that the diameter was 22 cm. 12-13 cakes came out. We remove the dough in a container sprinkled with flour, either in the refrigerator for 3-4 hours, or in the freezer for an hour.

During this time, prepare the cream. I have recipes for two types of cream on my site that are ideal for the layer of this cake. and its light version - . You can choose the cream of your choice. In these articles, the amount of ingredients is calculated specifically for this recipe.
After our dough has cooled, we proceed to rolling. If the dough was in the freezer, then we shift it to the refrigerator. Each time we take the balls out of the refrigerator one at a time, do not take out the rest of the dough so that it does not melt prematurely.
I used my miracle purchase - a silicone mat, it has markings with different diameters. In one of the articles, I already told you about its benefits, then I cooked.
Here is my silicone mat. If you didn’t find one in your city, then you can order it in the Bakerstore store using this link - Silicone mat.

If you do not have this device, then I suggest rolling out the dough on parchment, where you draw a circle of the diameter you need in advance (just remember to turn the parchment to the other side before rolling out so as not to eat the dough with pencil particles later). So, you at least roughly understand what to strive for.
The dough should be rolled out as thinly as possible, constantly sprinkling flour on the rolling pin. Of the indicated number of cakes, the thickness will be just the minimum. It is necessary to roll out the dough a little more than the outlined circle. Firstly, the dough will shrink during baking, well, and secondly, we will make the top coat of our cake from the scraps.

After you have rolled out the dough, prick it with a fork. So the cake will not rise much when baking.

I baked the cakes directly on the rug, if it is not there, then transfer the rolled cakes to a baking sheet covered with parchment and bake at 200 ° for 5-7 minutes until golden brown. Try to fit 2 cakes on the baking sheet at once, so the baking time will be significantly reduced.

As soon as the cake is ready, you must immediately cut it! This is a very important point, since the cakes from the oven are still pliable, but as they cool, they become brittle and will simply crumble. We cut it in the same way, focusing on the saucer, carefully with a knife. And even easier - cut with the help of a cover, you just need to scroll it left and right half a turn, and no knife is needed, and the circle turns out perfect. Unfortunately, I did not have a lid of the diameter I needed, and I used a plate.

Transfer the sliced cake to a wire rack and let it cool.

We do this with each cake.
During baking, our cream will just cool down and be ready to go.
We collect the cake.
We spread a couple of spoons of cream on the dish so that the cake does not slip.

Place the crust on top.

Lubricate it with cream. Do not spare the cream, according to my recipe, a sufficient amount comes out (2-3 tablespoons can be safely taken). So we do with all the cakes. At your request, you can put some filling in the layer, my mother always puts walnuts, you can add jam or curd, boiled condensed milk. This time I missed every 3 cakes, I just had a jar left after cooking. And you can not add anything, our dessert already tastes great.

After we have collected the whole cake, we press it a little with our hand on top and send it to the refrigerator for a couple of hours. During this time, the cakes will be slightly soaked with cream and the cake will settle. You can put a load on top of the cakes for 30 minutes, so the cakes will become even softer.


We send the cake to the refrigerator for half an hour, so that the cream grabs.

At this time, we put our trimmings of cakes in a blender and grind them. I don’t like to chop much into crumbs, it seems to me that this is more suitable for. But you can choose a different size for yourself. By the way, you can grind it simply with your hands or with a rolling pin if there is no blender in everyday life.

Sprinkle these scraps on our cake.

We put it in the refrigerator to soak. Best for overnight. From above, you can decorate with berries, or you can not decorate and leave it like that.

Here's what a handsome man turns out. A large number of cakes and cream make this cake a truly royal dessert. The recipe for this cake was borrowed from Victoria Melnik, for which many thanks to her.
And, following such a delicate and feminine cake, I will soon tell you the recipe for a real masculine, brutal handsome man - dark beer cakes, chocolate cream and ganache ... And all this splendor of taste will be gathered in. Your men should appreciate it. Do not miss!
Enjoy your meal.
Napoleon cake is a long-known dessert that is very popular. Many housewives like to cook this delicacy, because they are sure that the dessert will instantly fly off the table. Homemade Napoleon cannot be compared with any store-bought version, because a product made with love will always taste better!
The hostesses of our time do not even realize that in past years it was very difficult to get a cake recipe.
To be more precise, in the 80s, the recipe for making this dessert was still not exactly known. The hostesses passed various cooking options to each other, but there was no classic recipe among them.
Cooks of those times loved to write down all the recipes in a notebook. A separate notebook was created for cakes, since in those years they were considered one of the most popular dishes.
As you know, butter is used for cakes, which was difficult to get in those days. Margarine was used as a substitute, with which it was not easy to cook something tasty.
Also, one of the reasons why every hostess could not make a delicious treat was that the dessert recipe was not publicly available. It was then unrealistic to buy a delicious cake in the store, and it was difficult to make it at home because of the reasons described above. Those who knew how to make Napoleon at home often always sold it.
In addition to this delicacy, other cakes were also produced, but Napoleon was the most sought-after delicacy at all holidays. In those days, the dessert consisted of many cakes, which were 30 cm in diameter. Each was soaked in cream.
There were those who managed to get by chance the recipe for cooking Napoleon. In this case, the hostess kept it a secret from the rest.
Napoleon cake at home with custard - a classic recipe
Napoleon cake is popular in all families of the Soviet era; at any big holiday, you will definitely find this dessert on the table. Our family is no exception - we often prepare it too. We make it every time according to an old traditional recipe, which, in my opinion, is the most successful.

Cooking takes skill and time. To make a treat, you will have to allocate about 4 hours from your personal time. Experienced housewives divide cooking into several days: cakes are baked on one day, and cream is prepared on the second. You do as you wish!
Ingredients:
For cakes:
- wheat flour of the highest quality 0.7 kg.
- butter 250 g. (margarine can be taken as a cheap option, but the taste will deteriorate significantly).
- salt on the tip of a knife.
For cream:
- chicken egg 6 pcs.
- high fat milk 1 liter
- sugar sand 0.5 kg.
- wheat flour of the highest quality 4 tbsp.
- butter 250 of the highest quality at room temperature.
- vanillin 1 g
- vanilla sugar 1.5 tsp
Cooking
1. First of all, we will prepare the cakes. To do this, combine flour and butter in a deep bowl.

2. Now it is necessary to grind the mass to a crumb state. Personally, I chop the components with a knife.

3. Beat 1 chicken egg in a glass, then salt, pour water to the top and beat the mass again.

4. Pour the mixture into a bowl with flour and proceed to kneading the dough. First, mix the liquid with flour with a spoon, then continue to knead with your hands.

Cream preparation
1. We put the dough made earlier in cling film and put it in the refrigerator.
Now let's start creating the cream. We are looking for a 3 liter saucepan, pour out the milk and put it on the stove. In the meantime, you need to beat the eggs and sugar, add vanilla, flour to them. Then beat again until the lumps disappear completely.

2. Add about 250 ml of milk to the egg mixture, beat, then pour the mass into a saucepan.

3. We wait until the cream thickens. It will cook for a long time, it should be constantly stirred. If this is not done, then the cream will burn. The whole process takes about 20 minutes. If a path remains from the spoon, the cream is ready, if the cream is liquid, continue cooking.

4. We temporarily set aside the creamy mass on the table, it should cool completely. In the meantime, we take the cooled dough out of the refrigerator and cut it into 8 pieces. We turn on the oven and bring it to a temperature of 200 degrees.

5. We will need one part, put the rest 7 in the refrigerator again. We roll out the dough with a rolling pin, turn it into a cake of very small thickness.

The easiest way: put parchment on the desktop, put the dough on top and cover with a second layer of parchment. Roll out with a rolling pin until you get the desired shape.
6. Put the dough together with parchment on a baking dish, make holes with a fork so that the dough does not swell during baking.

7.This step will take an average of 10 minutes. It all depends on the power of your oven. In the meantime, prepare the rest of the cakes. Personally, I got 12 cakes, your quantity may vary slightly.


8. We continue to work with the cream. Beat the butter until white (or knead with a spoon). Gradually add cream to it and create a homogeneous mass.

9. Now let's start assembling our cake: lay out the cakes one by one, grease each with cream. Personally, it takes me about 3 tbsp for each layer. Along the way, I try to align all the cakes, breaking off unnecessary parts. Later they will come in handy to decorate the dessert. Important: immediately set aside one cake - it will be needed in the future to decorate the dessert.

10. The pieces that were cut from the cake should be crushed together with the last cake, then sprinkle the top layer of the cake and sides with chips. Ready.

Napoleon should absorb the cream, it will take about 6 hours.
The dessert will turn out soft and very tasty!
cake decoration
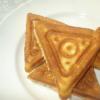
In my case, the cake was made for the child's birthday. The boy asked to portray a typewriter. I do not have much experience with mastic, but surprisingly I got something! I did this:

1. I took about 100 g of marshmallow and melted it, mixed it with 1 tbsp. butter and gradually add powdered sugar. You should get an elastic mass.
2. I used food coloring to give the desired color.
3. I blinded the shape of the machine with my hands.
The cake began to disperse in the morning, because you can’t hide it from a child! Napoleon turned out very gentle!
Napoleon Dessert Assembly Rules
1. Find a tray or dish.
2.Place the cake on it and spread with a middle layer of cream.
4. Next, we coat first with sour cream, over custard.
6. The following two two views.
7. Spread the last cake with a thin layer.
8. The cake should stand for half an hour and absorb all the cream.
9. Cover the top cake with baking paper.
11. We remove the baking paper, coat the top cake again with cream.
12. We crumble an additional cake on the top of the cake.
13. Let the cake stand for about 10 hours at room temperature.
14. Put the dessert in the refrigerator overnight. This time is enough for soaking.
Now you can take a sample from the "Napoleon"! Enjoy your meal!
Some useful secrets for housewives
1. As soon as I learned how to use the Internet, I immediately became interested in finding a Napoleon cake recipe. All were similar to mine, but still something was missing in my version.
2. Along the way, I began to understand the main secrets. It turned out that vodka is present in the classic recipe - it is added to the dough. Regarding the cream - 2 types are required. It is these details that make the cake tender and insanely delicious.
3. Try to make the cakes as thin as possible, while not sparing the cream. You can make it bigger - let it remain superfluous, but you will be sure that the cream will not end at the most inopportune moment. So be sure to soak the cakes with plenty of cream!
4. Now I will tell you a few words about store-bought sour cream. Just imagine, you went to the market, but you could not buy fat sour cream. What to do? Take a dairy product of lower fat content, a colander and gauze. Put the sour cream on cheesecloth, put everything in a colander and let the excess water escape. Add a little butter or cream to sour cream - this will save you in this situation.
Napoleon cake
A step-by-step recipe for making a Napoleon cake with a photo and video description. Detailed instructions on how to make grandmother's custard Napoleon cake
5 h
5/5 (1)
Kitchen appliances and utensils: oven, mixer, knife, rolling pin, fork, whisk, sieve, grater, deep bowl - 2 pcs, glass.
Probably, in every family, an old grandmother's recipe for making a Napoleon cake with custard is passed down from generation to generation. But sooner or later there comes a moment when you want to experiment and bring something of your own, or even cook according to a new recipe.

There are many options , how to make custard for napoleon cake. But with the addition of condensed milk the cream is very airy and spicy. I like to cook this cake because it turns out very satisfying and with a pleasant aftertaste. calories Napoleon cake with custard and condensed milk is quite high - about 500 kcal per 100 grams of cake.
Required products
Cake Ingredients:
For cream:
- Butter - 250 grams.
- Milk - 200 ml.
- Egg - 2 pcs.
- Starch - 1 tbsp. with a hill.
- Vanilla sugar - 1 sachet.
How to choose the right ingredients
- At the time of buying condensed milk carefully read the composition: only milk with sugar must be indicated there. No additives, namely: thickeners, vegetable fats, etc. in high-quality condensed milk should not be.
- When choosing butter give preference to oil with a high percentage of fat content and good quality.
Let's start cooking Napoleon cake with custard according to a step-by-step recipe with a photo.
Napoleon cake step by step recipe
Cooking the dough
- Flour - 500 grams.
- Butter - 250 grams.
- Egg - 1 pc.
- Cold boiled water - 200 ml.
- Baking powder for dough - 1.5 tsp
- Salt - a pinch.


Below in the recipe will be described in detail step by step, how to make custard with condensed milk for Napoleon cake.
Cooking cream
- Butter - 250 grams.
- Condensed milk - 1 can (not boiled).
- Milk - 200 ml.
- Egg - 2 pcs.
- Starch - 1 tbsp. with a hill.
- Vanilla sugar - 1 sachet.
1st stage of cream preparation
At this stage, I will tell how to cook custard for Napoleon cake.
- Pour starch into a glass or bowl, dilute it with a small amount of milk and stir until a homogeneous mass is obtained without lumps.
- Pour the milk into a saucepan, put on a minimum heat and bring almost to a boil.
- Take a deep bowl and add eggs to it. Beat them with a whisk and pour in the diluted starch. We continue to beat with a whisk.
- Then So slow Add hot milk, while continuing to stir with a whisk. It is not necessary to quickly pour in hot milk, as the eggs may curdle.
- Pour our egg-milk mixture back into the pan and put on the stove with the fire turned on to a minimum. Cook until thickened at high continuous stirring. When the cream thickens, add vanilla sugar and mix.
- Ready custard transfer to another bowl to let it cool down to room temperature.

2nd stage of cream preparation
And now I'll tell how to connect two prepared creams.
- The butter, which has become soft at room temperature, is transferred to the mixer bowl and begin to beat it. Beat the butter before purchasing white.
- Without stopping the whipping process, gradually add condensed milk and keep on beating. When all the condensed milk has been added, beat the mixture for another minute.
- Now we will gradually add our cooled custard into an oil base. Turn on the mixer again and, gradually adding the custard, beat everything well.
Assembling the cake
Set the cream aside layer by layer Let's start making the cake. We take a serving plate on which we will serve the cake, and put the first cake on it. We begin to grease it with cream, while putting more cream on the edge of the cake so that the cake is not dry. We coat all the cakes in this way, periodically pressing them lightly together.
We do not coat the last cake- we will use it for decoration, after crushing it into small pieces.

If you want to get a more even cake, then proceed as follows:
- We coat all the cakes, except for the last one (leave it without cream).
- Place a dry, clean cutting board on top of it.
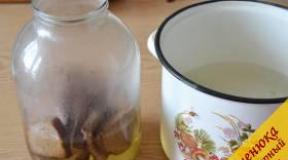
- We put a jar of water for 1 hour. The cake will look more even.
Thereafter grease the sides of the cake and the top layer with cream. Sprinkle crumbs on the top and sides of our cake. We leave for 1 hour at room temperature so that the cake is soaked and becomes softer. Then you can put it in the refrigerator.
Let's start decorating the cake. I like to decorate the cake with sliced strawberries and mint leaves, and in winter I like to sprinkle the cake with powdered sugar and spread walnut halves around the circle. You can also sprinkle cocoa powder on top.
Napoleon cake video
Cooking Napoleon cake with custard and condensed milk is shown in the video with a step-by-step recipe.
The cake is quite sweet, so in my family we make black tea with lemon and mint or black coffee for this cake. I recommend serving the cake right away. cut into bite-size pieces.
Probably, many of you at least once, but tried. His taste is familiar from childhood. It consists of many cakes, which are very tender and at the same time crispy.
It is impregnated with the most delicate cream, be it butter, protein, whipped cream or custard.
There are as many options for preparing dough as there are creams. You can diversify the taste with the help of jam, jam, walnuts, in general, at your discretion.
After reviewing the recipes described below, you can easily choose which one you like best.
Classic custard cake recipe
This cake is very tender, airy and it just melts in your mouth.

Dough Ingredients:
- Butter 400 gr.
- Flour 600 gr.
- Salt 0.5 tsp
- Water 150 ml.
- Eggs 1 pc.
- Vinegar 9% 1 tbsp. l.
Cream Ingredients:
- Milk 1 l.
- Eggs 4 pcs.
- Sugar 350 gr.
- Flour 4 tbsp. l.
- Butter 150 gr.
- Vanillin 1 p.
Prepare all the necessary products. Butter should be frozen, water chilled.
First you need to mix the liquid components. Beat the salt with the egg, pour them into a glass of cold water, add vinegar and mix thoroughly. Send this glass to the cold.

Sprinkle the sifted flour on the table. Grate oil on a coarse grater

With your hands you need to knead the butter with flour into crumbs. Collect everything in one slide, forming a hole in it and pour the egg-water mixture there

Knead the dough with a knife or a culinary scraper, then collect with your hands into one lump
For convenience, roll into a sausage and divide into about 10 - 12 equal parts
Give them a rounded shape, transfer to a plate and refrigerate for 2 hours, previously covered with a plastic bag

While the dough is resting, prepare the cream. Pour sugar into a saucepan with milk, mix everything and poison it on fire

In a bowl, mix the eggs with flour, stir them with a whisk until smooth.

When the milk is well heated, remove from heat, add a small part of it to the eggs and mix thoroughly.

This is necessary so that the eggs do not boil when you add them to milk.
Return the milk to the stove and slowly pour in the egg-flour mixture, stirring constantly.

After a few minutes, it will begin to thicken, reduce the heat and bring to a boil.
The base of the cream is ready, cover the pan with cling film so that a crust does not form and let it cool completely

Let's move on to baking cakes. Remove the dough from the refrigerator, take one piece and put the rest back
Dust the work surface and roll out the layer from the middle to the edges with a thickness of 1 - 2 mm

Prick it with a fork. Send to bake for about 10 minutes until golden brown in an oven preheated to 200 degrees

Each cake must be rolled out 2 minutes before the previous one is ready to prevent the butter from melting. While the cake is hot, cut it to the desired size.

For convenience, use a lid of the desired diameter, just attach it to the cake and carefully cut off the excess with a knife
Do the same for the rest of the dough. Collect the remaining scraps in a separate bowl and chop them with your hands.

Ready-made cakes are ruddy and very layered.

Meanwhile, the custard base of the cream has cooled to room temperature, add vanillin and softened butter to it

Stir with a whisk until smooth. The cream is elastic, glossy, pleasant yellowish tint
Put the cake on a serving plate and coat it with cream, gently, without pressing with a spoon, as it is very fragile

Due to the fact that the dough was pricked with a fork before baking, the cakes turned out to be even, without any bubbles.
Assemble the cake, spread it on top and sides

Sprinkle well with crumbs on all sides, without pressing down. This will make the cake lighter. Let it soak for at least 6 hours, then you can serve our treat

Such a Napoleon recipe is suitable for any celebration and for tea drinking in the family circle. Serve with hot tea. Enjoy your meal!
Cake "Napoleon" in a pan
Not everyone has an oven, but if you want to cook this delicious cake, then this recipe is for you! Cooking it is not difficult, but for frying you need a regular frying pan.

Ingredients:
- Eggs 1 pc.
- Salt 0.5 tsp
- Vinegar 9% 1 tbsp. l.
- Vodka 1 tbsp. l.
- Water 1 tbsp.
- Margarine 250 gr.
- Flour 3 tbsp.
Cream Ingredients:
- Milk 700 ml.
- Butter 200 gr.
- Starch 2 tbsp. l.
- Sugar 1 tbsp.
- Eggs 3 t.
- Vanillin 1 p.
Let's prepare the dough. Break the egg into a glass, mix well, add salt and water, stir until all components are completely combined. Send vinegar and vodka there

Vodka is needed to make the dough more layered
Set the glass of liquid aside. Sift flour into a deep cup and grate margarine to it, it should be very cold

Grind them with your hands into small crumbs. Make a well, add liquid ingredients and knead the dough

Divide it into 8 parts, they should be sent to the refrigerator, after covering the cup with foil

While the dough is chilling, prepare the cream. Put the milk on the stove and bring to a boil.
In a deep bowl, beat well 1 egg and 2 yolks with sugar and starch, put the rest in the cold

Divide the sugar into three parts. The first will be needed for cream, the second for proteins, the third will go into syrup
Pour the egg mixture into the milk in a thin stream, stirring constantly. Reduce heat and simmer until cream thickens. let it cool down

Let's start baking cakes. Take one piece of dough out of the refrigerator, dust the table, roll out the layer and cut it to fit your pan
Be sure to prick it thickly with a fork so that bubbles do not form.

To do this, it is convenient to use a plate of the same diameter as the pan.
Transfer the dough to a dry heated pan, using a rolling pin

The oven needs to be on medium heat. When the cake is browned on the bottom, turn it over with a spatula and leave to fry until golden brown. Bake the remaining cakes in this way

Remember, the dough shrinks greatly when frying, if possible, use a larger diameter frying pan
While the cakes are cooling, finish the cream to the end. Beat the butter in a deep bowl and add the custard to it in small portions.

In a ladle, mix sugar with water and send to the fire to boil the syrup. Don't stir it, just boil it for 5 minutes

Take the whites out of the refrigerator and beat with a mixer at low speed until white. Add sugar and bring to the formation of stable peaks at maximum speed
Pour the syrup into the egg whites in a thin stream while continuing to beat. Send the protein mass to the cream, it is necessary to knead with a spatula from top to bottom until smooth. The cream is ready, proceed to the assembly of the cake

Put the cakes alternately on a plate, pre-lubricating them. So continue until all the cakes are over

Leave one cake for crumbs, for this you just need to chop it with your hands. Sprinkle the cake all over

Send in the cold for impregnation, for about 6 hours. Decorate it with berries or nuts of your choice, or you can just leave it as it is. Enjoy your meal!
Cake "Napoleon" from ready-made puff pastry
Another option for making this cake is from ready-made store-bought dough. From this it will not become less tasty, but it will take much less time to cook it.

Ingredients:
- Puff pastry 1 kg.
- Condensed milk 1 b.
- Butter 200 gr.
- Apple jam (optional)
Defrost the finished puff pastry and place on a baking sheet lined with parchment paper.

It is better to use the dough in layers, it does not need to be rolled out and cut, its size is perfect for a small cake
Preheat the oven to 200 - 220 degrees and send the cakes to bake. The dough should rise well and be golden brown. Let the cakes cool, meanwhile prepare the cream

Put the butter with condensed milk into the mixer bowl. Beat on medium speed for a few minutes

The cream is ready, it turned out to be thick, so it will be very easy to spread it on the cakes.

Press them a little with your hands and collect the top layer for sprinkling the cake

Divide the layer in half, so you get 8 cakes. Spread each layer well with cream.

For a variety of taste, if desired, add a little jam through the layer, in my case it is apple

By analogy, do this with the remaining cakes. Brush the sides and top of the cake so the crumbs stick well and the cake doesn't dry out.

Leave in the refrigerator overnight. Serve with hot aromatic tea. Happy tea.
Video recipe for Napoleon cake
This video describes the whole process from kneading the dough to making the cream. If some point is not clear to you, you can review it again.
It clearly shows what needs to be done and in what order. To see what consistency the cream should turn out, which is very convenient.
Always cook with a good mood, then your pastries will always be successful